Greetings All -
A couple months ago I came up with a design idea utilizing EL Wire and acrylic for a specific project, code name Barbie.
I’ll post the writeup and design file in free designs for constructing the ‘EL Wire Tube’ components.

For this current project, The Reactor, I wanted to use that design to create something cool, tackle learning some new things, and of course challenge myself. So the project goals were as follows:
Learn how to make snap together acrylic boxes. (I used makeabox.io)
Make a completely original, and totally cool of course, design item.
Challenge myself with a project that has a huge number of order of operations.
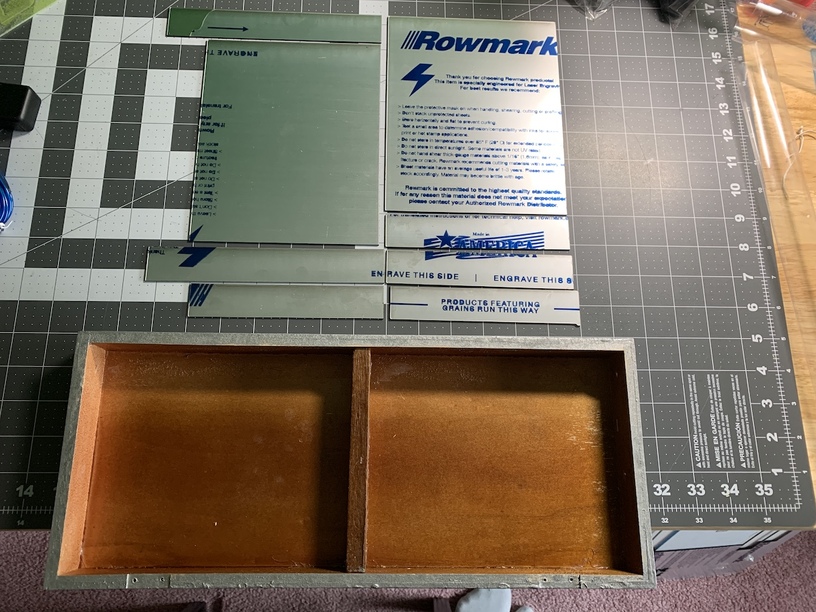
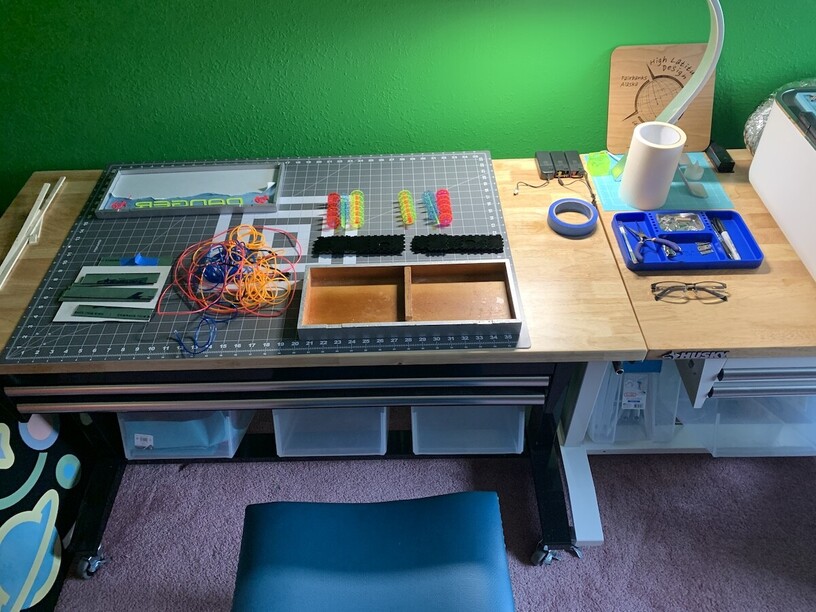
So here we go. I needed some generic router bits for another project and grabbed this wood box of them from Lowes. I was looking at this case and thought, I’ll bet I could fit a series of EL Wire tubes in that. I let the idea grow organically as I started laying out pieces of materials I had on hand.
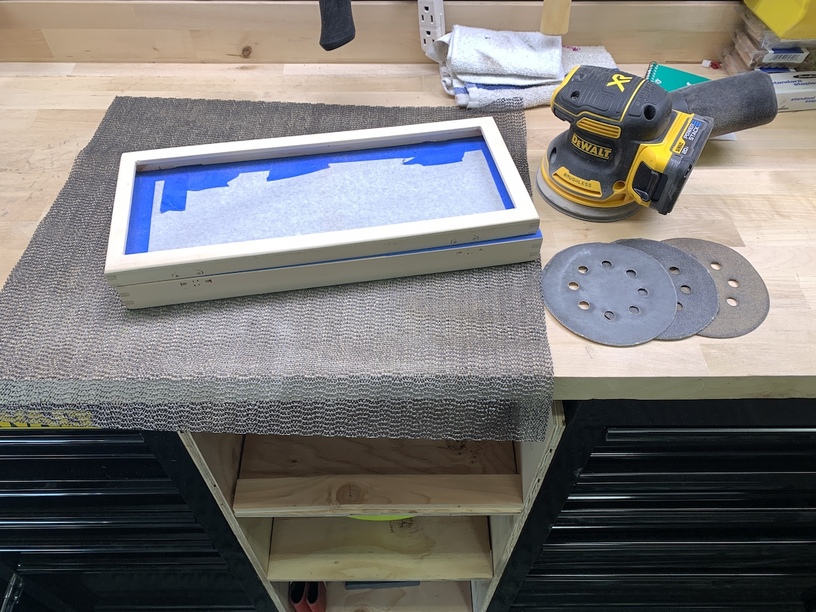
I wanted the box to be ‘Solid’ and seriously durable looking, so I sanded it down and went with a hammered silver.
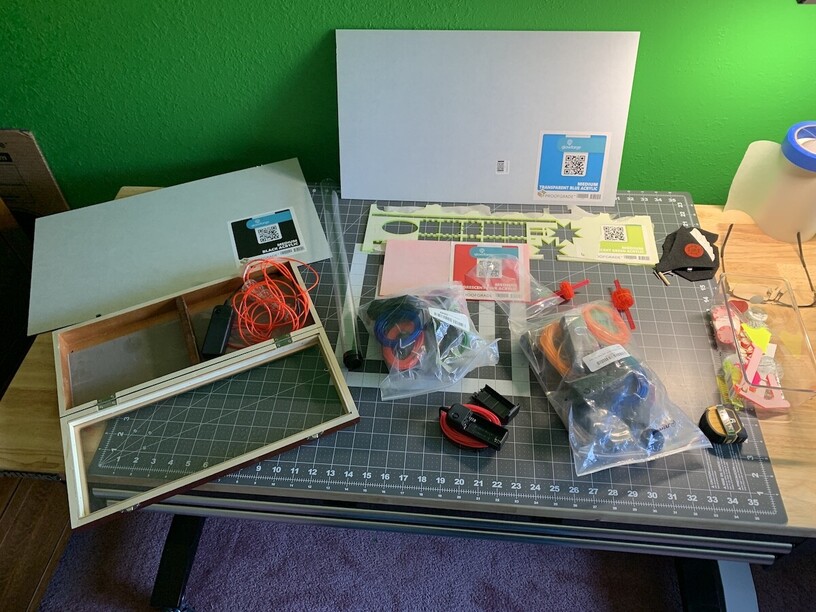
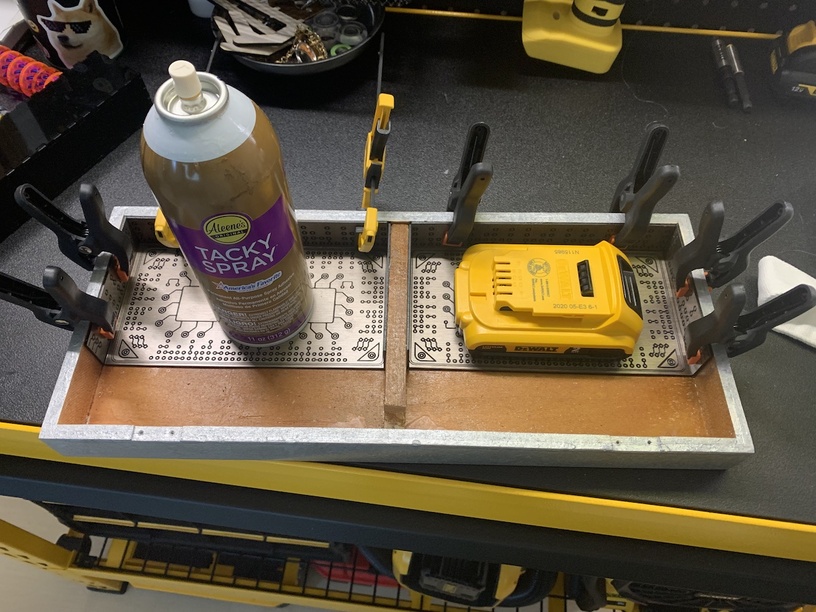
Putting the cart before the horse, I measured and cut the interior pieces in felt. But it didn’t look good, and the glue didn’t want to stick to the wood finish, blah blah blah. Bottom line, it sucked, and I knew I wanted a more ‘metallic’ feel to the inside of the box anyway. So I went with the old standby ‘aluminum’, for now. ![]()
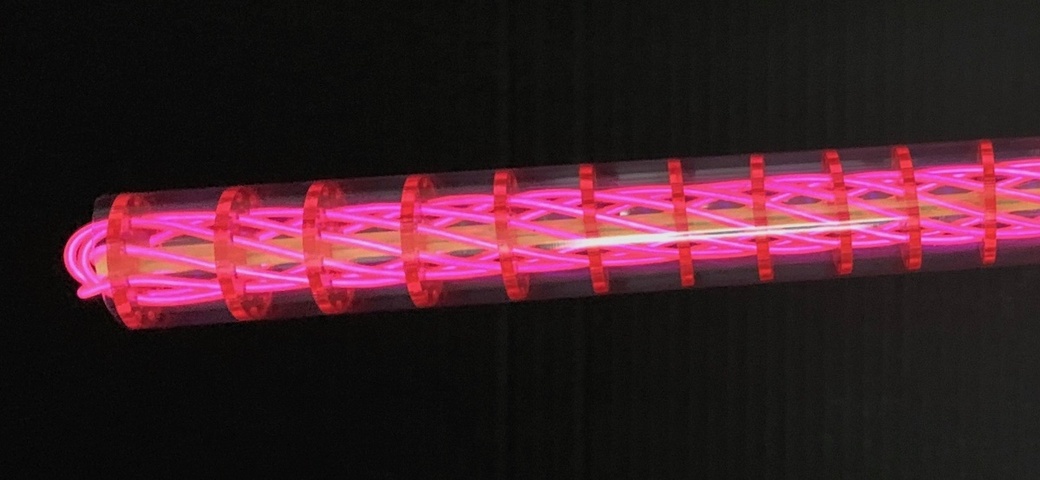
I then figured out how many ‘tubes’ would fit, and therefore how many acrylic disks and shafts would be needed and cranked them out. For reference, you can go down to about ¾” spacing between the disks before the wire binds up and you can’t push it through anymore.

Next was a seemingly endless series of fitting challenges to get the tubes, the acrylic base (boxes) and electronics to fit in the space I had available, all while ‘learning’ how to make the finger joint boxes. I’m not a planner, I’m a trial and error learner. So I just started ‘weaving’ the series of tubes, until realizing I had f’d up something, unravel the progress made, change out a part, and restart - 3 times in a row, over the course of a 4 hour exercise in patience building…. Then, questioned my life choices for taking on this build.
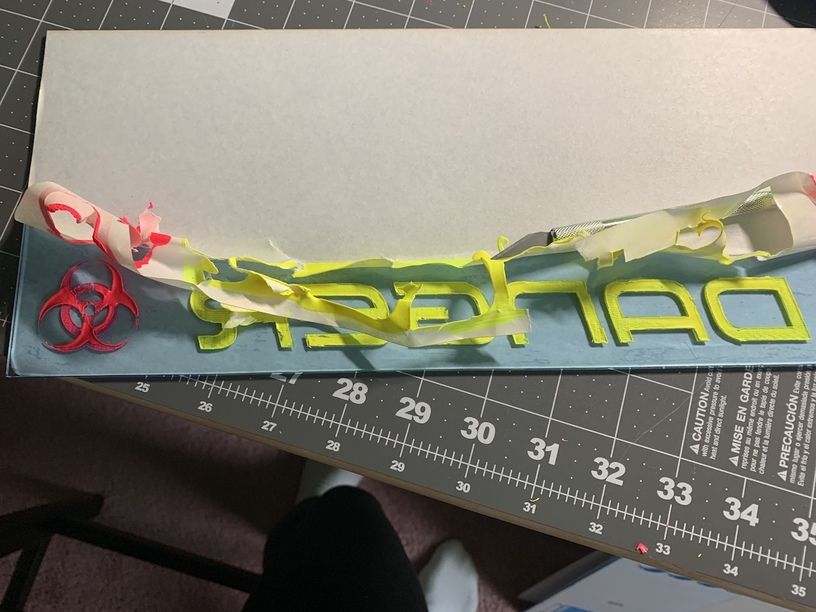
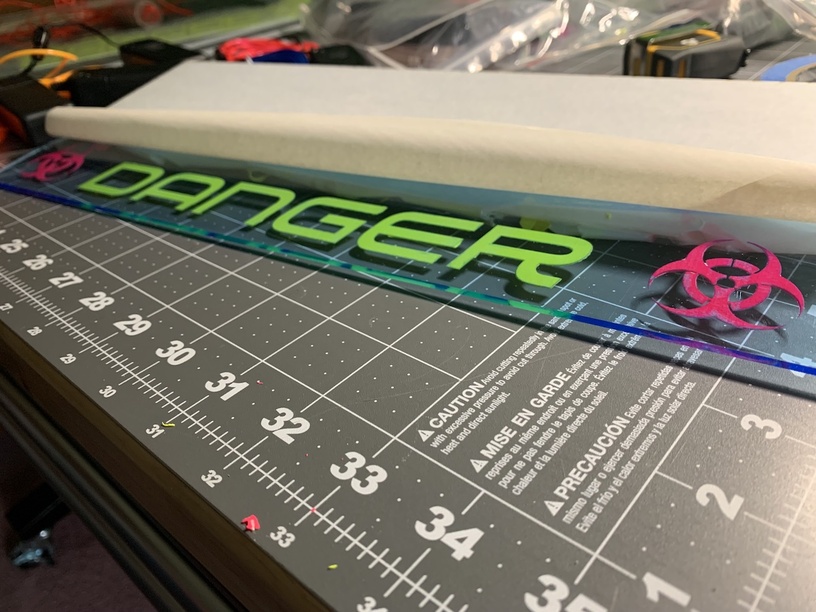
But, to feel good about making some progress, I also worked on doing the top. My original idea for the ‘glass’ case front turned out pretty awful as I was using an acrylic ink product I hadn’t used before, and thus had no idea how it worked. Plus, I was using the thin crappy plastic that came with the case. It was a total fail. So I grabbed a fresh piece of Medium Translucent Blue Acrylic, and tested an idea I’ve also wanted to try – filling engraved acrylic with acrylic paint, blacklight glow paint to be specific. ![]() This was a success, although a little more cleanup work than anticipated, the finished result was really good on the lettering, and good enough on the graphic.
This was a success, although a little more cleanup work than anticipated, the finished result was really good on the lettering, and good enough on the graphic.
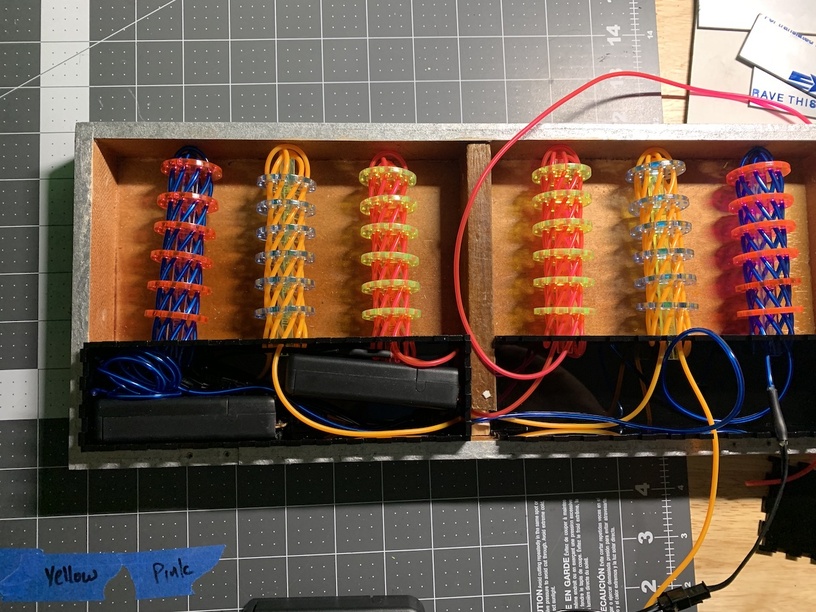
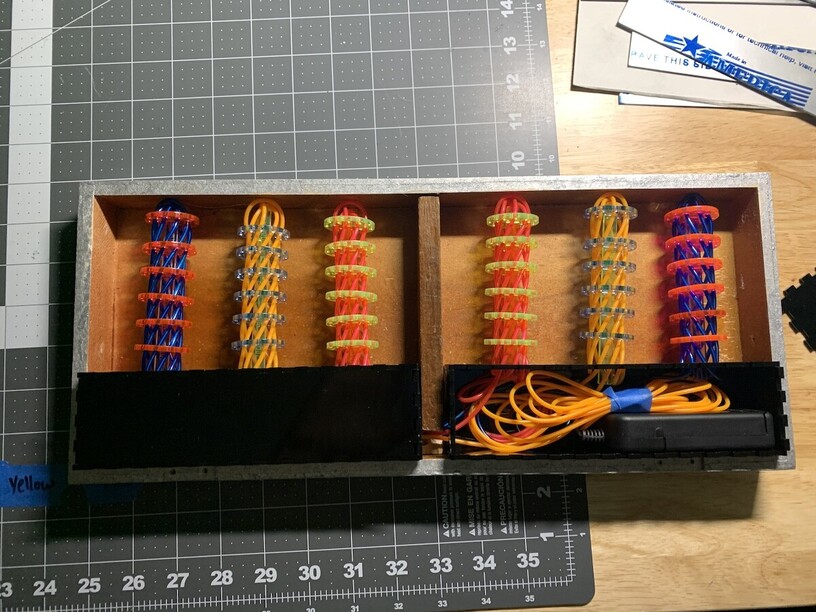
But I finally got the sizing, spacing and electronics logistics worked out perfectly. I cut all new pieces, cleaned up the work area and called it a night.
Next day, on to final assembly – two solid hours of it. This was probably my favorite part of this build. It’s time consuming and repetitive, but oh so satisfying….
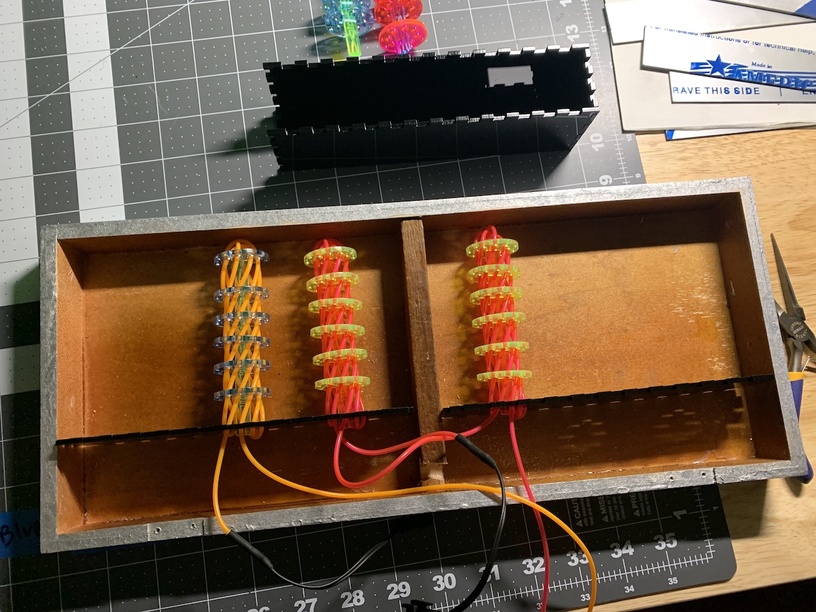
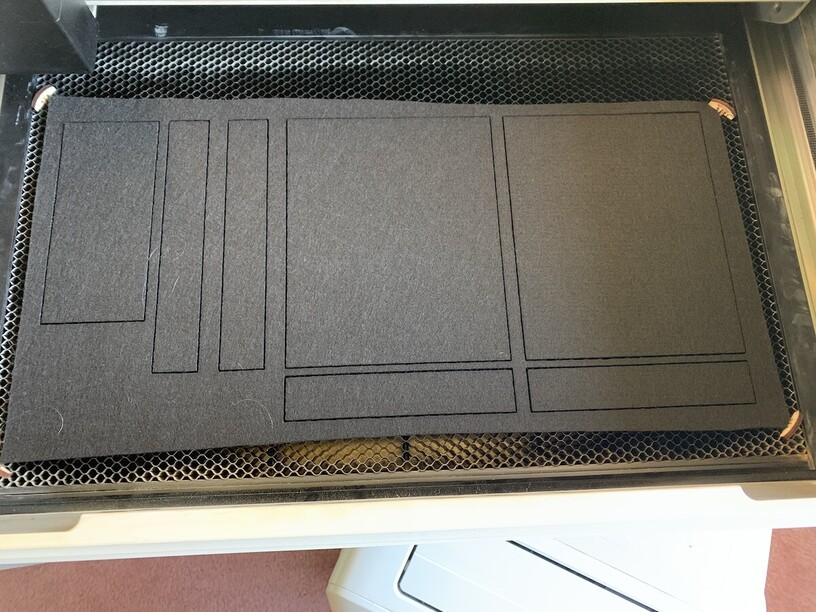
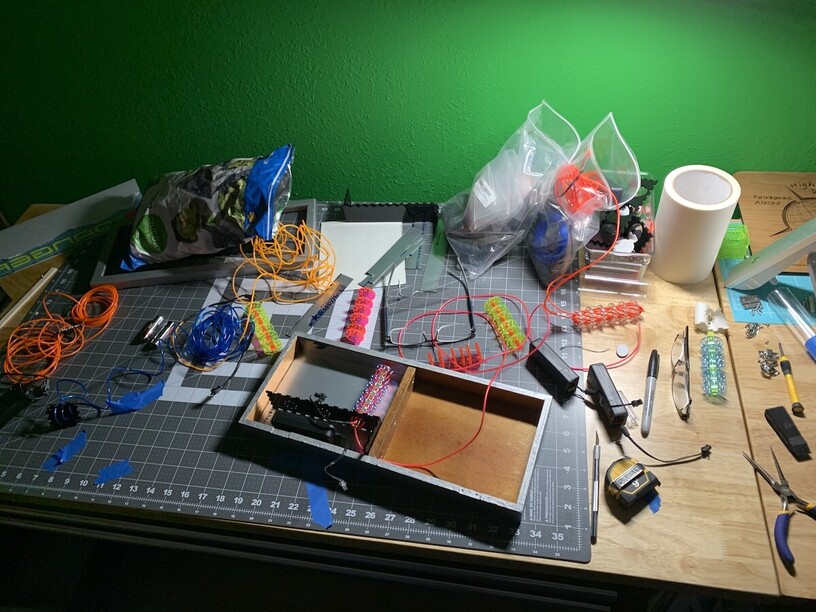
Back to the interior. After finishing the tubes and base boxes, my plain metal interior looked boring, unfinished and the pieces weren’t the right size anymore after altering the tube bases so many times. So I tried a series of scoring ideas, thinking a circuit board pattern would be cool. It looked just ok on the ‘aluminum’ that I had already cut. But I tried it on some Lasermax ‘New Bronze/Black’ from JPPLUS.COM and it looked great.
So here we go, the end result…. This project was seriously fun to make, despite my hair pulling session getting the spacing and electronics to fit. But everything, other than the box painting, I could do in my maker space instead of the garage, meaning I could sit down the whole time. ![]() Even with the EL wire lights off, it’s definitely cool and completely satisfies my original vision. So without further ado, I give you, The Reactor -
Even with the EL wire lights off, it’s definitely cool and completely satisfies my original vision. So without further ado, I give you, The Reactor -
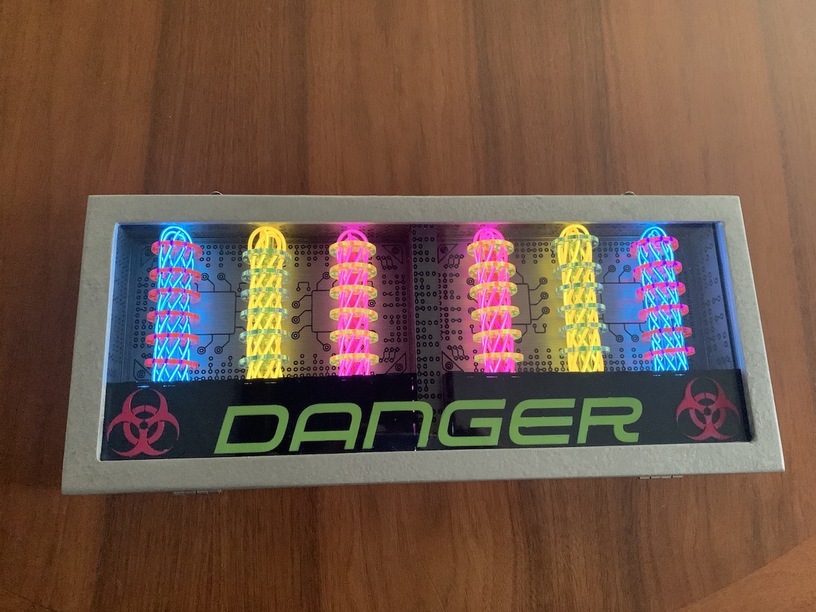
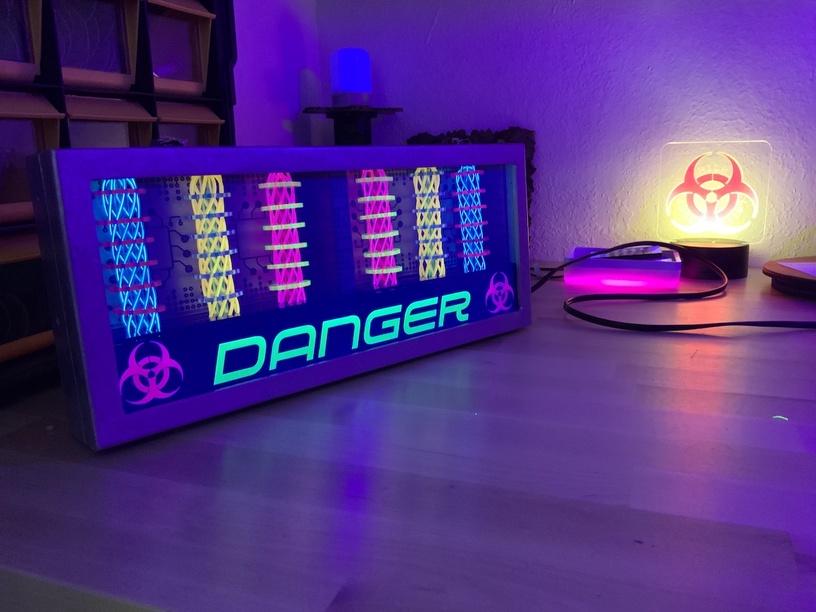
This project was a real challenge. As mentioned, I wanted to stretch the number of ‘order of operations’ to my limits. Weaving three separate sets of wires, through two tubes each, in two separate boxes and spaces, was definitely a methodical exercise. But when you turn the wire lights on, and a black light – Oh baby!
Mission accomplished! But I think I’ll take this weekend ‘off’ and just do a simple palate cleanser project or two. ![]()
Hope you enjoyed the write-up,
HL