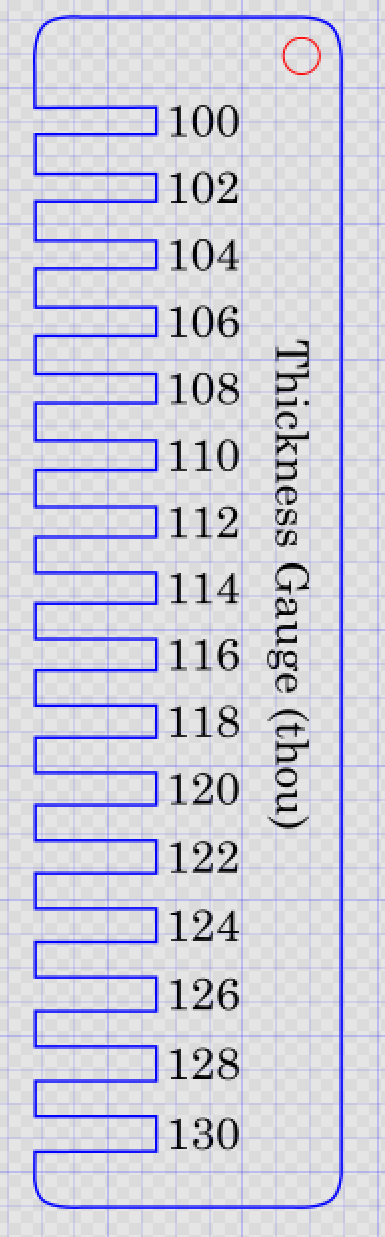
Here’s a useful analog tool to check the thickness of “1/8” inch stock. It has slots from 0.100 to 0.130 inches in .002-inch increments. I was tired of the slop I was getting on joints in undersized stock and it’s a fast and foolproof way to check thickness.
@petej
Thanks for the gauge, but in addition you have unwittingly solved a problem with my inkscape software!
I have some sort of glitch in my installed version, 0.93, which hasn’t allowed me to change ruler units to inches, and suddenly, opened up your file and there it is, lovely inch units along the rulers.
I’ve now saved your file both for the gauge, and a new custom template for 12 x 20 , and it works.
Can you tell me what the background is ? I’ve cleared the grid, but would like to clear the background as well, but don’t know its location.
John
Hi John. In Inkscape, check the menu File->Document Properties. In the Page tab, uncheck “Checkerboard background.” The next tab is “Guides,” which lets you turn guides on or off.
Actually I thought about kerf when I created the file, but convinced myself that it didn’t matter: what I cared about was the resulting slot. But your comment made me reconsider. At this point I’m not sure which is more useful for me, but I edited the original files to reduce the slots by .007 and noted the reduction in the legend on the ruler. The attached file contains both versions, plus a pair of gauges centered around .250.Thickness Gauge.svg.zip (58.9 KB)
Nice! You look at a set of digital or dial calipers? They go from 0-6" and you can measure any size between to 3 decimal places in seconds. It’s a very handy tool! Thanks for sharing!
Digital calipers are excellent for precise readings. But I am expert at getting imprecise readings from them. Maybe I measure the wrong area of a corrugated board, or tilt them slightly when I use them or stick my thumb inside their jaws. I don’t know. Plus I often misplace the calipers by burying them beneath Glowforge detritus.
I am no luddite, but I find assurance in this set of wooden slots, even if the original design was off by .007 inch. What I like is that if I create a slot in Inkscape based on the values printed on the gauge, I know exactly how the Glowforge will cut it. JamesDHatch is quite correct to remind me about kerf. So I should regard the numerical labels as pointers, not as actual values.
After designing a two-part hook that slotted together I decided to make the Thickness Gauge. The slots were quite loose because I lazily assumed a plywood thickness of 0.12 inches and the calipers were hiding beneath some 2mm EVA foam pieces.
If the Thickness Gauge disappears as swiftly as the calipers, I’ll cut another, repeating as necessary. My next challenge may be to find things covered by layers of Thickness Gauges.
Could be a bunch of things. Poor quality calipers. Worn calipers. Warped wood. Or just unfamiliar with the tool. I use them every day with my cnc machine. There are tricks and techniques. I do like your gauge! I’ll probably give it a try!
Those of us with some kinds of mechanical or machinist background tend to be able to use them more accurately than someone who just picks one up and tries to use it. Things like “close jaws until snug but not monkey tight” isn’t part of the typical arts & crafter’s background. Most people who don’t get reliablly consistent results are because they’ve never had any training or instruction on use of calipers. This is a whole new world for many folks just entering the 2D (2.5D) manufacturing world.
I make these all the time for different materials with different kerf characteristics. They are really nice for doing pressure fits. I do these with circular holes for screws and rods.
Analog devices can speed things up and are very useful. Think of thread gauges or feeler gauges. And being cheap to make, it helps to have several of these around to use wherever.
From left to right, these gauges are/were for: fitting an acrylic cog on the shaft of a stepper motor, pressure and loose fitting a steal hobby drive shaft into acrylic parts, screwing micro screws of different sizes and testing whether the micro screws were long enough, and pressure fitting draft board in draft board and acrylic in draft board. At some point I got smart and started etching the measurements/ranges into the gauges, too. Of course, I keep all of these gauge designs in case I need to reproduce them in a different material or, what’s more likely, if I lose the original.
While I do keep track of which measurements work for which applications, so many variables go into the fit of two components that you can’t catalog everything. Off the top of my head, the fit depends on:
The material of the “tab” or male piece, versus…
… the material of the “slot” or female piece.
Whether I want a loose fit (and how loose) or a pressure fit (and how tight)
Material thickness
Which side of the material was cut by the laser (the kerf is actually a V shape in profile)
In the case of a screw, the properties of the threads.