Most of my projects are technical in nature for clients who won’t let me share the designs because they are early prototypes and test units for products that you may see on shelves in one form or another in a few years. As a result of this, I have had to make several projects that screw together, either for access or to mount dissimilar materials. For one or two time use, threading the acrylic with a standard metal tap is fine, but more than a few uses and the threads wear out and strip. To combat this, I have found two solutions. The first is to use a special threaded screw for plastic, but even these will eventually strip out, especially at the small sizes I use most frequently. In that event, or if I have to replace one of the stripped threads, I have started using these small threaded inserts. They are designed to be hot set into plastic and I have been able to use them with acrylic and also with 3D printed materials. One must be careful to pre-drill and keep the insert straight and centered during installation, but they can be installed pretty easily with a soldering iron if you are doing one or two, or with a special tip for a soldering iron if you are doing more.
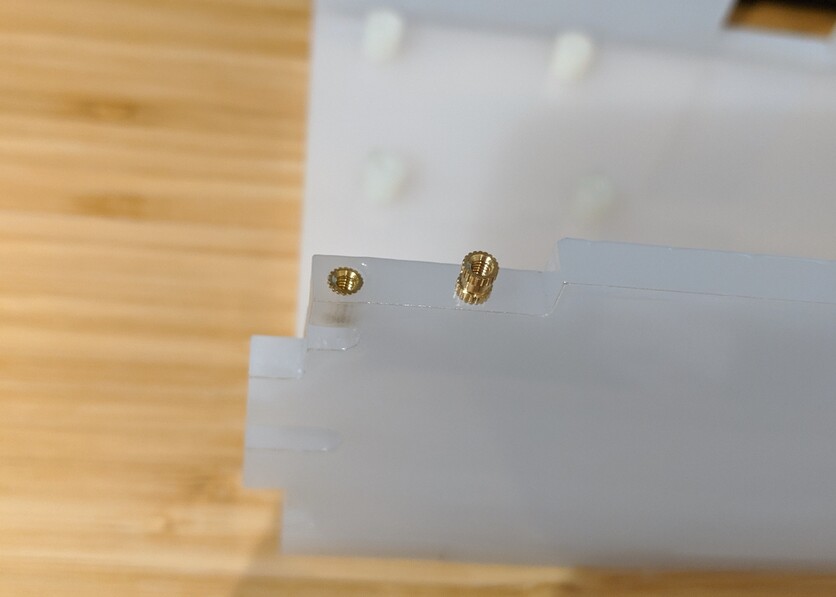
The insert shown is a M2 threaded insert set into 5.5 mm thick acrylic.
I have found that the optimal installation hole is to drill the hole for the OD of the smooth part of the insert, 1.5 times the height of the insert, and then do a very small counterbore to the OD of the serrations, about 1/2 the depth of the first set of serrations. This lets you install the insert and keeps it aligned better. It takes practice to get the insert in straight and flush; the excess material goes to the bottom of the hole and wants to push the insert back out. Using a small probe tool to hold the insert into the hole at the correct depth eliminates the need to file the top flush.
If you are inserting into a lasered hole, make your hole to the OD of the smooth part and then you can etch your counterbore pretty easily.
You may still have to edge drill the acrylic to get to the nut, based on what I saw there, and it isn’t a clean look. The other problem with captive nuts is that they aren’t truly captive unless you glue them in place. The Prusa printers use this in their construction and having built three of their kits I tend to shy away from this method for anything that will be assembled more than once. For my clients, exposed nuts aren’t permitted, so the heat set insert is a cleaner solution. It is also less susceptible to break out since the plastic melts and forms around the serrations on the nut.
I’ve done these a lot in 3d prints but it didn’t even occur to me to try them in an acrylic sheet! Going on my list of joint types to try and I look fwd to seeing what all you come up with.
Ya know, I bought a bunch of those a couple years ago for this very purpose (actually, to use with Delrin since it’s notoriously difficult to glue) but have still not actually used any. Thanks for the inspiration!