I am working on a tile engraving project for a Christmas present. I have not found it as easy as others have made it look.
I started with some subway tile left over from the last remodeling project.
I have a large block of color with white letters. I am having trouble removing the marker from the edge without taking off all of the color in the field.
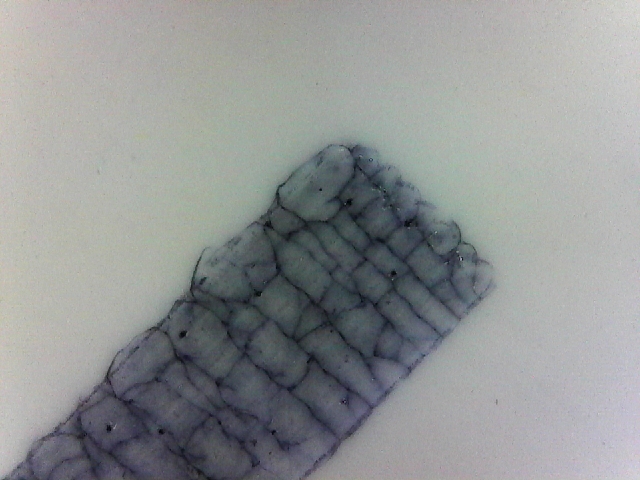
I was trying to figure out why the edges were not crisp so I pulled out my USB microscope and took some pictures.
Just using engrave it seemed like the edges of the letter were a bit jagged. I could see where the laser stopped and started (it seems like there is a bit of a ramp up). Engraving was done full power, full speed, 450 lines.
It appears that that glaze does not give up without a fight. There is quite a bit of fracturing.
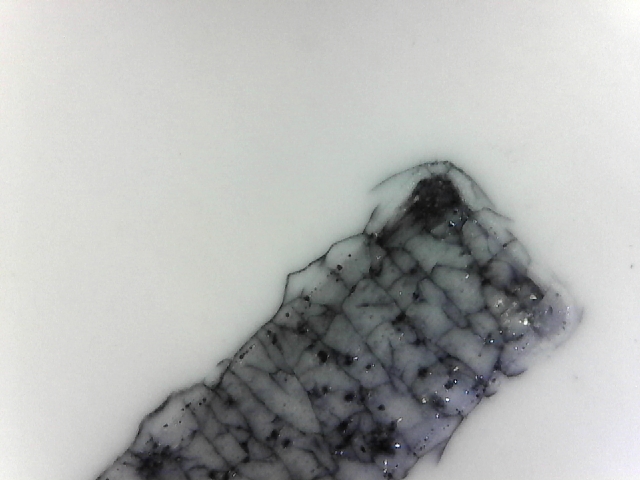
I tried scoring the outline before running the engrave. This seemed to product a sharper edge, until I hit it with the sharpie. The outline seemed to fracture the glaze even more making for a less distinct edge.
My plan is to use Acrylic paint. Perhaps the thicker paint will not bleed into these fractures?
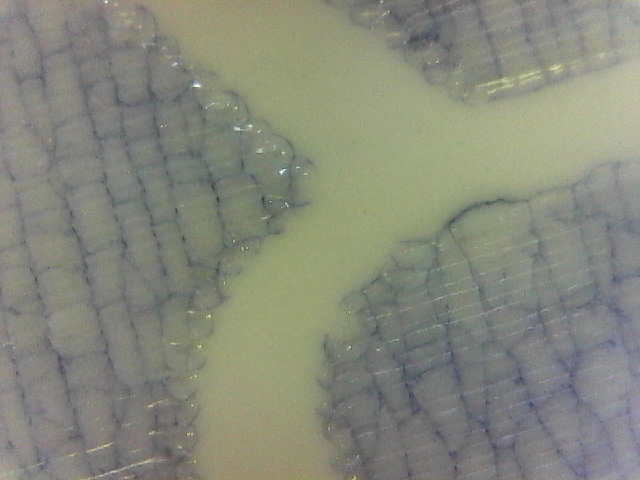
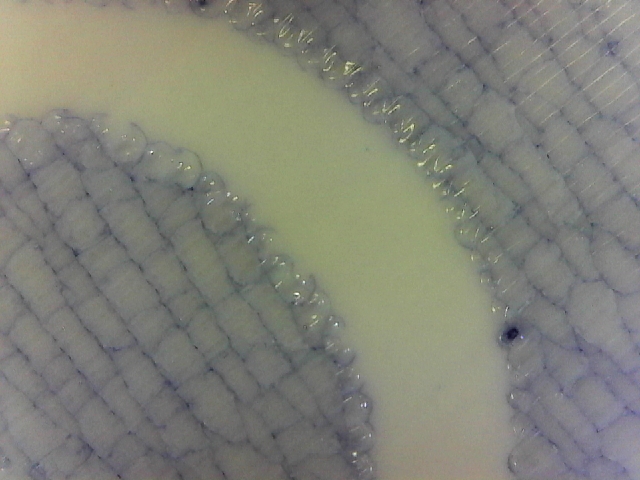
Here are a couple more views of the regular engraving. Is it possible that I need to slow it down some more? Perhaps I am not removing enough of the glaze.
A couple notes from my limited tile testing. Thinner lines or engraved areas work better with keeping the marker in there. I’ve found that it’s easiest to remove the extra marker quickly after applying, so I typically do small sections of my designs before moving on. It takes some practice to not get splotches in the overlap areas, though.
But I think your bigger problem is the tile choice. These tiles are what I’ve been using (or their Home Depot cousin) and the finish is less of an issue.
I have seen at least one person around here try engraving on the back of a glazed tile. It’s a bit of a different look, but can be interesting on some projects. But most people I’ve seen have used the standard ceramic tiles.
I have used tile I have left over from kitchen project–thick handmade tile with very thick glaze, and it doesn’t penetrate the glaze, but results in a nice silvery-grey where etched–a nice look unless you want color, since any ink/paint will go into the cracks and either only, or certainly darker than the other areas. From what I’ve seen of close ups using the 44 cent tiles, the laser removes the glaze and cuts into the tile body, which since it’s porous absorbs the colors more readily and consistently vs the glaze.
On my tiles, the glaze already had some crazing (the fine cracks), but did get more pronounced with the laser, and it could be for your tiles the etching is changing the stresses in the glaze, which may be inducing the new cracks.
So you may just need to try some different tiles to get the look you are trying to get.
Try slowing it down if you don’t want to see the fracturing (which I think looks cool in the right places). I generally use 500/FULL. For the absolutely cleanest possible result you might try even slower with less power, although I have not done this. FULL power is less precise.
Great work! Leave it to this group to have a USB Microscope. Poor Dan and the scrutiny we can offer. But as to tiles its a toss-up quality control and standards are all over the place, other than they look good.
That looks like some work I did where the beam didn’t have enough power to truly ablate the glaze. You might need a different tile, or you might just need to crank the beam up. (And be sure you have good focus.)

 But as to tiles its a toss-up quality control and standards are all over the place, other than they look good.