That looks awesome! Looks like I’ll be trying to make it too, as my kids have seen it while talking with friends on Skype and I’ve tried to order the game and it’s nowhere to be found at a reasonable price at present!!
Did you make the game cards as well?
Would be interested to know where one can find them.
thx!
Totally awesome!
1 Like
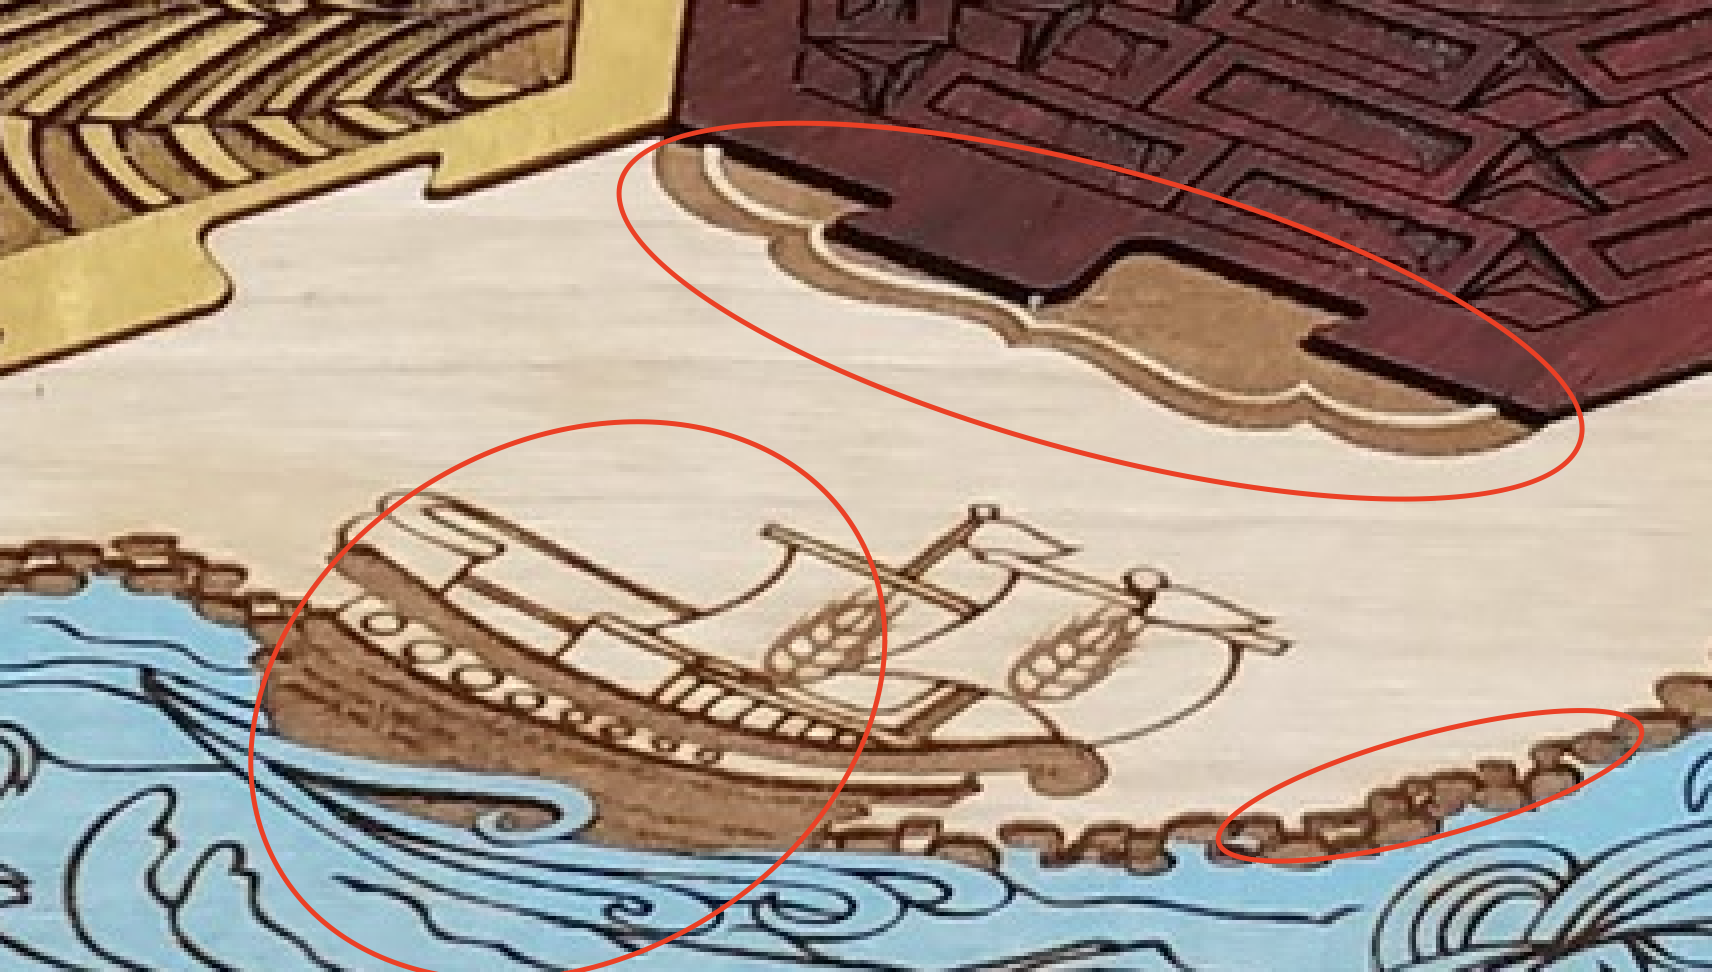
Good Morning… I am new to the Glowforge world and just got my machine on Saturday. I have been working on my settlers file for a couple months now and am curious as to how you engraved the ports, ships and the centers of the rocks on the the shoreline(The light brown part). Are those just a low power engrave? (is that even possible) or did you just stain those areas?
Also any help on hardwood settings? I bought 1/4 inch Hickory, Padauk, Hard Maple, Poplar, African Mahogany, Anigre, and Black Walnut. I tried a piece of African Mahogany on Saturday and had some issues. I did some test cuts and thought I would be good so I cut my file and my desert piece didn’t cut all the way through…  I cut it at 120 speed and full power. Also when using my own material and it asks for the thickness… What exactly is that providing the machine? For example if my wood is .25 thick but I make the mistake and say it is .24 will it only cut to .24? or what exactly is that providing the machine? Sorry for the 50 questions but I’m grateful for any help I can get!
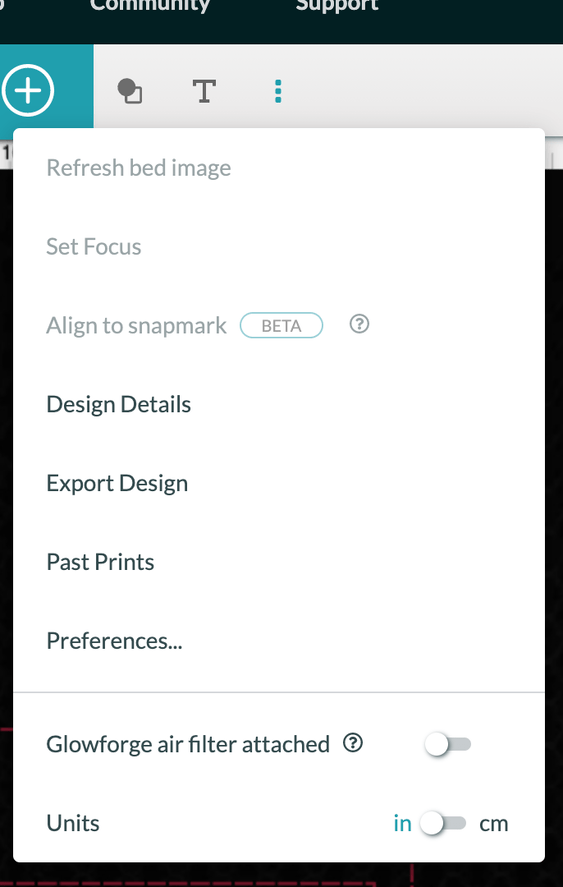
Only addressing one of your questions…have you tried the set focus feature? It will automatically set the focal distance for you so you don’t need to measure. It’s the second one down in this drop down menu;
I have not… I will for sure try that though. Thanks
Love it when a 3yr old thread get resurrected!
I love it more when it’s one of mine! 
The light color was just a regular engrave on the wood, I didn’t do anything fancy with the power settings etc. If I remember, that was maple hardwood and for the “land” portion, I just used an oil finish on it. The oil on the engrave darkened it up a bit but not too much. Most of the “color” was just the result of the laser engraving that piece.
Thank you for your response… But just to be clear… The black lines of the boat and waves and outline of the rocks is regular engrave… But as for the brown of the boat, centers of the rocks and the shore line those you used oil? The waves lines look black but the other sections look brown.
Sorry for the run around. Just want to make sure I understand.
Thanks so much
3 Likes
I hope you two are serious… I appreciate and need the help!
1 Like
Yes that was just the color that the wood took after the engrave & the oil. It was already darker than the rest of the “land” after the engrave. The Danish oil darkened it up just a bit more. No stain or anything in that area though. Just the magic of the laser.
1 Like
Beyond that, all I’d say is that the darkness of the color will of course vary based on the wood you’re using. Some will be darker than others. I think I had used maple for that but it also might have been basswood. It’s been a few years, so I don’t remember exactly.
1 Like
Got it. I am using Hard Maple and to me it just seems like engrave = Black outcome always… So I was thinking maybe you did lower power and that gave you the brown color rather than Black but I guess not.
Thanks again!
1 Like
Congrats on your new GF and welcome to our little forum!
I tend to jump in with both feet full steam ahead too, but the tutorials really are helpful; have you gone through them yet and read up on what all the setting do? If not, it will really help you get better results and not waste quite as much material.
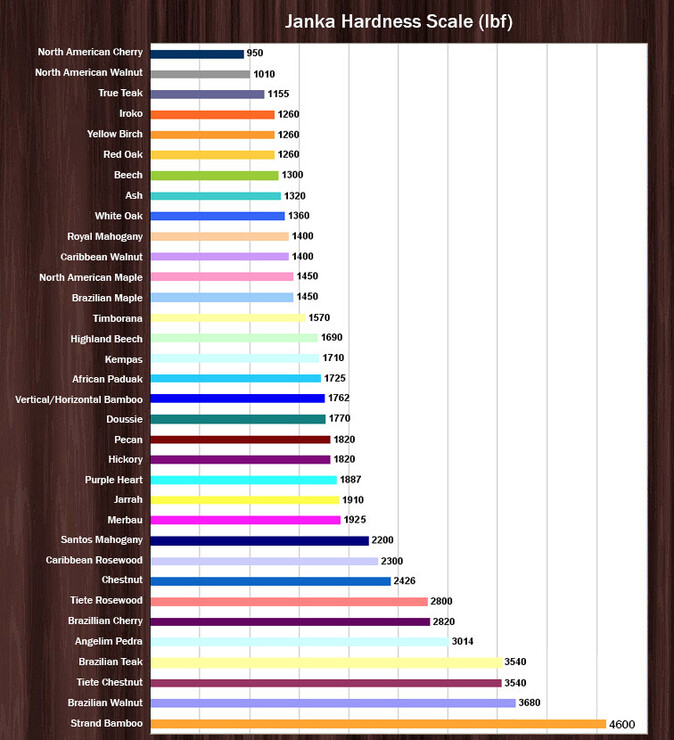
All wood has a hardness rating, and knowing it can really help determine what settings to use. (It’s called the ‘Janka’ scale.) You can look for a wood with known settings that has similar hardness and that will give you a starting point. (For example, I want to use Beech and it has a similar hardness to Bamboo, so I’d start with the Bamboo settings.) There also lots of info in the forum about testing new material, and it’s extremely helpful too.
And here’s a good starting point.
Vital info about what each setting does.
About material height:
There are two measurement the GF needs; material height and focus height and the difference between the two can be a bit confusing. The laser beam is shaped like a cone and the focus height is where you want the narrowest part of the beam hits the material. Most of the time (like 99.5% of the time for most people), you want the material and focus heights to be the same, and luckily the GF takes care of that for you. (Sometimes it’s useful to “defocus” the beam, and you can change the focus height manually. If you search the term you can find some good uses for it.)
The exact material height is needed for the GF to focus the camera on the top of your material so you can line up your file correctly, and that’s what set focus is for. (You can also set the height manually if need be, but obviously set focus is much easier.) Even when you don’t use set focus, the GF does its own auto scan and determines the material and focus height, but your file placement may be way off.
3 Likes
Absolutely gorgeous. Not sure how you’d feel about hands on your work, but no way could I resist the tactile look. I’d be constantly running my fingers over it instead of paying attention to the game.