Our family has been avid gamers for a very long time and Settlers of Catan has been a staple of our family game nights since longer than I can remember! After having started the trek down the path to the Glowforge, I saw that they were offering the Catan board as a free download with some amazing graphics. I knew that had to be one of my first prints. Well, it’s been a month but I’m finally at the end of getting the game board completed and ready to play!
I took some time here and there trying to figure out how Forgey worked, got side tracked by some other bright and shiny objects, fought some self-induced issues printing the board (yeah, I am really SOOO terribly good at those). Finally though, it’s done and sooo many things learned along the way. I purchased the water tiles from Etsy but after printing the first 2 realized that they weren’t scaled to the size of the pieces I had pulled out of the GF PDF file. I had to order more wood as I didn’t have any other light colored hard wood available that would be large enough for those border pieces.
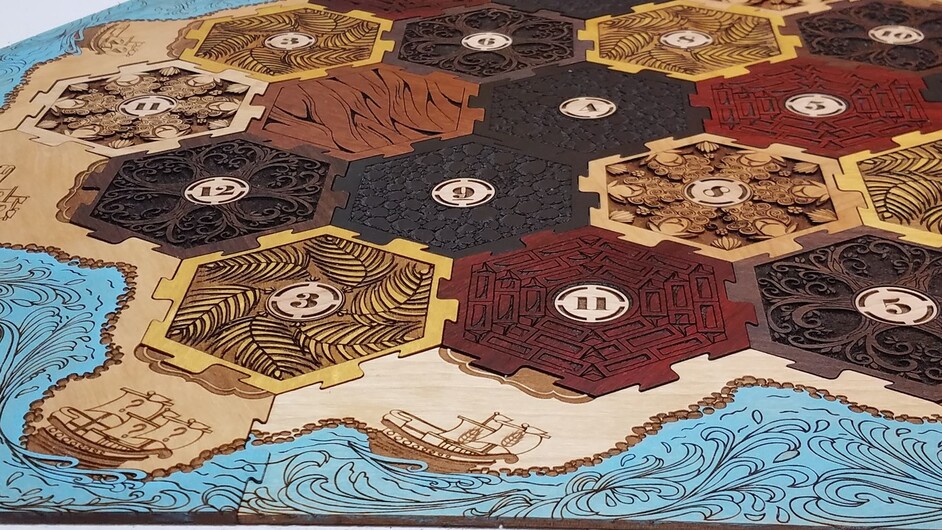
In the end, I stuck pretty much to the PDF script and used Padauk, Maple, Yellowheart, Walnut, Mahogany (desert tile) and Winge. I took a week or two before printing out the winge though. After reading about the horrible effects of that wood, i had pictures of the neighbors kids twitching on the ground in their backyard. I eventually got over that and just printed it and it went just fine. (Yes, I made sure their kids weren’t in the backyard before hand! :)). My biggest issue was with the Yellowheart. I setup the first set wrong and had to re-print but ran out of material. Went to a local store and got some but realized after I had cut that it was warped :(. I managed to straighten it out and it’s fine now. The border pieces were done with birch wood. I was going to do them in maple but decided that birch was a better option as it takes stain much easier than the hard maple.
Overall, I’m very happy with how it turned out. If I had to do it again, I probably would do it in 1/4" instead of 1/8", just for durability. I would also do an engrave of the center pip hole instead of a cut so that the center pip would be proud of the hole and easier to remove.
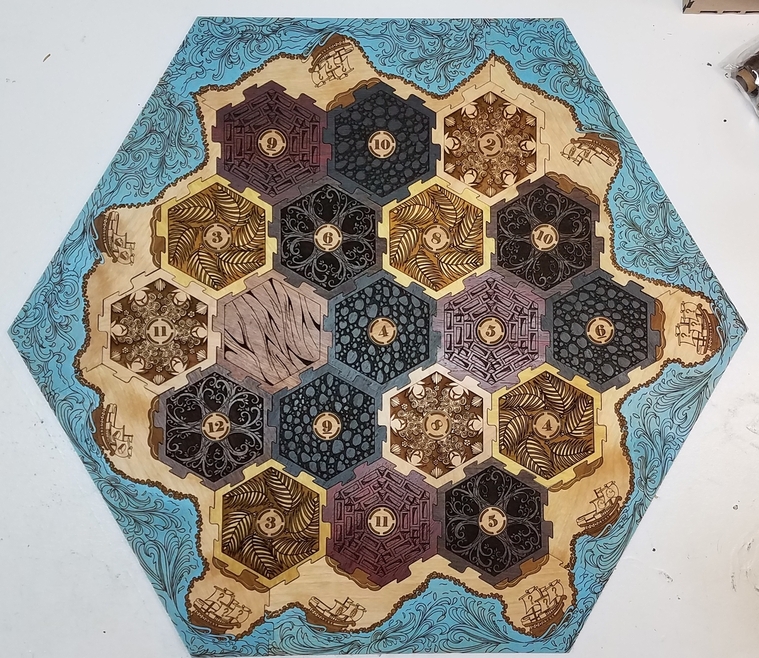
Here are a couple of pics of the completed board. Not the best lighting but good enough!
My wife kept saying that I didn’t need to stain the water blue because it looked good already. After she saw it stained, she admitted it really helped give it definition and pop!
When I first saw the PDF from Glowforge, I figured it would be a piece of cake to make but then figuring out what settings I wanted to use for the engraves, altering a few minor things, scaling up the borders, dealing with random other issues with the wood… Yeah, it became a much larger project! A very fun and educational process.
It is against forum guidelines to request design files.
If someone shares a print that they’ve made, please respect their sharing and do not ask for the source design or artwork. Designs take work and have value, and when you ask someone to give you that value for free, you undermine their work.