Hello,
I have a problem in Inkscape. I am trying to exclude part of a design from a larger design, however. when I chose the items and click on the exclusion button, I get paths within the deign that are not desired.
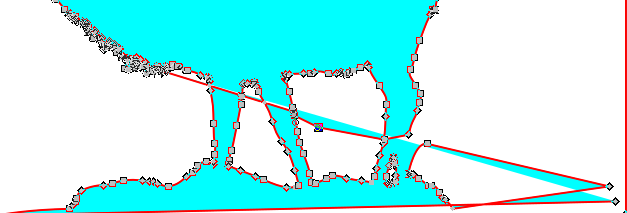
I want the area around the elk to have no fill color. When I try to exclude that part of the design, I get a triangle that is filled. I can not figure out how to clean it up.
If you look in the node view there is likely a single node at the top of the triangle. If you drag it down to the line under the elk it should give you the look you’re looking for.
Ok, looking at it specifically it’s a little more complicated because that line is connected everywhere it crossed through the elk. You can either fix it via node editing (splitting the line on the two crossing pieces, deleting the part you don’t want, and then re-joining the line with the pieces you want - or, if you traced this, it might be faster to retrace the elk and what they’re standing on and deleting this elk and putting that one in its place.
Note there is now fill around his antlers due to the merging of nodes - I believe to remove those the easiest way is to duplicate and Exclude those (in Inkscape it’s under Path), rather than trying to trace down which line is in the wrong place!
Scratch that! I have tried to edit with no luck. when I get the design looking good, I try to exclude it, and I get more triangles with color in the wrong spots.
I would like the elk to open (no line along the bottom of the elk) and a part of the border. I have spent hours on this and keep going around in circles.
do you have any other suggestion - Please!
Thank you!
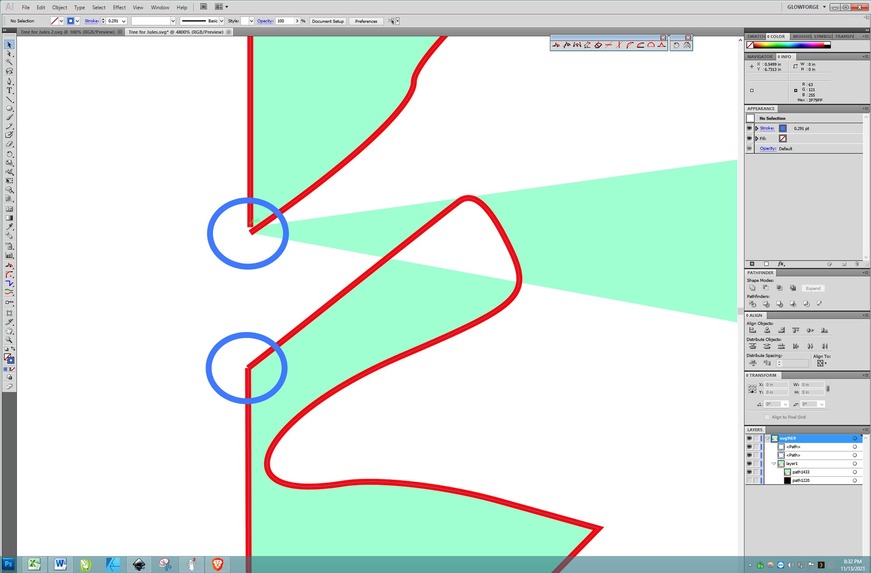
Did you want the elk connected to the frame? (It’s easy using @deirdrebeth’s rework…you just select both of the separate parts, make sure they overlap slightly, and join them, not exclude them.)
Select the elk, hit the down arrow a couple of times, then select both the elk and the frame and Path > Union.
Yes, I do want to connect the elk to the frame. Forgive me for being so daft, but when I do that, the elk disappears. Also, I would like to understand how she reworked the art. When I rework the art by deleting the odd lines that cross the design, I just get more odd lines through the designs.
I have attached another file that is doing the same thing. Maybe you can see what I am missing and not understanding??
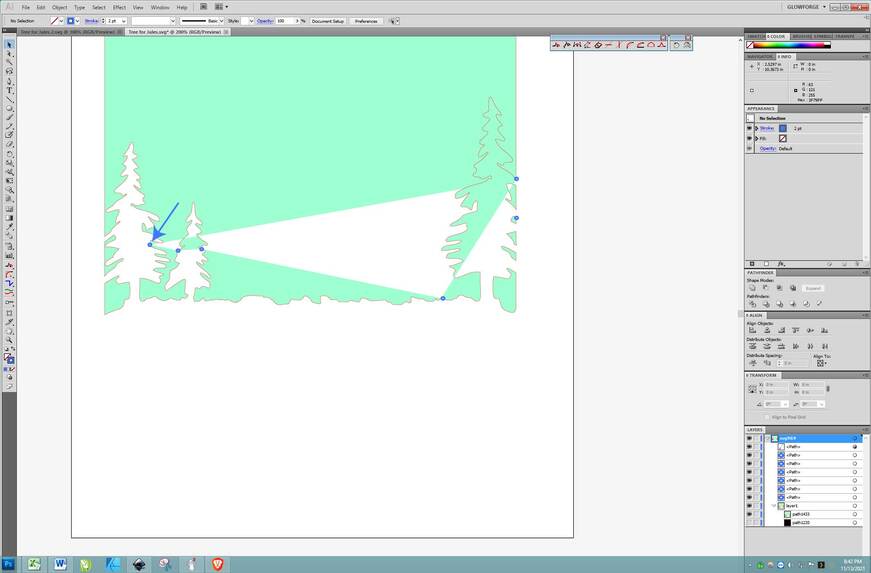
Looks good…you might be getting hung up on the Fill aspect of it…if you are trying to Engrave that, yes, it’s going to make a mess, because you have several open points in the shapes, and for ENGRAVING that creates a problem…it needs completely closed shapes or the program tries to connect the open dots, and that can cause some really strange effects.
If you are cutting though, I don’t see anything wrong with that one…it’s going to cut out as a frame.
Try visualizing each of the red lines as a cut line…what happens when you cut that out of a sheet of paper and the little bits fall out? You end up with a frame with the trees attached. There is no cut line separating the tree from the frame.
You don’t have to have a fill color in it to make it cut correctly. Or maybe it would help to think about pouring paint into one of the trees…how far will it go until it hits a red line? That’s the main shape.
Try visualizing it that way…you’ve actually got it.
If you plan to engrave it though…yeah, that’s going to take a considerable amount of work to fix.
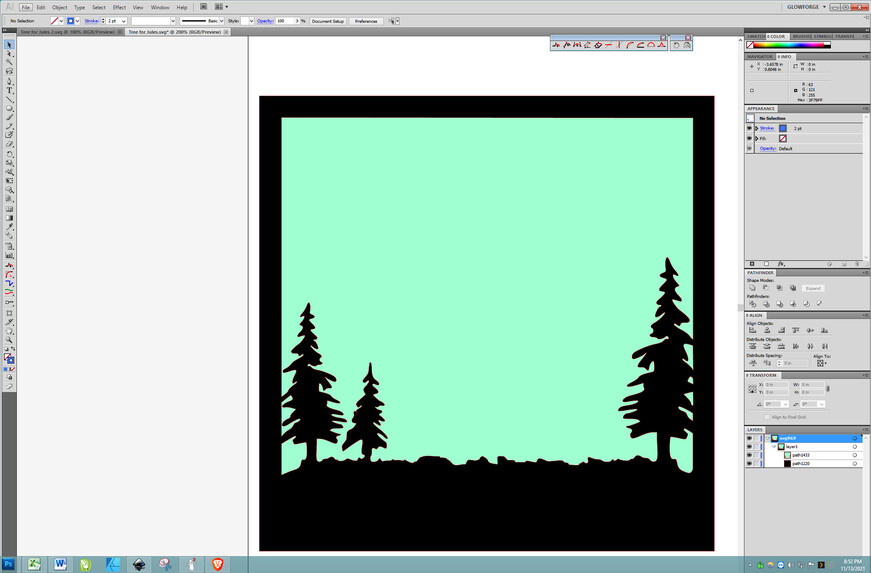
Thank you! Yes, I will be cutting this. I was trying to add color so the person I am making this for could see it on “paper” before I actually cut it. I think the colored layers would be easier for them to visualize. I had no idea it would be so difficult!!
Thank you for your help and the information. I will fiqure out another way to show the item to them.
I’m sorry you ran into trouble when preparing your design for printing. It’s exciting to see the incredible help and guidance you received from our other community members. Thanks folks!
Did the information they shared help you complete your project?
Yes it did. I ended up running the project on card board to show the customer. Still, I would like to learn an (easy) way to accomplish coloring the layered designs and sharing it via an electronic device, but the card board draft worked well.
Thank you and thank all those helped! The GF community is the best!
It’s easy enough but it will be extremely time consuming…you need to find all of the open points and join them into closed shapes…usually just by zooming way in on the spots where the engraving goes out of kilter and joining the points together…as you do that, the appearance will keep shifting…you keep locating the open points and closing them one at a time.