Okay, it’s been a while since I posted anything. Been kind of busy with other things. Finally got around to trying out leather. To keep it in perspective. I’ve NEVER worked with leather in any way, shape or fashion. Decided to just jump in and do the GF wallet.
Kind of lengthy but thought I’d post my experience working with leather for the first time.
I purchased the design and cut it out. (That was pretty easy)
Since I can’t just pop the design in my files and put a graphic on it I had to measure everything and put the measurements in a file I started in Corel. (Still easy)
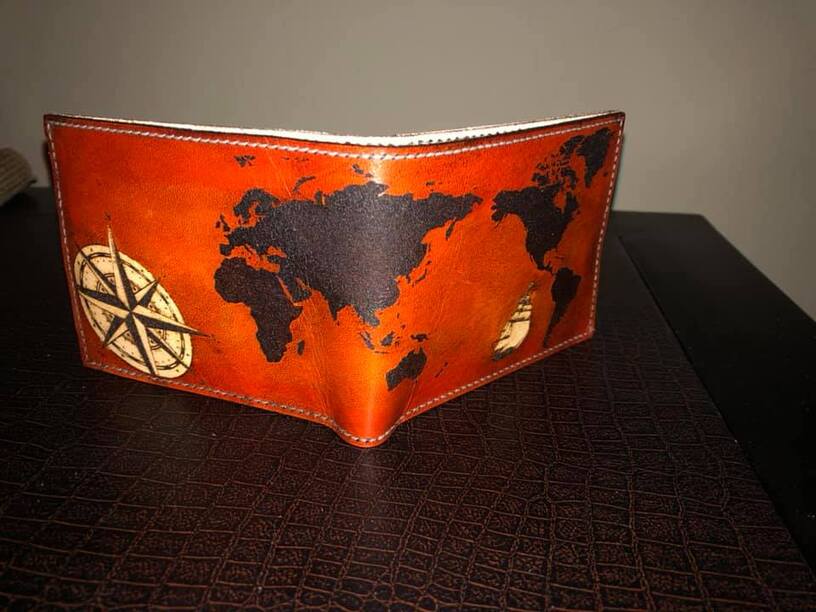
What do I put on it? I like both western and nautical images. I decided on a nautical theme. Went to Vecteezy.com and found some free images. Found a few things in different files that I liked. A cool compass, a map and a ship. I downloaded it all along with some other things in case I changed my mind.
The compass had more detail than I needed so I got rid of some of it and then manipulated the remaining image to work with what I wanted. Really just changed the size and moved a couple things to fit better.
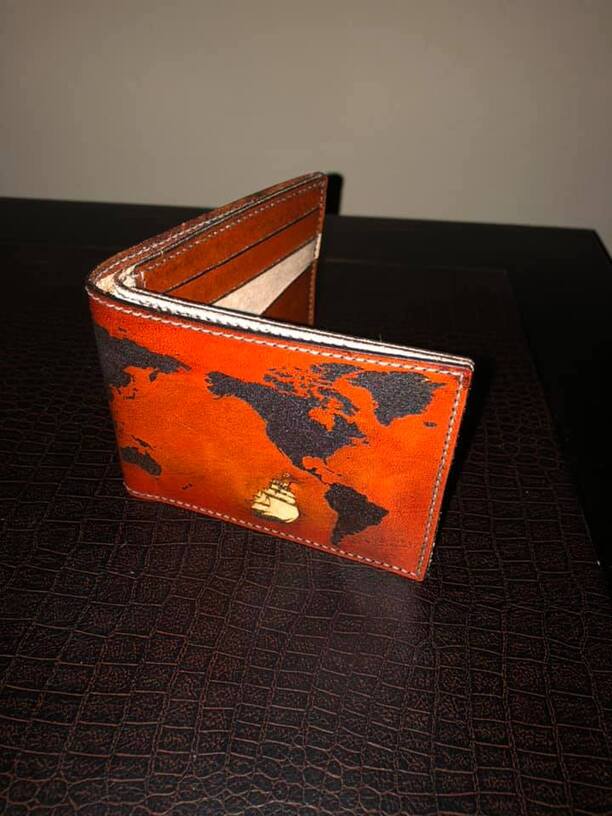
The Ship was pretty cut and dry. Just changed the size.
The map. The U.S. was on the wrong side. I wanted it on the front of the wallet. It’s all vector art so was pretty easy to just move things around. I confess I had to look at a map to make sure the final product looked correct.
Okay, I’m ready to engrave. Let’s do a couple tests on some small pieces. Okay. I settled on 1000/40/270. (Worked fine for the map but had to do it a couple more times at 10% power to get more detail on the compass and ship. (since then, I’ve read that I should have pulled the masking back to do the engraving and that I could have done it with much less power. You live and learn.
The engraving was acceptable so now I need to learn how to dye the leather and also how in the world am I supposed to do a “saddle stitch”. I went to a local leather store. The fixed me up with the dye, some wax thread and the needles. I went online and watched people do the stitch. (This isn’t real difficult but it is VERY time consuming).
I think for a first time working with leather it turned out sort of okay. I know I can do a lot better with the things I learned.
What did I do wrong you ask?
The power settings. Next time (and yes it sounds complicated but I like the look of two colors on the leather) I will peal the masking and engrave at a much lower power setting. Then will put masking back on and do a very low setting just to cut around the engraved areas. This way I can remove the tape from the part I need to stain so the compass and ship remain the same natural color of the leather.
I’m going to make the ship bigger. It was sort of lost in the design and kind of a pain to work with being that small.
Going to let it all dry for another day before stitching together because that gets a little messy if it’s not totally dry.
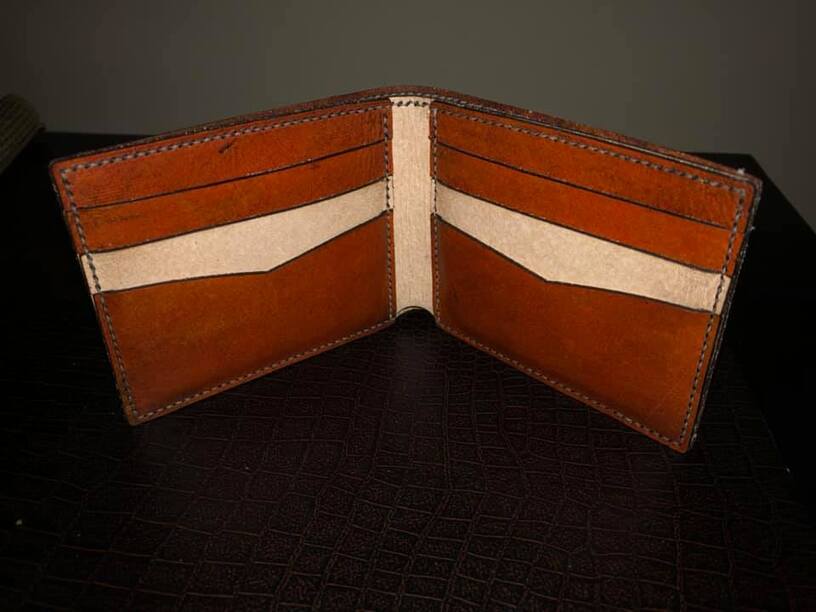
I may add fabric to the inside. I’m not sure. That’s just a possibility.
It took me all day Sunday to do this. I posted pics and mentioned that the compass didn’t turn out well. Someone asked if they could buy it. I told them that after I get this down I may try to sell for $80 or $100 but if they wanted the imperfect wallet I’d sell to them for $40 just to cover my cost of the leather and some of the time I spent on it. They agreed and now I no longer have the wallet.
I think it looks great! Especially for your first leatherwork. The quality of the stitches tell me you are meticulous at whatever you point yourself at.
Thanks. The stitching took longer than anything. I watched so many videos and still couldn’t figure it out. Then saw one guy that I finally understood. I just copied what he was doing. I’m really glad the GF cut out the holes. I don’t thing I would like to attempt punching them as I went along.
Unfortunately I read your remarks about working with leather too late or I would have had a bit of an easier time with the engraving. Next time though. I’m also looking at doing the pattern a little different to make it a bit thinner when folded. I appreciate all the information you post. It helps a lot.
You might consider tacking the leather down to the grid, etc. and running your cut first, carefully removing the masking, and then running the engrave. If you can do so without moving the leather it will be easier to keep the alignment perfect unless you have SnapMarks. I think you will want to use a jig for sure.
I’ve been collecting materials to try a leather project and appreciate your write up. I am taking a free stitching and lacing class at our local Tandy Leather shop today and am excited. One thing I’ve learned from these ladies at the leather shop so far though is that most people who do leather as a hobby for themselves do hand stitching but those who sell their work usually use a machine. I went to Joann’s and they said using a leather needle, plastic nonstick foot, and thicker polyester or nylon thread (thinner matching thread for the bobbin) you can use a regular home sewing machine. I didn’t make anything yet but did try the machine on some medium leather and it works beautifully.
After perfecting your leatherwork you could maybe pump these out with a machine.
Great job!
My experience with natural veg tan (or most leathers–I use a lot) is don’t worry about the masking unless it’s suede–but then test what the masking does to the hide–the masking itself can ruin the hide more than not masking for etching.
And I like to etch first, then cut. (Unless the leather piece isn’t big enough to fully pin it down outside of the design). Better to go with two or three passes for the cut than try to up the power or slow down the speed–the cutting can really mess up the leather (density within a hide will vary, and I rarely get leather sections from the same hide to cut thoroughly using the same settings),
Use a toothbrush & bit of tap water to wash the soot off, and veg tan will take some time to dry again–but since you’re dyeing it, if any soot does get into the hide, not a big issue.
And a skiving knife will help thin down the hide even more in areas where it bends and pieces are joined…