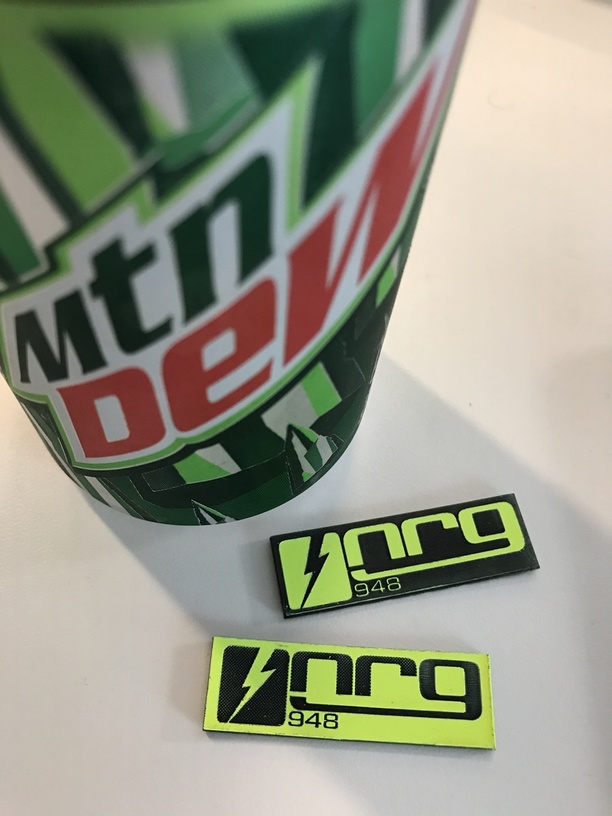
My son’s robotics club (Newport Robotics Group, FIRST FRC #948 in Bellevue, WA) is always looking for cheap easy give aways for the kids and to the other teams. I think I’m in love with the two layer acrylic from inventables. I used it for the first time this week. I’m playing with an epilog at work (same one @macphee uses)
You raster blast away the top layer (in this case neon yellow) to reveal the bottom layer (in this case black) and you can still vector cut to size whatever you would like. Comes out really crisp
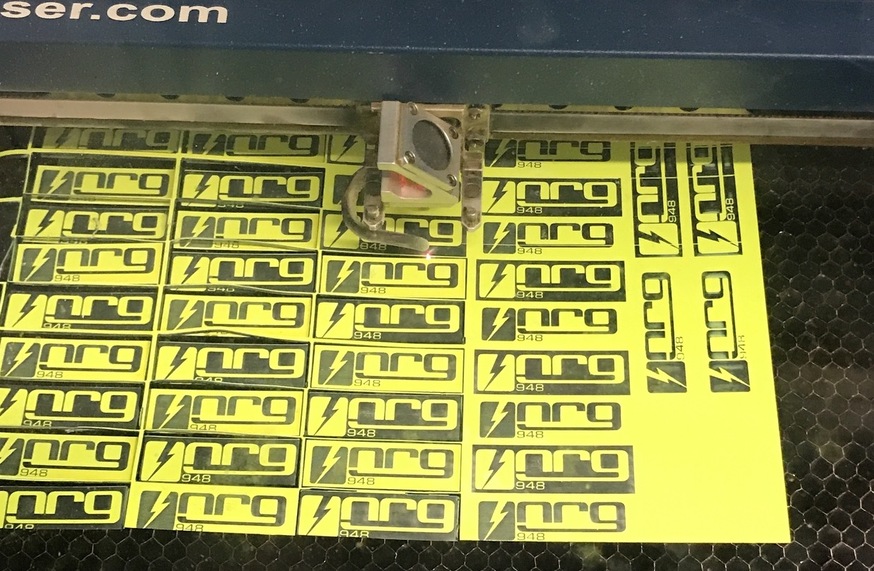
BEWARE - if you do too many at once and pack them in (like i did trying to be efficient and all that…) you end up warping the board from the heat you’re giving one ply of the material and not the other - then the board warps and you lose some yield on the parts due to having to toss the ones that were not within the focus of the laser and it’s more likely to start burning (i.e. it starts burning).
Do you think it would work to still pack the board so full, but do every other one on each row in the first pass, then go back and do the rest in a 2nd run? Sure it’d take twice as long, but I’d think it would be less heat concentration.
Yeah, it’s kind of like setting up a program for a plasma cutter to cut steel. You generally don’t want to run a full sheet of parts continuously with a cut path optimized purely for speed. You either need to add in idle cool down time where the torch is not running, or cut parts on another area of the material.
I am so glad you did this project. I am wanting to use this medium too and your experiences are so valuable. The yellow and black combination is stunning. Thanks for sharing.
I am assuming spacing them and doing multiple passes pausing in between might/will help. If I were doing it at home with the a glow forge it would be easier to do that than being in a lab at work where I just want to get home at the end of the day. I will post a ton when I have a unit at home - I have plenty of ideas for projects.
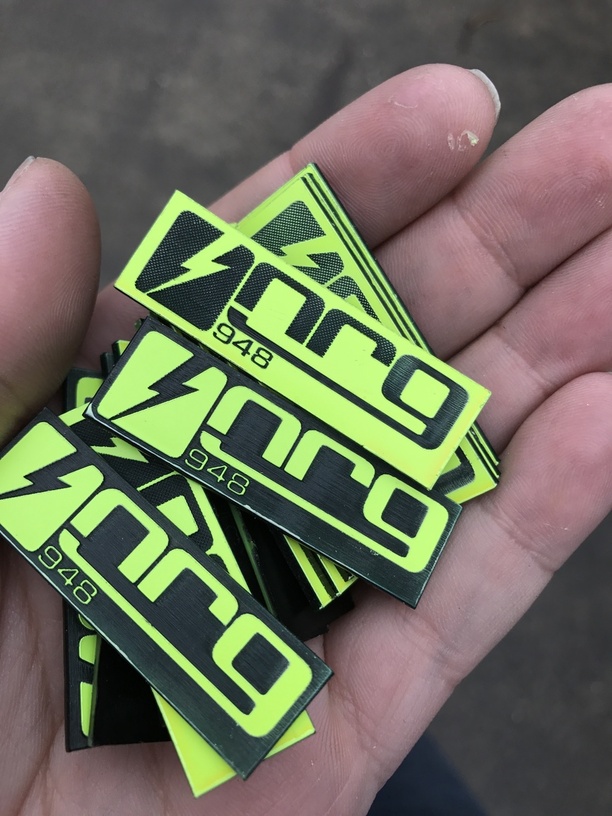
The yellow on black material looks very clean when cut. Others have been reporting that dark-on-light color versions of this material tends to leave a dark residue on the lighter lower layer when engraved.
Well, I have one each of every inventable 2 color sheet coming in 3 days to play with. (and 5 each for the colors I already know I want to make work). figured it saves time to just order everything in their store once and test. I’ll do the same for proofgrade and have photos and settings in my evernote if I need to remember which I liked and didn’t.
I’ll let you know how light on dark is vs dark on light. I have access to an epilog and a universal laser - I’ll be honest the universal with its narrower beam basically melted through to the back of the 2nd ply and came out crappy - and I pretty much think the universal’s print settings dialog hates me so I went to the epilog which I’m much more familiar with - and was able to get this type of result with just four individual tiny test pieces. woot. And yes the yellow on black came out with deep good looking blacks. Love it.
I think I’m liking the just get one of everything and try it approach at this point. I also just bought off ebay misc busted metal iphones and macbooks and will use them to perfect etching on that stuff. Some guy sold a bulk box so I have dozens of the backs of iphones (all with cosmetic flaws which were replaced because of the cosmetic flaws) but perfect for learning/experimenting.
OK - so what I did was change the cut order - I did vector cuts in one direction first, then the other direction - this made a ton of little rectangles, then I did the rastering across all of them. No more warping pushing it into the laser. Can crank out about 40 every 9 minutes on the epilog at work this way and no need to babysit it and zero discards.
@dave1 did you figure out good engrave settings for 2 color acrylic? I’m trying it for the first time and the colored dust (red) is settling on the engraved white areas and won’t come off.
Tried the default PG engrave setting first but that looked awful. Then the soon-to-expire PG light light engrave and that is better but nothing usable. Tried 30% & 1000 but that doesn’t even bow through the plastic masking. Gonna raise power a hair & slow it down a little and see if that works.
@Mike13 I found that changing from PG engrave to Manual, changing power to 1/2 of the default PG setting and increasing the number of passes to 2 made a huge difference.
I don’t fire through that plastic masking - I remove it and go with either no masking or shoot through blue masking tape if I’m feeling really picky that day. I have not gone after the settings for the glowforge yet - only the universal at work.
Yup - that totally did the trick. Wasn’t sure if you were basing it off of the light or dark setting, so I split the difference between the two. Probably could have just halved the light and would have been good. Thanks for the suggestion @jbpa!