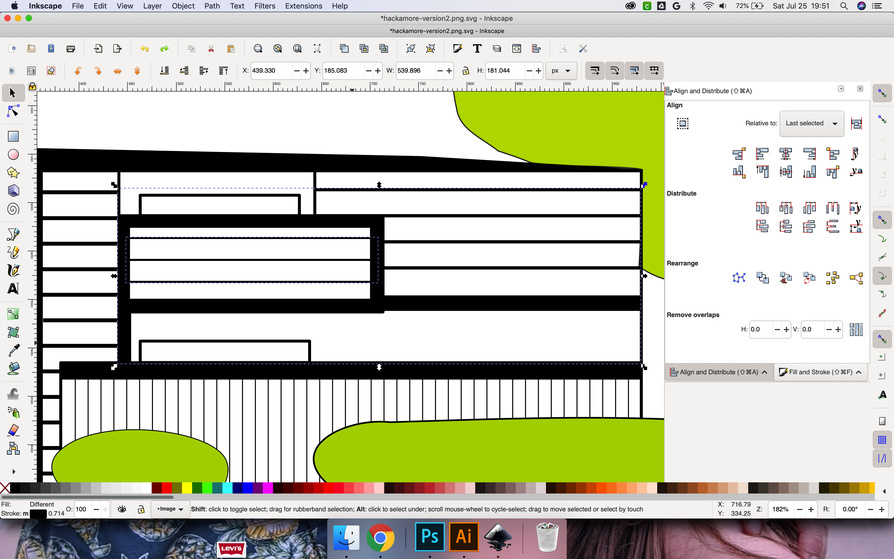
I tried my hand creating an outline of my house in Inkscape. I’ve come pretty far - but I’ve got some lines that are giving me major headaches.
When I combine these small lines with the bigger box, it clears it out. Any tips would be appreciated.
I tried moving layers… I tried combine (it makes them all outlines and that’s not what I want)
In addition, i’m also needing to cut out the bushes with the fence line. I union-ed the lines and when I go to “difference” it makes the fence white… please help
If you use the make a bitmap copy option instead of the (IMO superior) export png option, brie sure you set the DPI in your preferences high enough so it won’t look terrible. The default is 96 dpi last I checked, which will be insufficient for most engraves, I’d pump it to 300 dpi at least.
Or you could use export png and get fully custom control over things and be done with it. It’s an extra step but the customizability is worth it to me, and you get a separate file that is fully editable in your favorite image editor.
You will note under Path there are a lot of possibilities, Only the Difference is relevant to which is above or below, the little icons give a hint of what they do. Since you have undo, there is little cost in trying them all, If you wish to engrave a wide line Stroke to Path will make it two lines you can engrave in between.
I plan to make this a cut out of acrylic. I was thinking last night it’s probably because they are filled areas. I’ll need to combine them first then add the fill. For the bushes I should probably just adjust the lines up to where I want the bushes to be and give the fence a solid end point. I’ll give it another go this AM and watch some more YouTube videos.
I was able to combine the lines but I can’t seem to get them to all connect as one piece - especially the filled in objects. I threw it into GF to see what it’d render and now I’m getting even more discouraged.
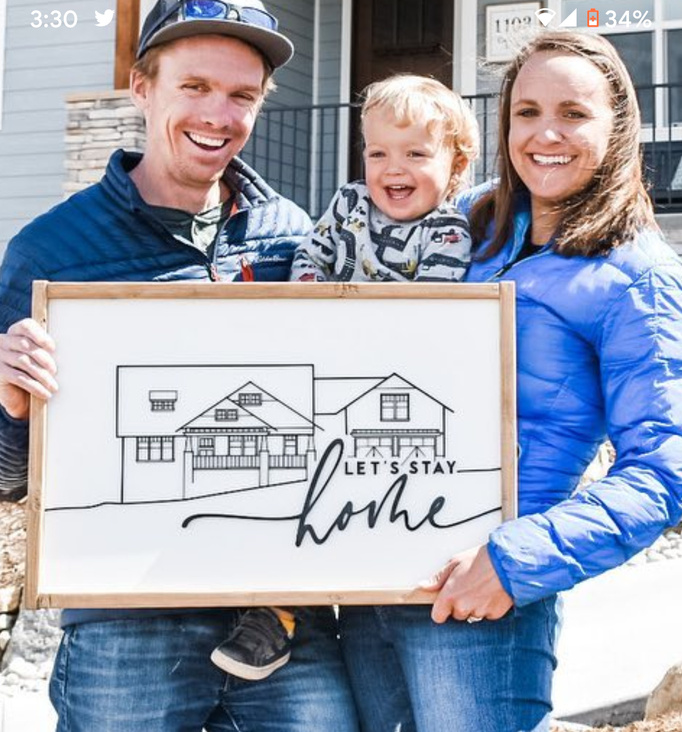
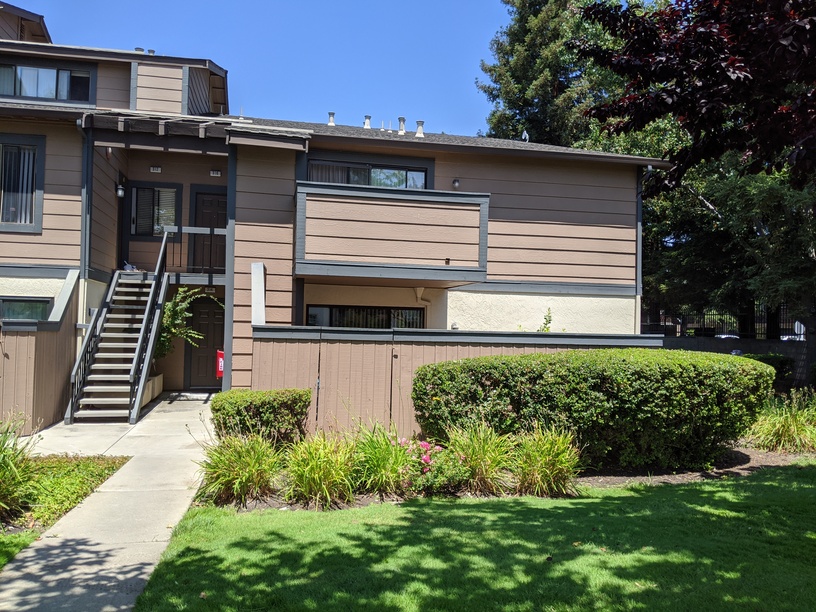
As a plea for help and explaining what I’m trying to do - here’s an inspiration photo I’d like to do with my house:
I thought drawing out lines would make cut paths and the fill would make them solid - I just can’t get it to work. I’ve include my svg file if there’s an angel out there who would like to help me fix my project.
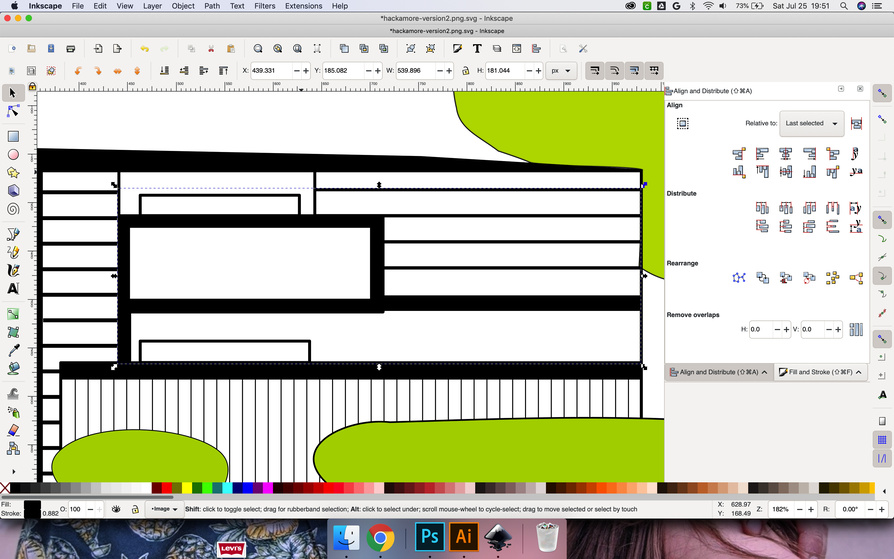
Hello again! I hope someone can guide me in the right direction…
I re-created my project and seem to be in a good place, as far as the house being one piece.
Now, I need to understand how to make a piece solid so it doesn’t cut them out as different pieces. Forgive me, as I do not know the correct language, otherwise I would have googled it.
The closest I’ve got was “welding” shapes - but I can’t figure it out for the life of me. It HAS to be simple, right?
There are a couple lines that I can’t get to merge, but at this point I don’t care unless someone can tell me how to fix it
The picture of your end goal really helps a lot. However, there are two ways to make that picture. The first is to engrave the black areas and then use paint or something to fill them in. The other way, the one I think you want, is to cut out the black lines and lettering and then mount the cutout on a white background. In your case, maybe a piece of black acrylic and a piece of green acrylic for the bushes and tree? If so your firsthome file is closer to your goal than the second attempt. That said, there is some work either way.
I want it to cut out of acrylic as one piece.
I threw it in illustrator and was able to get it to one piece with a couple overlapping lines that perhaps I can fix after i figure out what I want it to do in the laser.
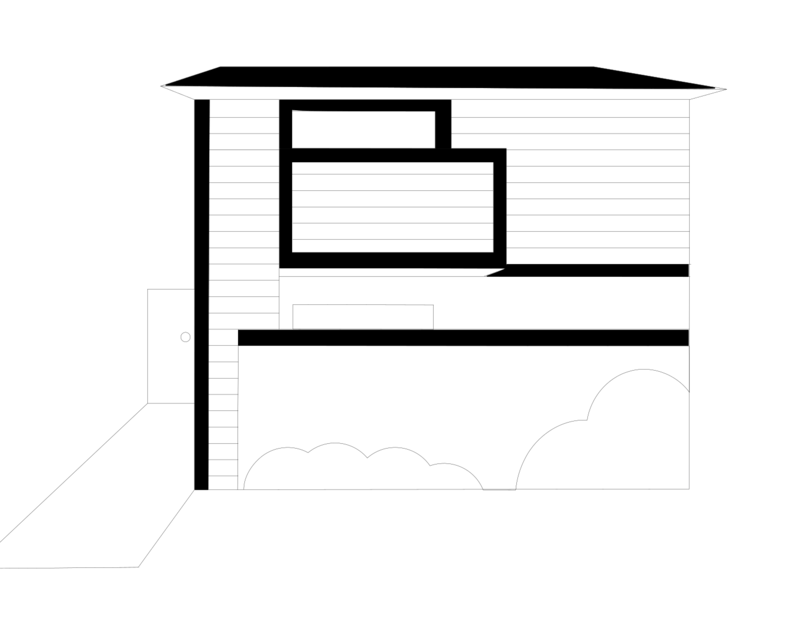
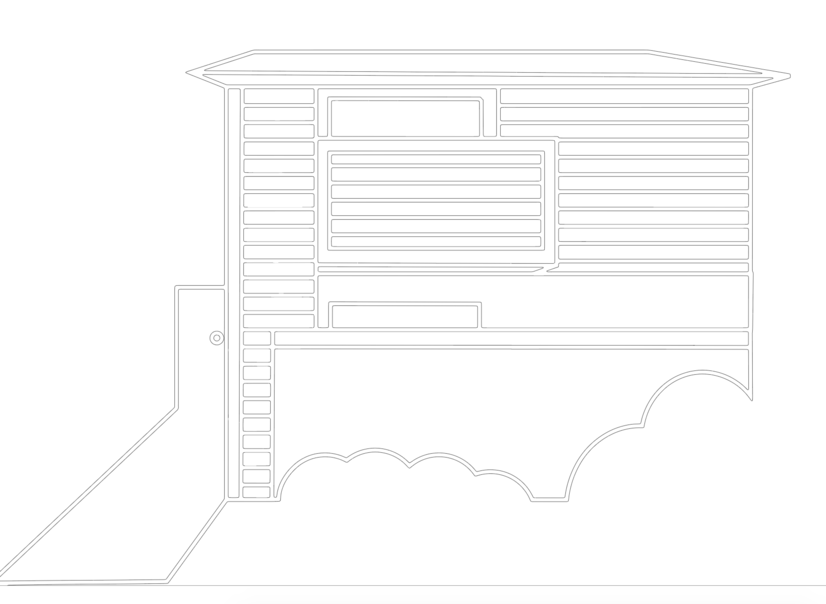
Its essentially the outline of all the lines on this image…
I dont know how to otherwise have it make sense of what I’d like to happen…
I wand the entire house to be cut out as one piece. The lines of the wall to be cut out in between the lines to create lines when cut out, like negative space. The roof to be attached to the rest of it, but a thicker piece. Does this make sense? Am I losing my mind? Is this possible?
The lines for the siding are a ten-thousandth of an inch thick. I think you will find that to be too delicate. I’m pretty sure if you try that you’ll wind up vaporizing or melting the siding lines.
IMO there is a design decision to be made here. If you want to go in the direction of your most recent post, you will need to score the thin lines into your backing material and cut out the roof and thick black lines. This has the advantage of keeping the perspective of the roof overhang and deck overhang. You will wind up with four separate pieces of black acrylic to mount over the scored piece of backing material. Very carefully mount.
If you want a single piece, where the siding lines and driveway are one piece, you need to make those lines thicker like in the firsthome.svg.
I threw it in illustrator, thickened the stroke to 20, rasterized it, then image traced. This is getting me closer to what’s in my mind.
I like your idea of the roof overhang! I’m going to go make dinner now and perhaps run a test piece so I can get a better idea of what It’ll actually look like in hand.
Yes, that is much closer. Definitely run a test piece on something like cardstock.
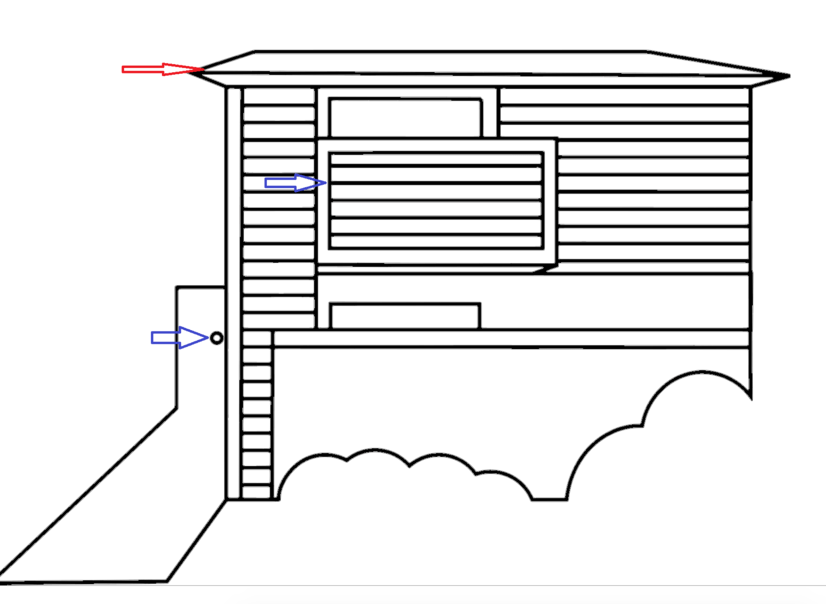
One thing you can do before running a test print is to take your png, open it in MS Paint, or Photoshop or GIMP and then do a bucket fill. What is filled will be what you cut out on the glowforge. This is what I got.
The red arrow shows where you are probably going to want to delete the inner roof polygon. The two blue arrows identify parts that will free float (they weren’t filled in by the first bucket fill, I had to fill them separately.)You can merge the circle (door knob?) with the side of the house. For the deck, delete the two rectangles that define it. I know this seems counter-intuitive, but it’s what you’ll need to do. A similar thing to define what I’m guessing is the sliding glass door.
At any rate, using Paint/Photoshop/Gimp and the fill tool will quickly show you what you’re going to get. I’m going to bed now, enjoy your dinner!
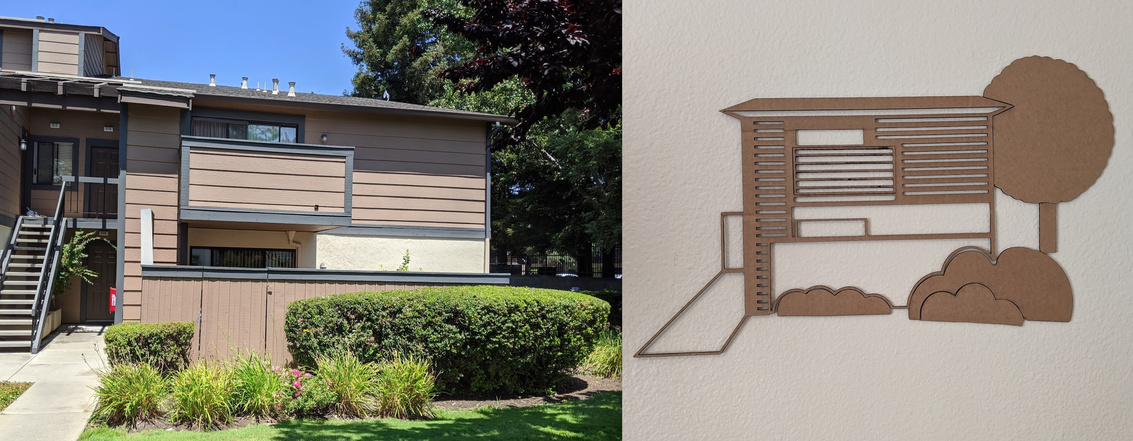
A quick update to show my progress - I still have a lot to finesse (like the middle had double lines so it burned a bit) but it’s happening! and I plan to update this thread of updated terminology and process
If you tackle something like this again - you can get a cleaner result staying in vector instead of rasterizing and tracing (the tracing process often creates weird artifacts). Once you have all your strokes the way you like (and make sure “fill” is set to none) choose “object/path/outline stroke”. Then merge the result together with the pathfinder tool.
Lately I have been exporting Gimp paths as SVGs. I create the paths from the masking so one has to be careful to have a clean masking but they are easier than trace to get a clean result.
Thank you everyone for the help!
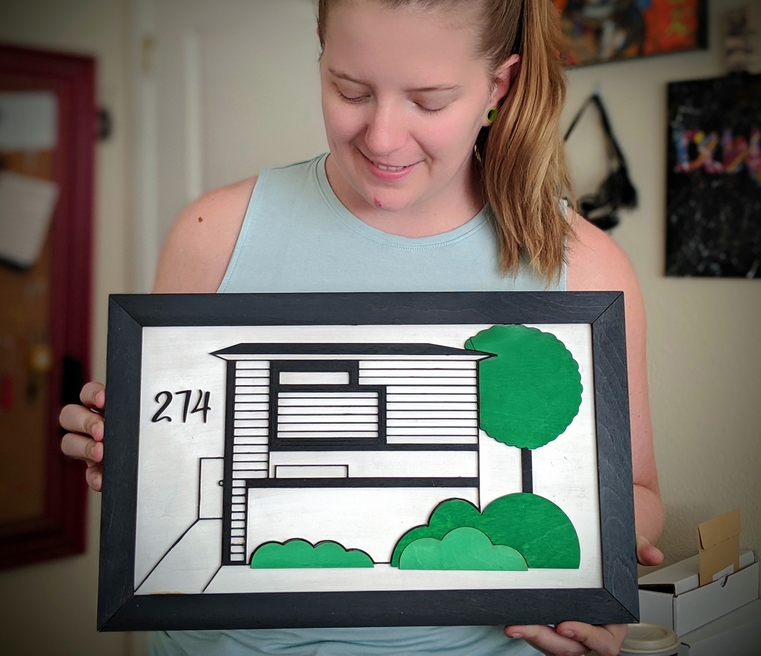
Here’s the final picture (it’s not perfect, but done is better than perfect!) This is a very personal project of mine, as we are closing on our house in two weeks!
This week I’ll update this thread and give a little walk through on how this can be done.