Unusual tabbed box design problem

I need to make a tabbed box that is open at the top, and that mounts to the underside of a larger flat plate. The result is an enclosed pocket beneath an opening in the mating plate. So I want the tabs along the top of the box to mate with appropriate features around the opening in that flat plate.

I can think of a few ways to do it starting with the artwork generated by any of the many tabbed box makers available on the web. But they’re all a PITA. Nothing I’ve found on-line will do it (I found one that’s close, it’ll make a tabbed box “frame” (basically a tabbed box with a tabbed-box hole going through the center of the box) and I can use the interior hole for the outline I need. But it’s proving to be frustrating to get the dimensions accurately set.

Does anyone know of a tabbed box maker that’d do what I’m looking for?

Something like this (but imagine it with tabs. I was too lazy to try and model them for this image).

2 Likes

Not hard in inkscape You could make an open box and just modify the bottom.

For something that specific you might have the best luck using Fusion 360. A couple of the guys here, @jbpa and @dehne1, have built a sweet little plugin that creates tabs and slots along specific faces. It’s great for tabbed anything.

3 Likes

It’s not that easy in Inkscape, at least not that I could see. The problem is that for the notches to be correct, you need each edge of the top flipped 180º, which is not the same thing as flipping the whole thing or making a negative of the positive.

For Fusion360, That’s sort of what I was thinking of for one of my solutions. But I don’t do Fusion360 :frowning:. But I can take the 2D outlines from any tabbed box generator and loft them to 3D, assemble 5 sides of the box so just the “crenellated” top edge remains exposed. Then I can use subtractive CSG to cut out the notches from my top plate, and then I can collapse the top plate outline so it’s only 2D and export it back to AI for final prep. But it’s a PITA. I was hoping someone knew of a generator that does it natively.

Start

Add…

Exclusion (not intersection)


Add green and purple and combine…

Clean up…

And you have this

12 Likes

I used Boxes.py and illustrator to make my word clock.

6 Likes

There are lots of ways to do this, here’s another perspective for how to do it “simply” in inkscape. I tend to do things in a way that reduces the number of boolean actions because they can introduce error. Besides, different methods make more or less sense to each person, maybe you’ll find it useful.


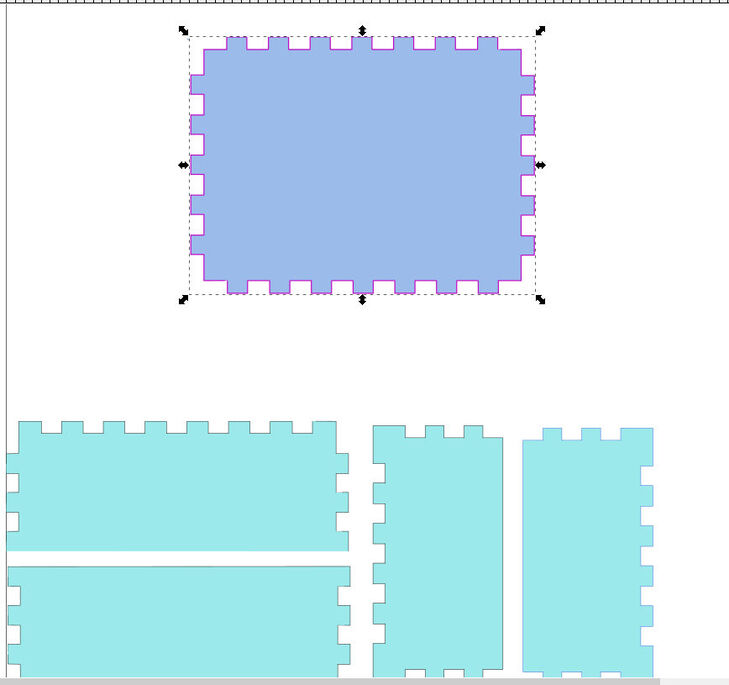
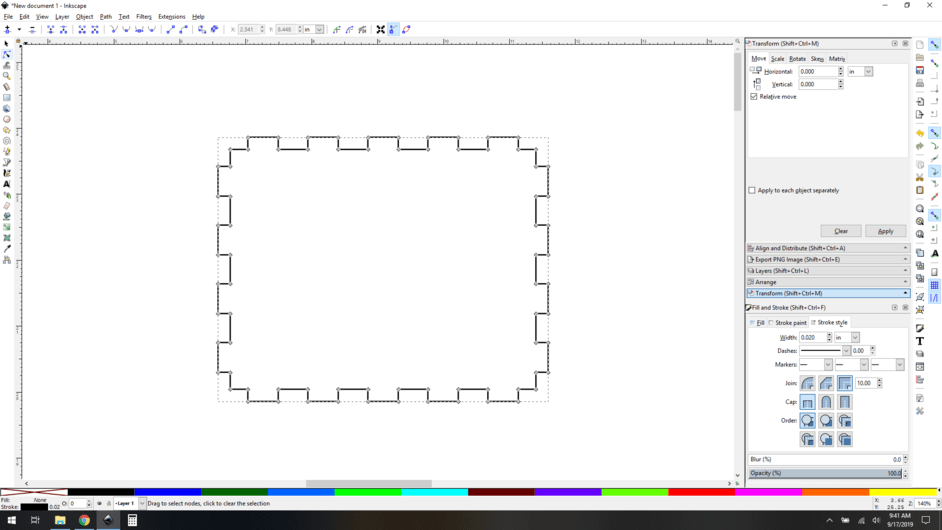
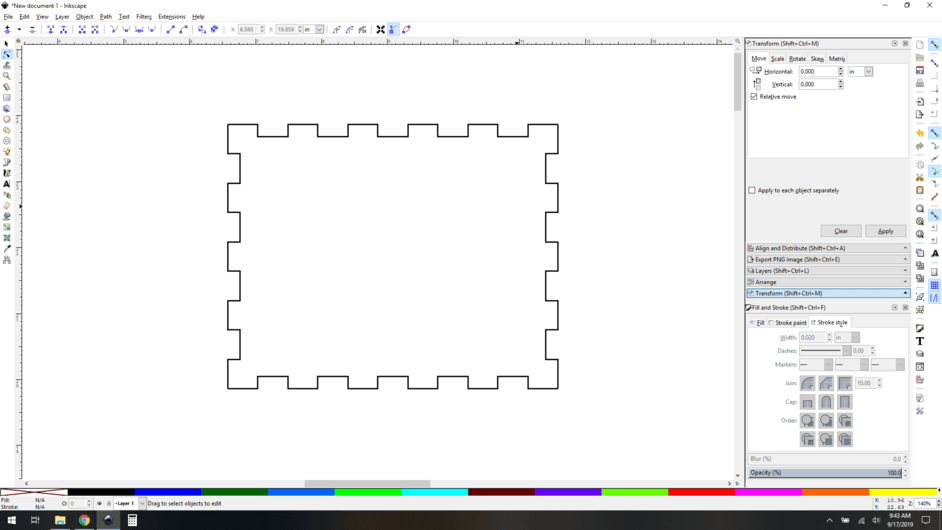
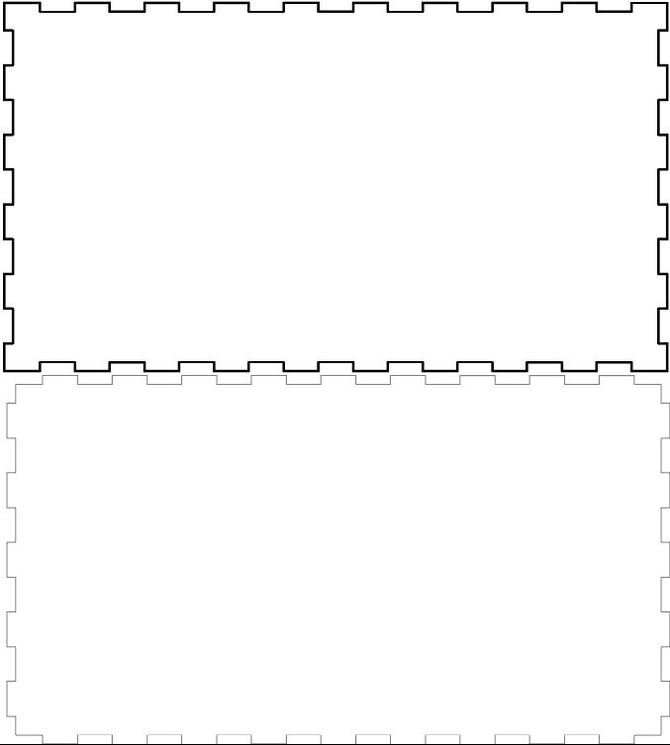
Generate a normal box, this is one with a 0.006" kerf adjustment. Isolate the top that you want to “inset”.

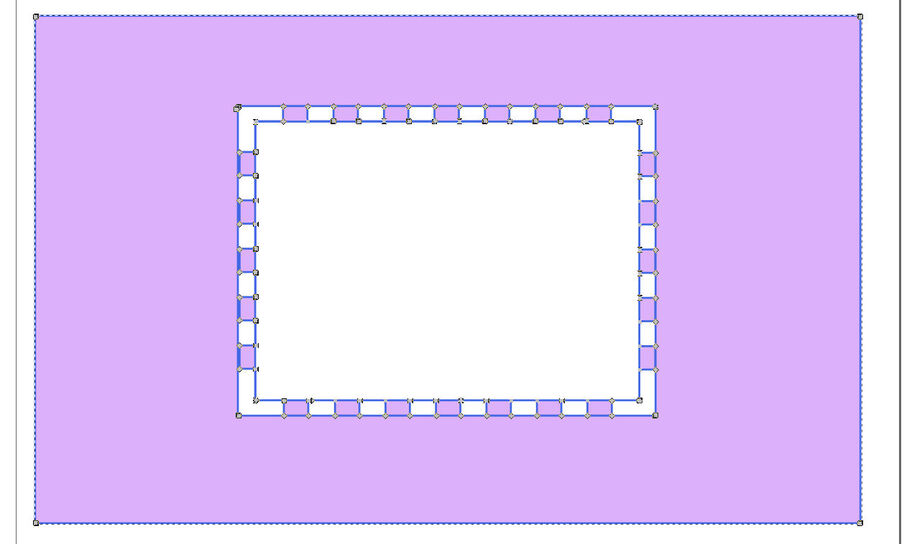
Enter node editing mode

Grab the corner nodes, and break them apart.

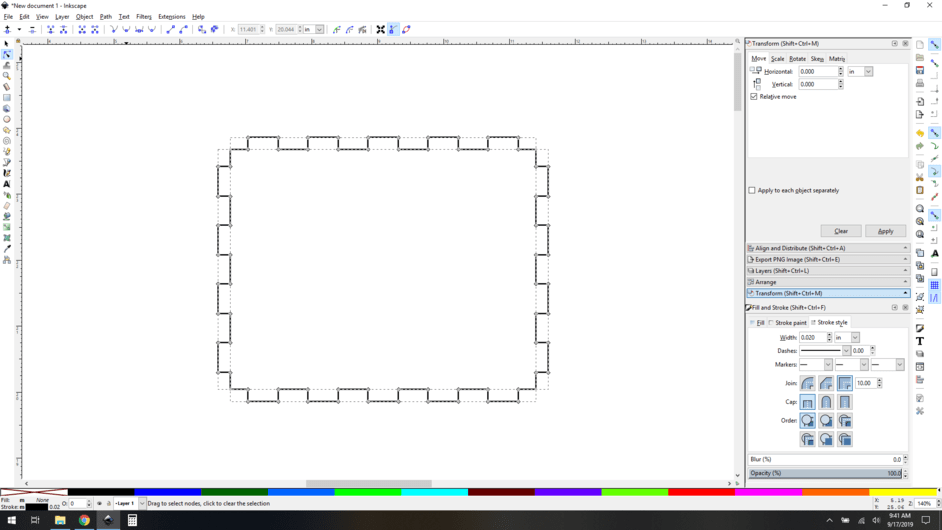
Break that result apart (Path->break apart), now you have separate path objects for each edge.

Select each edge, one at a time [don’t move them]. Flip them. For the top and bottom edges, flip them vertically, for the sides, flip horizontally. It’s important to do them individually if your box is asymmetrical. It may seem like you can shortcut this, and sometimes you can, but it only takes a sec (use the “v” and “h” keys, it’s nearly instant).

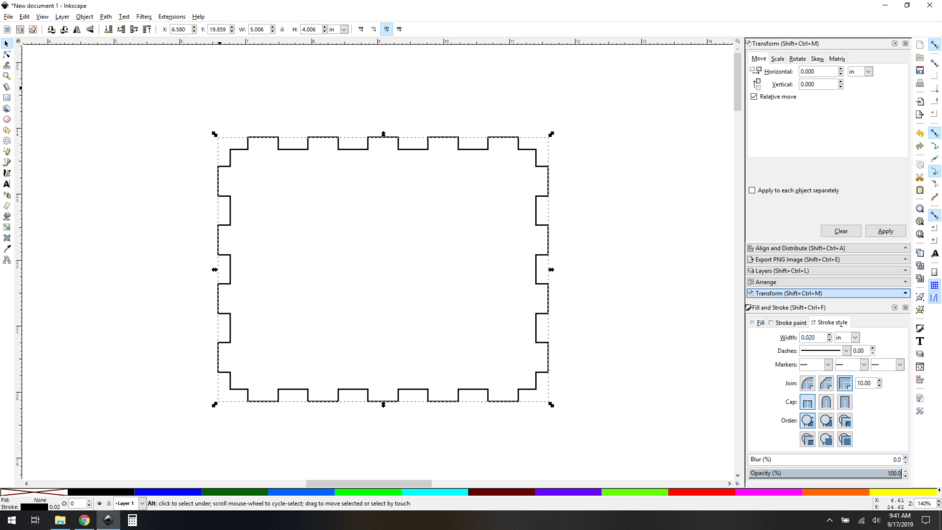
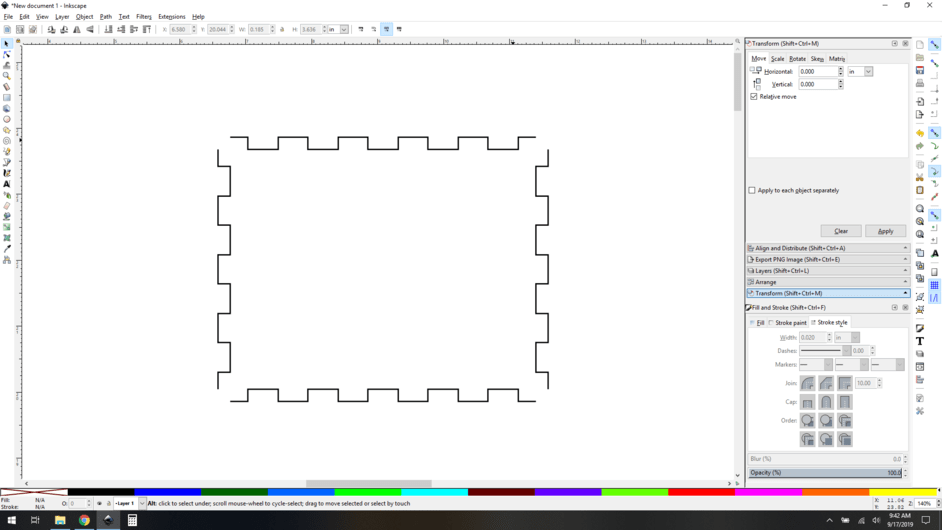
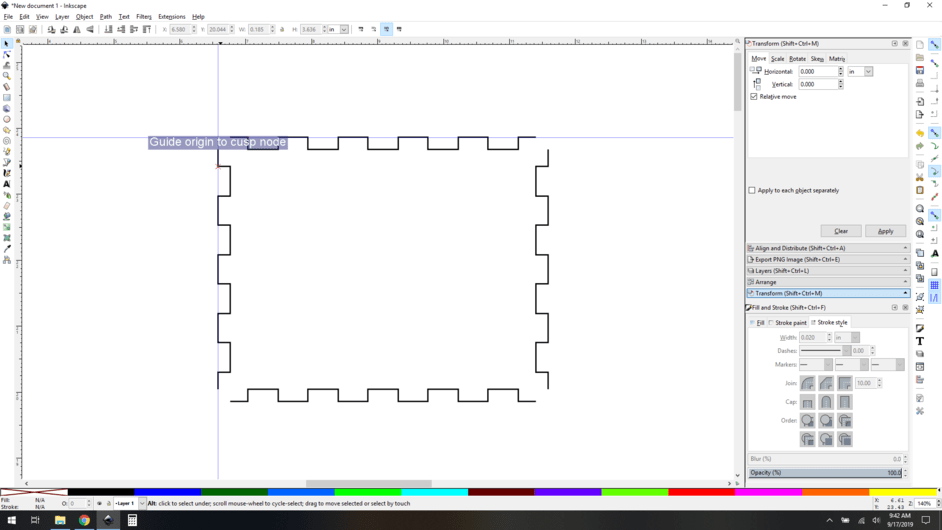
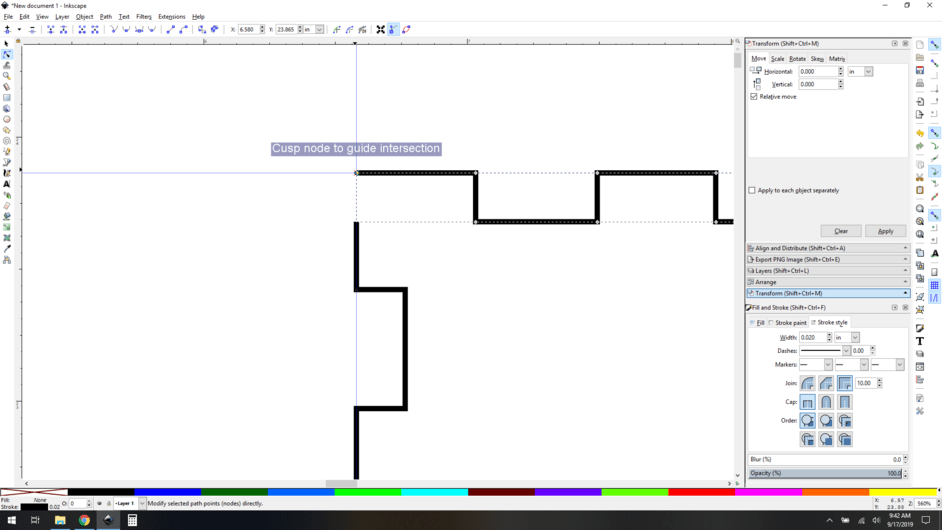
Now you need to heal your gaps in the corners. Use guides to help you do that. First, add guides, snapped to the new outside edges…

And now drag the nodes to the intersection.

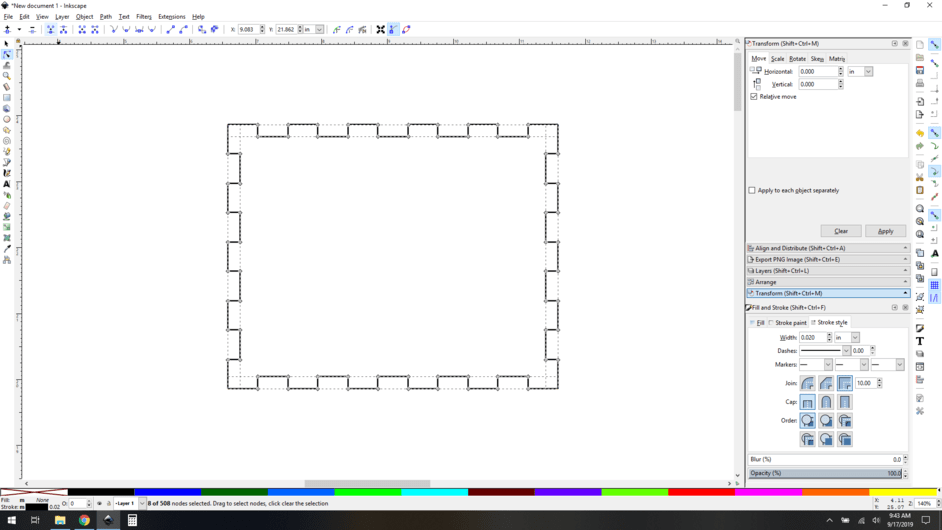
Repeat for all the corner nodes.

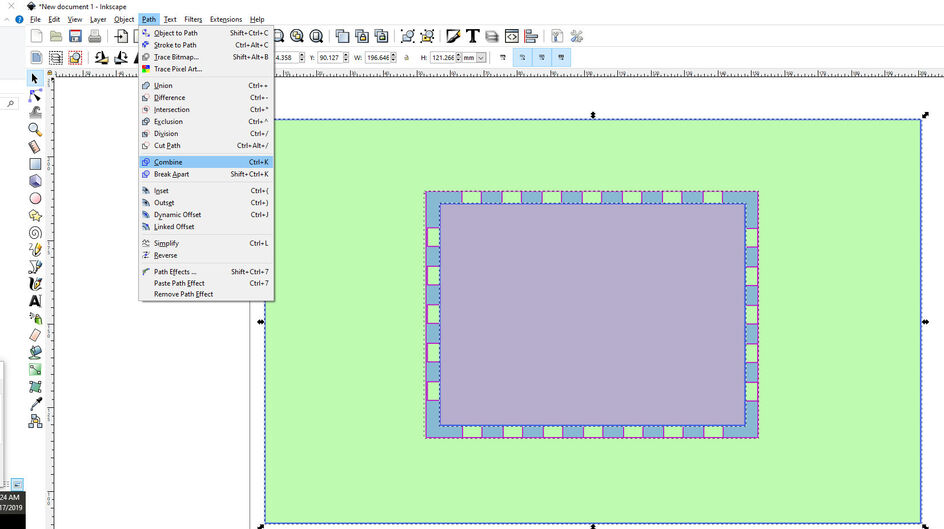
Now you need to join your corner nodes (semioptional, but I like to do it.) You’ll select them by shift-click-dragging across the new overlapped nodes to select the pairs to be joined and click the “join selected nodes” button.

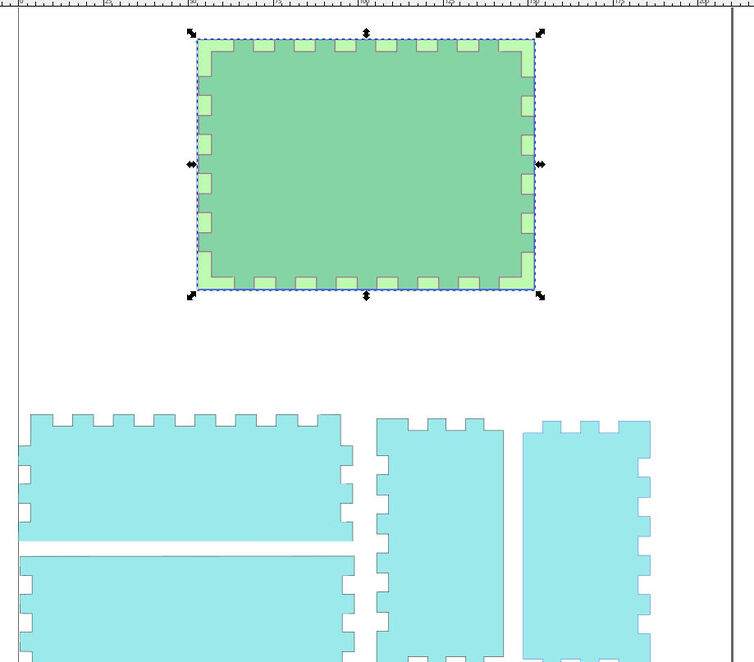
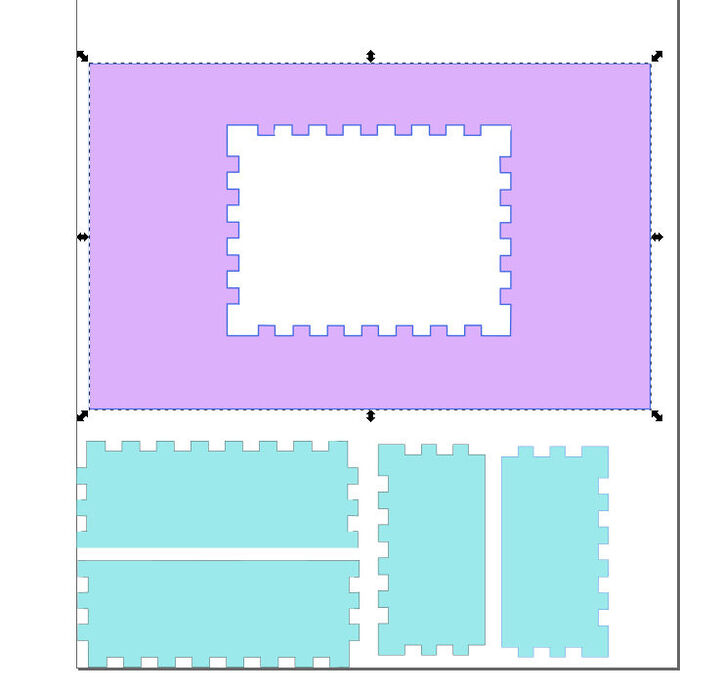
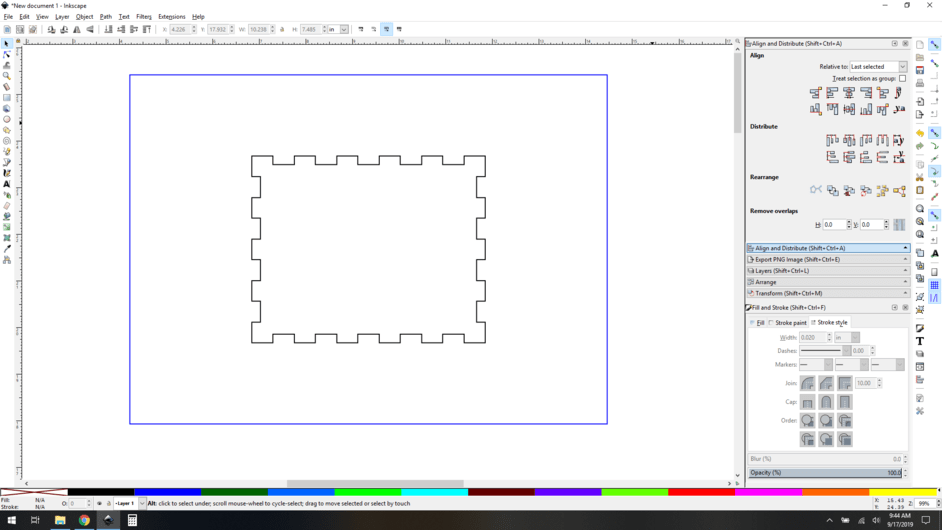
Now enclose the new shape you just made inside your larger rectangle, aligned as required by your design. ( I did a simple center here, but whatever you need.)

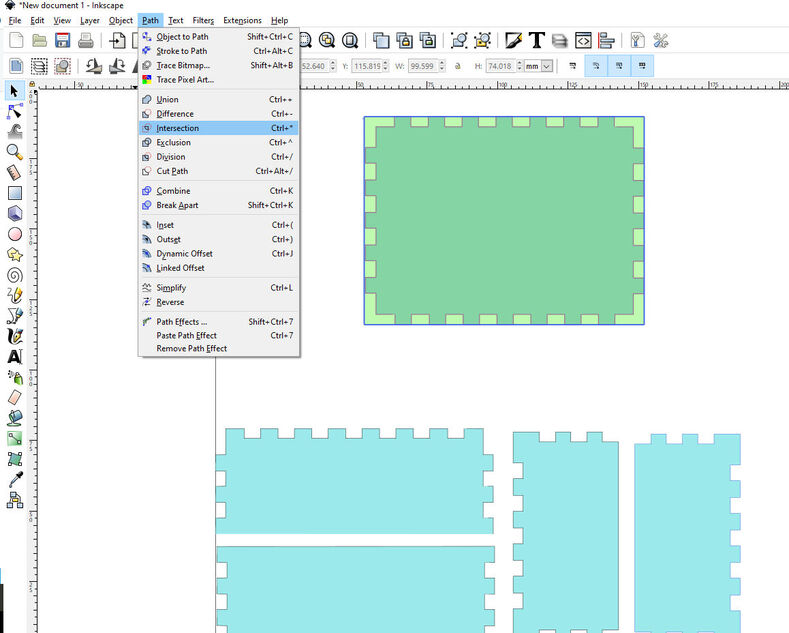
Group them if you like to prevent accidental misalignment later. You’re done, don’t do any booleans (difference or exclusion), or you’ll lose the ability to force the cut order inside-out as is best practice. They need to stay as separate paths with different colors.

[inb4 yes you can move multiple nodes at once, but that comes later once you are really comfortable with this method. Yes, you can use control key to constrain node travel direction, so you one really need two guides, but see above re: later. Heck with path snapping you can do it with zero guides, but that’s a hassle and now you’re just showing off.]
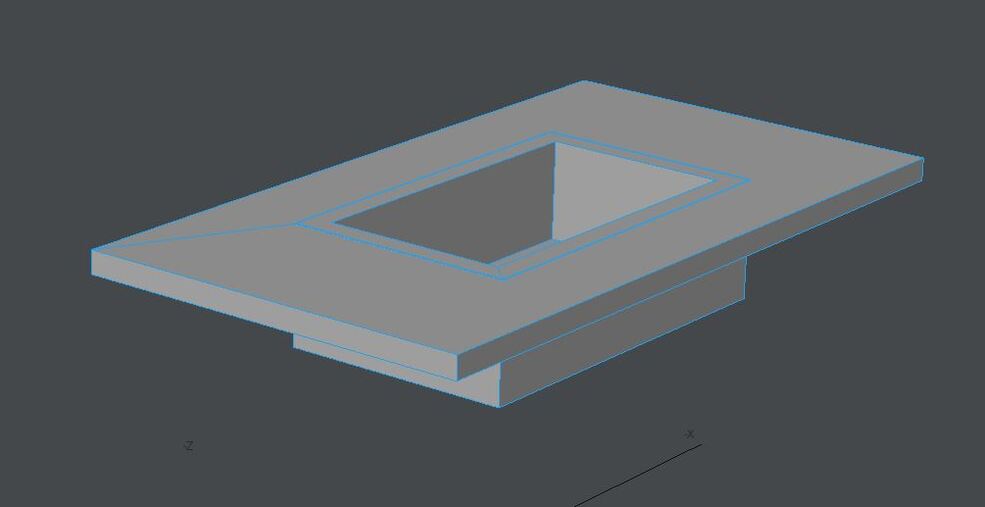
10 Likes

Great feedback folks, thanks!

I used Evansd2’s method, only in Illustrator and not Inkscape. Basic operations were the same. Split the vertices at each corner, select the 4 edges and “reflect”, then drag the end points back together and join 'em.

I did this with the artwork that I last generated and I don’t remember what program I used for it. But I do remember (now, belatedly) that the Inkscape plugin I used didn’t actually join the vertices at each corner so if I’d used that plugin I wouldn’t have had to do the splitting operation.

Outline on the bottom is the original box top produced by the generator. Top one is the same object with the enges flipped around.

Turns out I had the right concept but hadn’t bothered to figure out a way to do it in Illustrator (which I am not any kind of expert in using). But seeing it laid out in Inkscape I realized Illustrator must be able to do the exact same thing. I had to break down and RTFM for a few minutes. But then it was all smooth sailing.

Thanks again for the help, guys!

4 Likes

In OnShape CAD you would model the shape and then apply the “LaserJoint” plugin to the pieces you want tabbed together. That would be a very fast to make design.

1 Like

If anyone cares, this is what I made, that I needed help figuring out how to make.

Now I’m a freakin’ expert…

Damn GF Basic is literally exactly 1" too short to cut this in one piece. Should have got a Pro. :slight_smile:

5 Likes

The bed sizes are the same, and there is room in the back that the extra inch or two should not have been too much of a problem.

This topic was automatically closed 32 days after the last reply. New replies are no longer allowed.