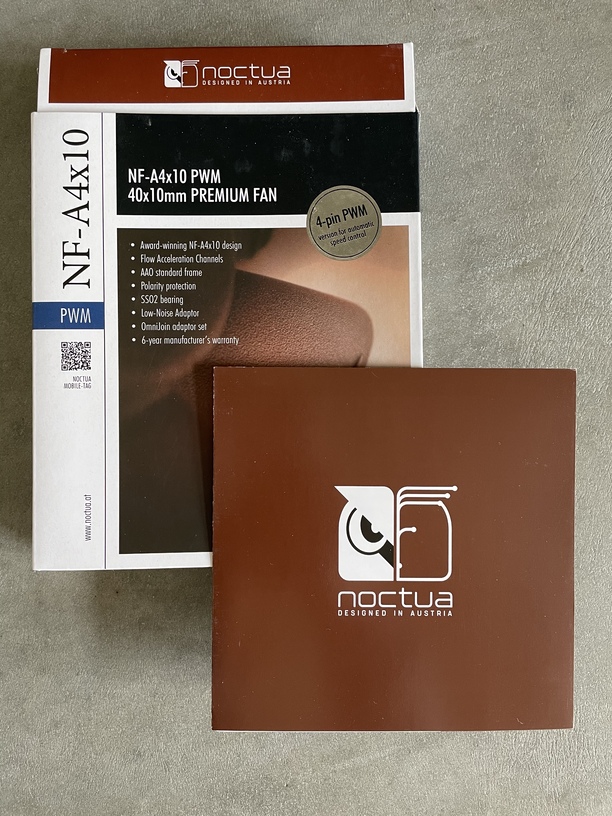
Nice! What model fan are you using?
1 Like
Just seeing this for the first time - too cool!!!
1 Like
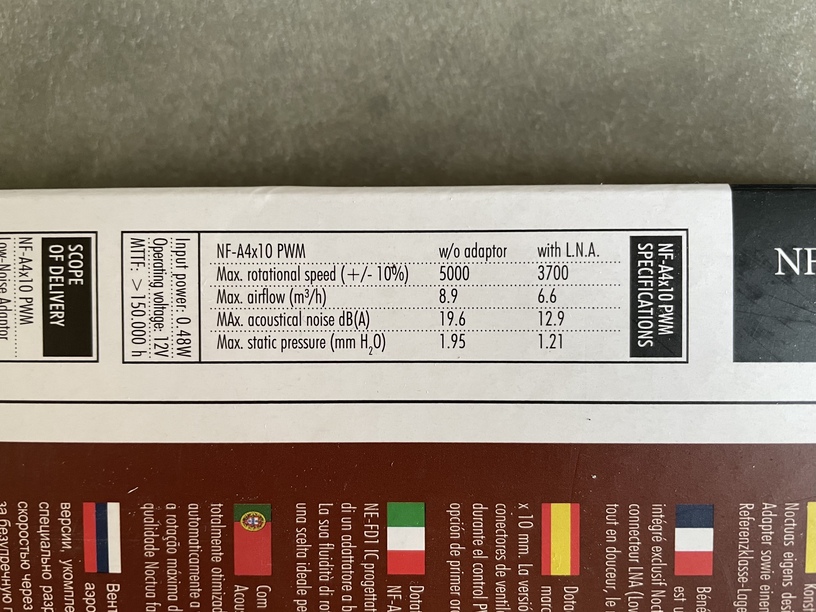
I’ll be curious to see if you get enough suction to make it work here. Those fans are rated to 1.95 mmH2O, the ones I use are 27.3 mmH2O, about 14x as much vacuum and about 2.5x the airflow.
That being said, if you seal it up it might well be plenty. Vacuum works on surface area, so if you’re cutting larger pieces I bet they’ll stay put.
3 Likes
I guess you are right. I do have to cover up the space that is not used by the paper I am cutting, to get enough suction.
Ideal would be a stronger fan (or better 2 of them).
1 Like
Even with a stronger fan, I have to cover it up too. I use sheets of printer paper to cover parts of the mesh that aren’t under my material.
There’s a whole discussion about fan power in this (super long and boring) thread. If you dig in you can see far too much info about delta fan models and whatnot. Your design looks smart, pretty modular, like it might be fairly easy to make new fan mounts with different fans if you needed/wanted to?
Who knows, it’s a good experiment! If it works then you’re setting up a new idea of what is needed to make enough vacuum. We’re all just mucking about with lasers here. I like your use of tile as a base, that’s a good idea.
6 Likes
So far:
I had to cover the open spaces with copy paper to get enough negative pressure.
Those two fans do keep down copy paper. However if you use cardstock that is slightly bent, those fans are not strong enough to suck the slightly bended corners down.
I cut tiny bits. Upfront I vacuum cleaned the GF, to see how much fly aways I would have afterwards.
The tiny bits stayed on the mesh or were sucked through it, except two little bits that ended up somewhere on the copy paper. This tiny:
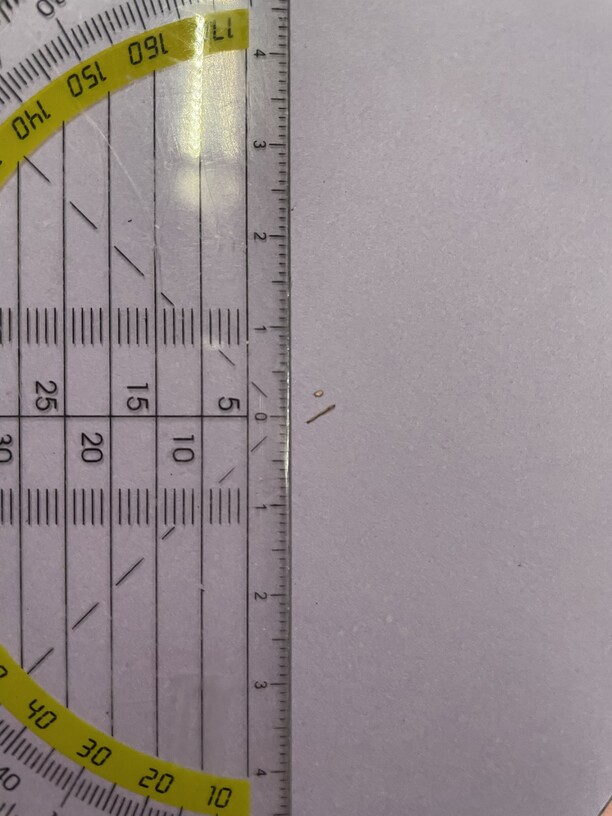
One small bit passed through the fans and ended up at the back of the vacuum tray.
The biggest piece I cut was 3x3 cm and stayed on the mesh too.
So it seems that most cardstock bits stayed in place on the mesh or ended up in the vacuum tray after been sucked through the mesh. However, some really tiny tiny bits might have got sucked into the chimney, after passing a fan and without me knowing it ![]()
I am not sure if there will be enough suction to compensate for more air leakage when you make many cuts on the maximum cutting surface.
So, now I have ordered two stronger fans, that will work with the battery I am using now and will fit in the same tray. I will make my nephew happy with two extra fans for his home built computer, so no loss there ![]()
One more thing: I used the passthrough to build the tray and it worked like a charm. So much improvement there, perfect alignment!!!
8 Likes
Which fans did you end up ordering?
1 Like
I have ordered two Sunon DC Axial Fans, 12 V dc, 42m³/h (24.7 cfm), 6.12W. Depending on the project, I can always decide whether I need to use one or two fans.
2 Likes
They look beefy, I bet you’ll like them.
1 Like
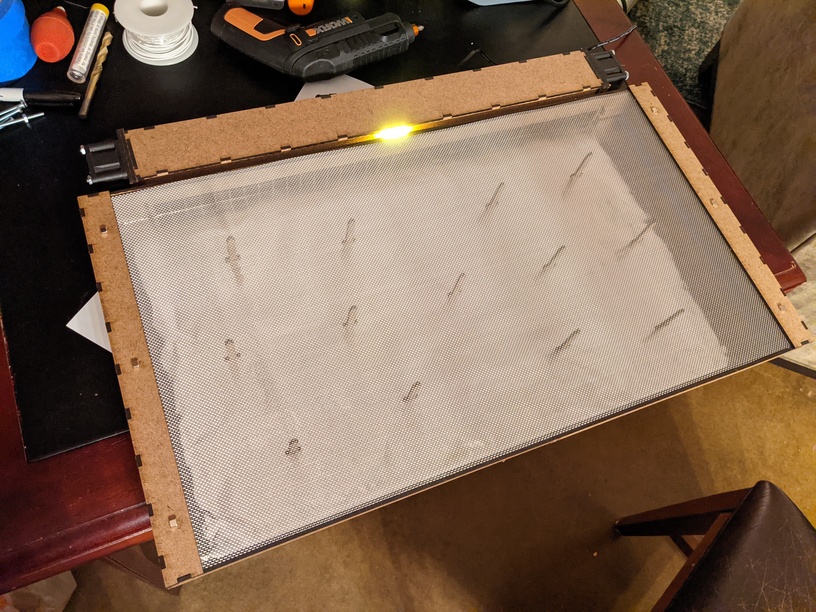
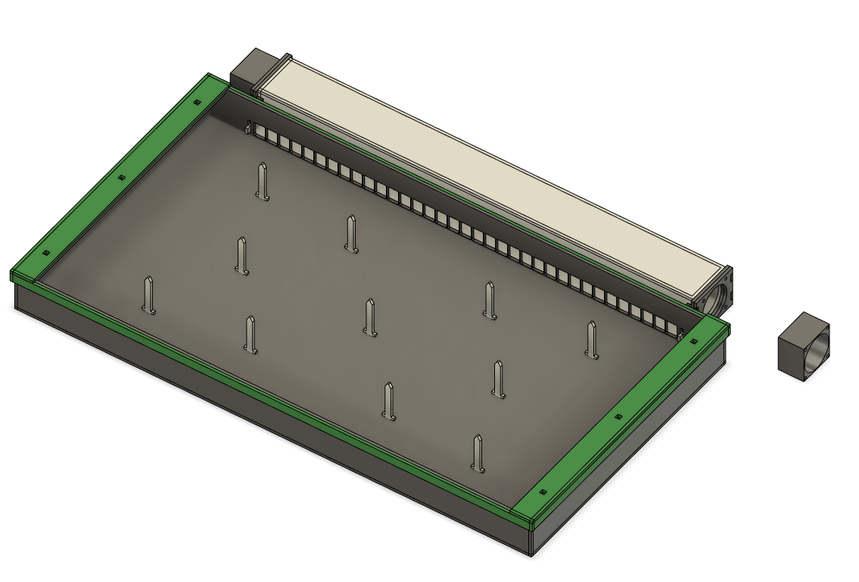
That looks like a maximum size vacuum tray. The little ‘swords’ are a good addition to keep the mesh up high without too much influence on the air flow!
4 Likes
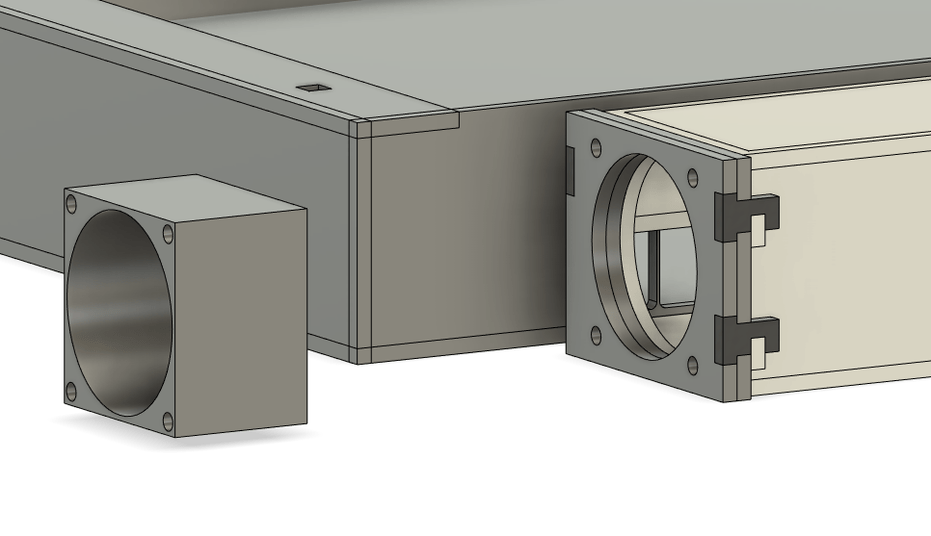
It is the same width as the standard tray so it snugs into place between my tray boots. It’s low enough I could use the passthrough if needed. The top “frame” magnetically locks with the bottom to hold the mesh firmly in place, and the fan assembly is removable and has a switch and indicator LED. The internals, including the tiny swords, are all shielded with aluminum foil. It was a fun build!
5 Likes
15 Likes
I think that’s going to be the case no matter the fans that you choose. One of my favorite things on the Trotec is the downdraft/suction I can create. Even running a 1.5 hp blower that’s dedicated only to under the bed for suction, covering up the empty space is imperative.
9 Likes
That really is a next level design! Great that you will be able to use the passthrough with your vacuumtray. So that makes me wonder which fans you used in your design?
For me it was quite difficult to find powerful fans that are small enough and would go with the battery. I ended up with just enough vacuum with 4 cm high fans.
So now I have ordered more powerful ones. Which was quite difficult, because at that moment they were not available for me as a person, only for businesses (unless I wanted to order them from another continent, which takes for ages).
But again, I love your design. You might consider selling it!
3 Likes
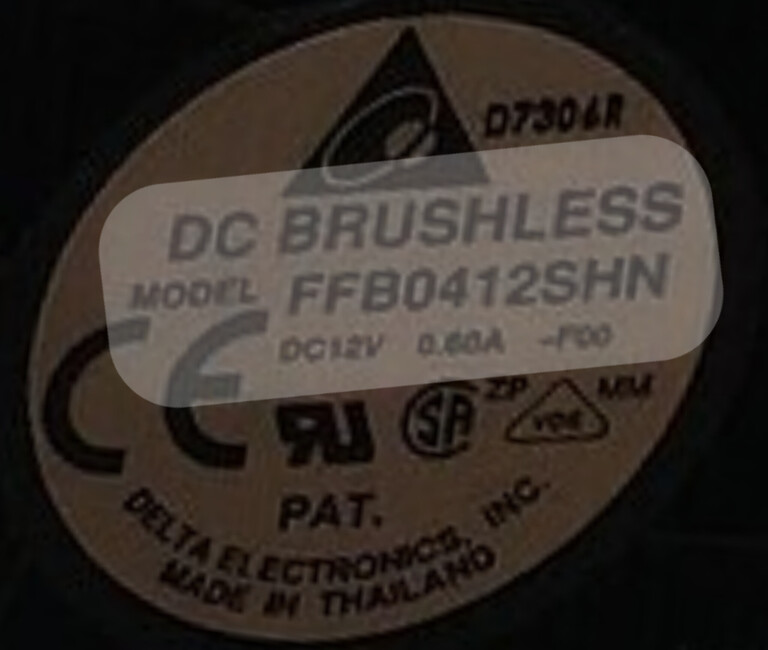
I used the same as fans @evansd2:
I went the plug-in route, with the cord coming in through the rear passthrough slot.
There’s discussion of better 40mm fans in the thread above which would result in improved suction.
7 Likes
Because of the passthrough compatibility and one of the pictures in a previous post, I was assuming smaller fans.
When (not if) I build a next vacuüm tray, I absolutely will try to design a version that will be compatible with the passthrough, like yours.
Thank you @evansd2 and @timjedwards for the inspiration for a next version 
5 Likes
Simple test new fans:
With the former fans, the hexagon was blown away and for safety reasons I stopped the print.
This is with the new fans, no movement of the paper pieces at all. I did not cover up the complete mesh surface, because that sounded too much for the fans. So I left about 35 cm2 open. The copy paper is 75 grams.
13 Likes
Great job! I’m really interested in this but, unfortunately, I would need to detailed instructions to get this done. If I could indulge. How do you connect the fan to the power? I like the idea of using the TalentCell rechargeable battery. How do you add the on/off switch? (do you have an Amazon link for that?) What are the dimensions for each side of the box? How did you cut the box (Glowforge or something else)? What is the sanyo-denki gadget for?
1 Like