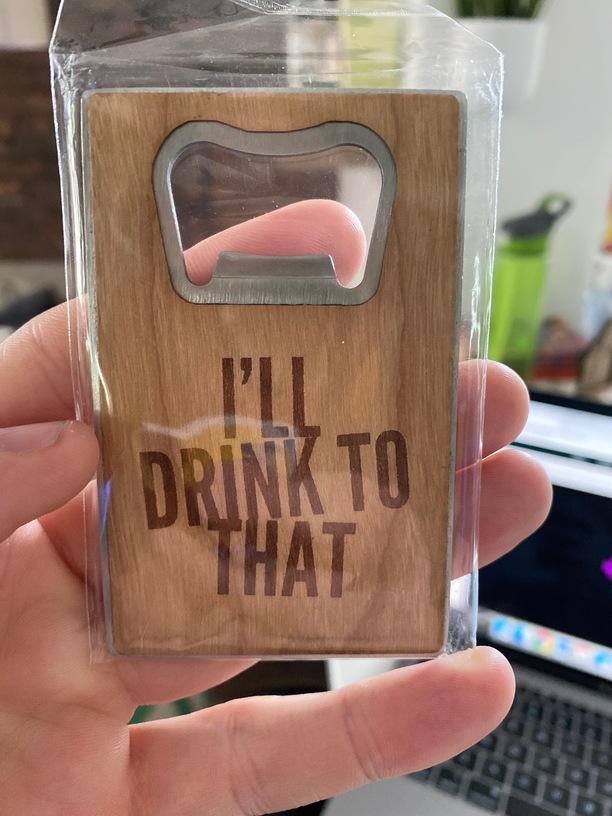
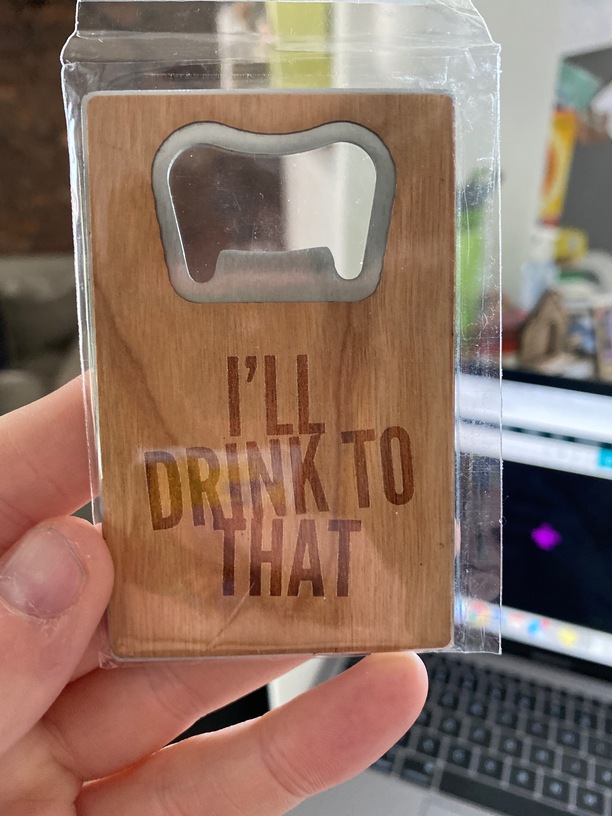
Hey GF Community - I’m working on a light engrave on some bottle openers. I got the settings from the company where I bought the product: Full power / 52 on Thin Cherry Veneer. Last night I tested the first one and it was perfect - a nice darker engrave. I woke up to do a few more today with the exact same settings and today they came out lighter. They don’t look bad - I just like the look of the one from last night better! Any idea why one engrave would come out darker even with the exact same settings? Does the wood engrave “deepen” in color over time? So, maybe because that one has set out for 12 hours, that could affect things?
Also, does it make a big difference between Draft Graphic / SD Graphic / HD Graphic? I have it set on SD Graphic.
Pictures attached for reference - any help for a GF newbie is greatly appreciated.
So for engraving in general:
Higher lpi = darker.
Slower speed = darker.
It’s a veneer so you can’t hit it too hard, but slowing it down will definitely help.
Also, lastly, it’s an organic product, the definition of analog. You can get color variations even in the same board. It’s hard to get a truly predictable result in engraving on wood, but the basic concepts of higher lpi and or slower speeds will generally lead to darker colors.
If the color is very important to you, it’s possible to test it. You might want to look into one of the many engraving test patterns that are out there. I think @eflyguy and @rbtdanforth have both posted them in the past.
(also moved to BTM so we can freely discuss the non-PG settings and material)
Awesome. The other thing to think about with engraves, if you ever do anything with particularly fine lines, slowing down gives a better result then as well. At higher speeds sometimes fine lines get so underburned that you can’t even see them.
You have to be a little careful about the recommended setting from material suppliers because they aren’t universal and may or may not work on the GF. I’m not sure if you’ve seen it yet, but this is a great explanation about the manual settings and what they do. It can help you understand the differences you see in the settings.
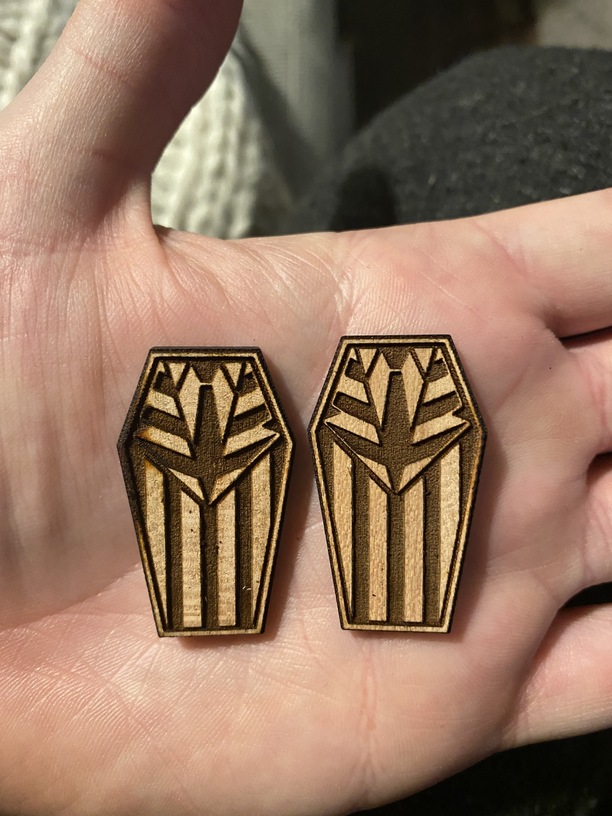
Following up to this - I have another question about settings. I’ve tinkered with the settings on new wooden pins that I’m creating for my company. In one pass of engraving / cutting 4 pins in a row (Speed 850 / power 100 / LPI 225) two came out perfect and two had charring imperfections. All were masked on nice cherry wood (not PG) - from Smokey Tides. As I’m new to this, is there any reason that some would come out perfect and some would burn in the exact same pass? Is that just what happens with working with the imperfections of wood? Or does it mean I should still fiddle with settings and can achieve something that’ll make each of them more uniform? Pictures attached .
If it were me, I’d lightly sand those theater nerd pieces with 300-400 grit sandpaper (220 at the very least). The smoke residue will probably come right off after <10 seconds of sanding.