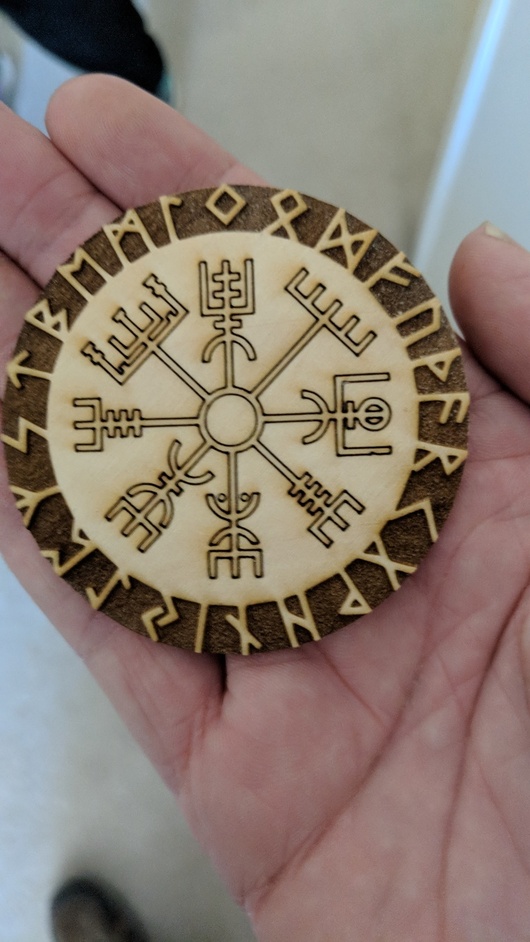
A friend of mine that I haven’t seen in entirely too long is having a surprise birthday party. He has a particular attachment to the Vesvigir (Norse Compass), so I figured it would be a fun learning experience to use that as the basis for my first project. I’m super happy with the final product! I started with a jpg of the vesvigir, and managed to wrangle inscape into doing what I wanted with it (in spite of the cursed beziers).
I used the 1/8" Maple proofgrade for the final print, but ended up doing a TON of experimentation on basswood and poplar stock I got from the local hardware store. The peel-off covering on the proofgrade is so nice for keeping the wood clean and the lines sharp. Unfortunately, when doing detail work this fine it’s a total PITA to get it peeled off because there’s so dang many tiny little pieces. I’m still finding more little bits.
Wonderful detail, hate weeding also, at least weeding a hard object is easier that a vinyl decal or stencil from a silhouette. It’s one of the things I look forward to with the and
Ditto on the gorilla tape. I use an old gift card to burnish the tape down. Multiple rows for larger projects, then just peel it up. It’s a dream come true.
Also there was a link a while back to a tape test, and T-Rex tape is even grippier, but I haven’t had any problems with gorilla.
Gorilla tape is almost too grippy. I’ve lost a couple of (very) fine details on an engrave with the gorilla tape breaking off a small island within an engraved area. Lesson learned.
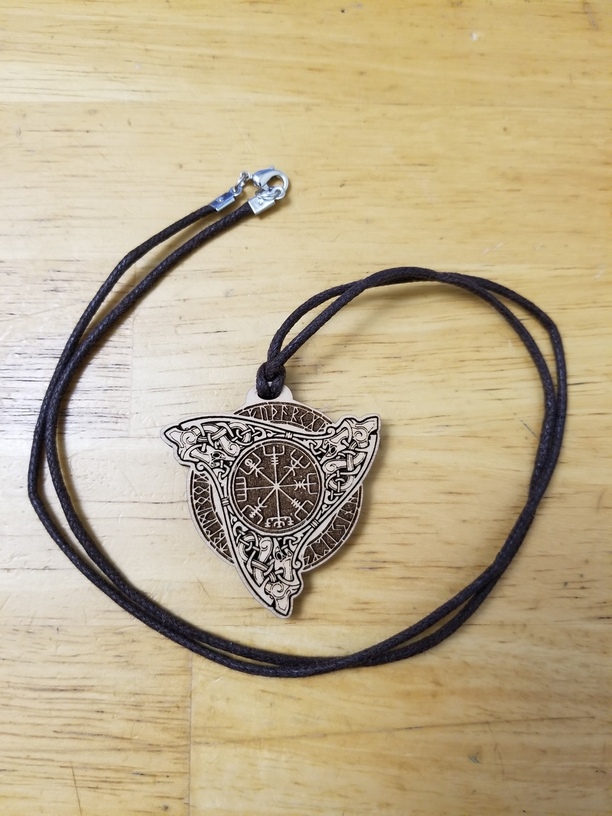
Yes, it’s pretty small - 35mm across. I made a larger one while I was doing test prints, just to play around with it. If I can figure out something for coasters that’s not too expensive, I may make a set of those as well using the final design from the keyfob.
I’m curious how sturdy the keyfob is going to be - worried about the spot where the keyring goes breaking off. I’ve got a few weeks before his birthday, so I’m wearing it on my Keychain to see how well it lasts.
I’d cut out the center of the diamond that’s on the top in your pic. You can put a keychain ring in through there and it’s not a separate piece that’s sticking out of the main ring.
The keychain one is small enough that a hole for the keyring would obliterate any of the letters. There’s no room for in the design without cranking up the size to “far too annoying to have hanging with your already stupidly large keys”.
I found a design I liked (google image search, for the most part). Looked for one with clean lines and as high a resolution as possible.
Import into Inkscape and convert to vector (PATH->trace jpg)
I think I converted it into a path at this point (I don’t remember, and am not savvy enough with Inkscape yet to understand if this was necessary, lol)
Break it apart into component pieces (I did this as an experiment, and it automatically inverted the lettering in the outer ring - probably could also do this with a circle and subtraction, but since I wanted to treat the inside and the outside differently I needed to separate them anyway.
Cleanup the shapes after breakup. I have to remove some pieces that obscured the whole thing, and needed to subtract a circle out of the center to get the look I wanted. I also ended up editing the beziers to fix a weird notch in one line from the original art.
Add my own layer with a circle around the edges (for the cut), and massage the bezier curves to make a spot for the keyring hole to fit.
In the middle of this was a lot of experimentation with different woods and different settings. The final PG Maple piece was rather boring on the settings (PG engrave, PG score, and PG Cut). The basswood I got from OSH, so it wasn’t Proofgrade. I played with settings like 300/15 and 500/20 for the engraving.
I’m tempted to engrave the center next time, instead of scoring. Just to reduce the weeding, lol.
After 2 days, the basswood keyfob broke off of my keychain. The Maple is still there, but I’m a little nervous. I may switch to coasters, or see about a thicker wood piece.


 and
and