This is my first post, although I’ve been making lots of things on the GF. I decided to finally share my work here. I’ve appreciated this community. I’ve scoured and read hundreds of articles to perfect my projects. THANK YOU to all of you who share.
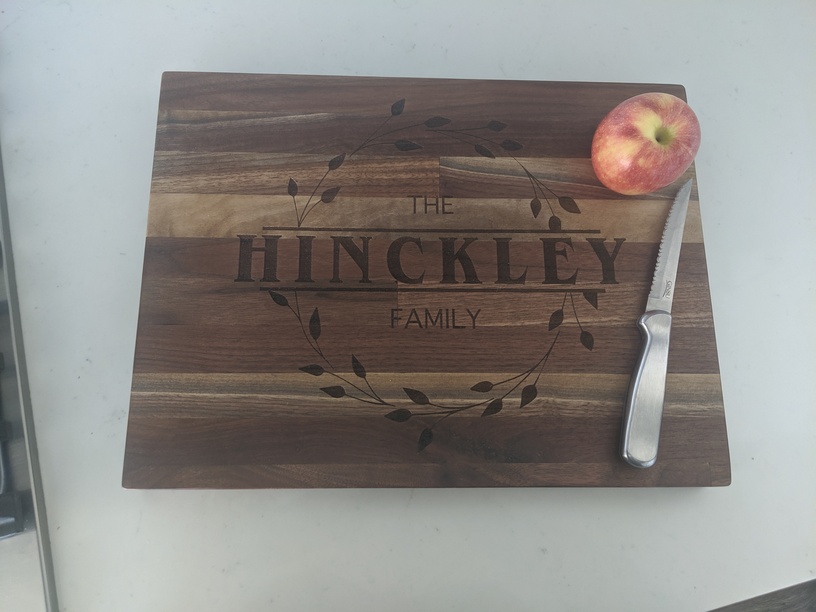
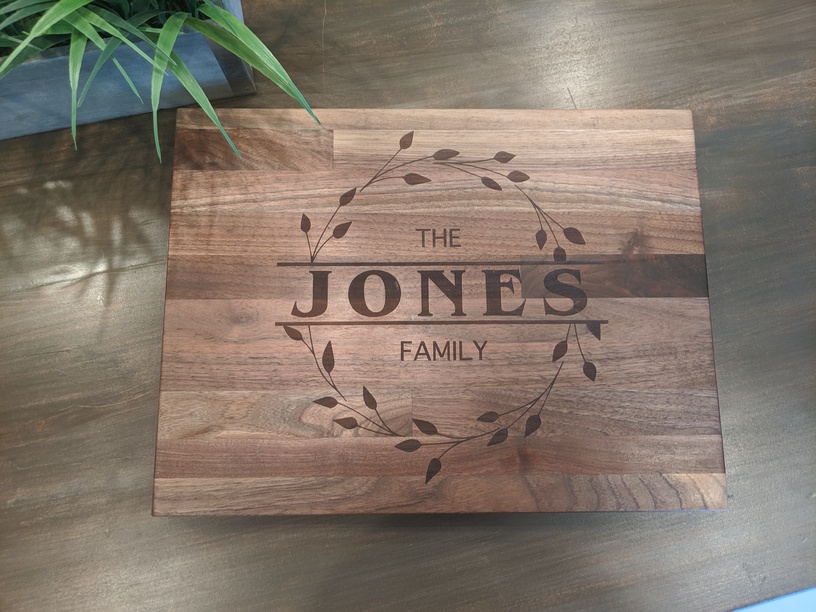
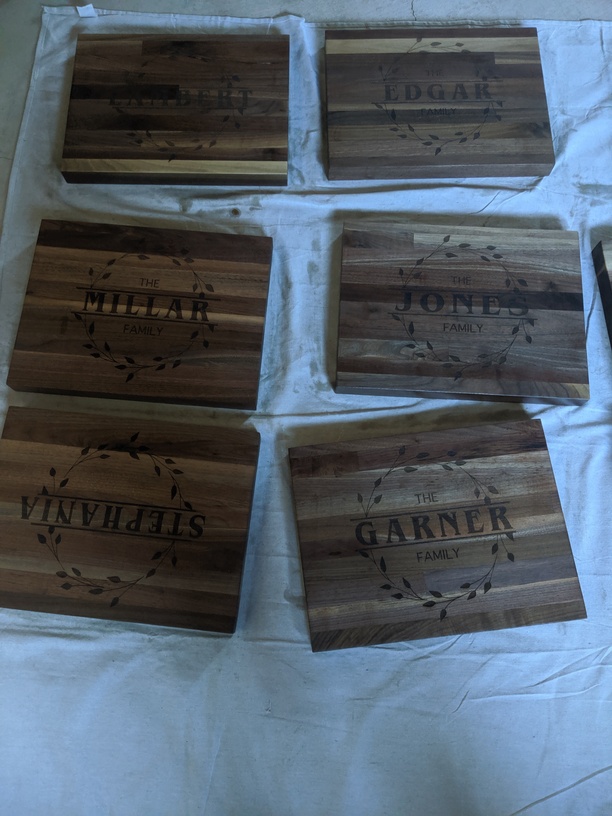
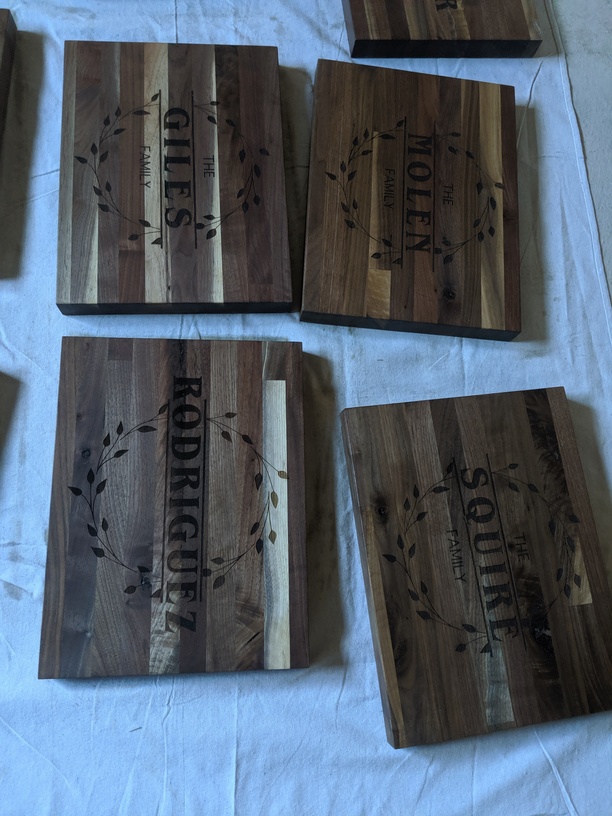
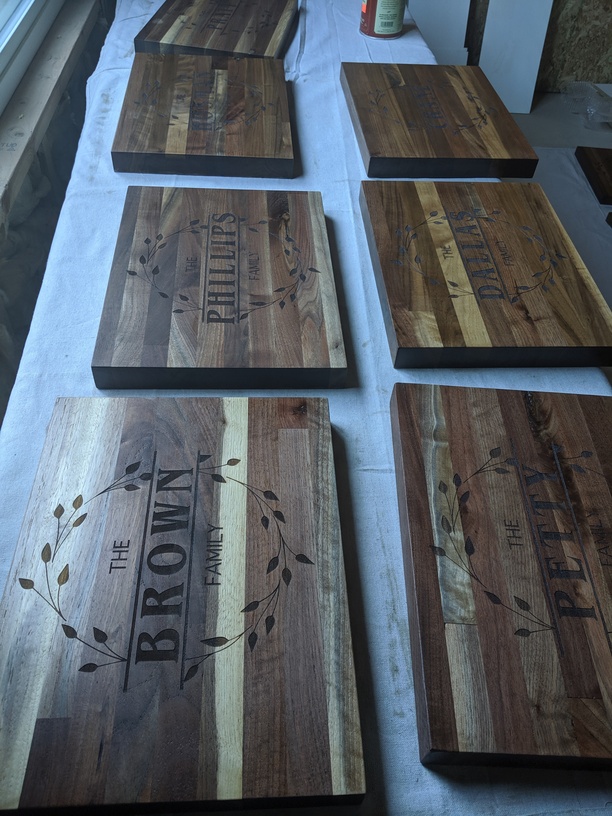
I had a client who needed 37 walnut cutting boards. They wanted them to be high-end, quality, pieces. I found a beautiful piece of butcher block walnut. I cut them down to size, sanded, engraved, sanded again, finished with butcher block mineral oil and the Good Stuff (on the front only, actually).
The blocks were approx 1.5 in thick so I had to engrave without the crumb tray.
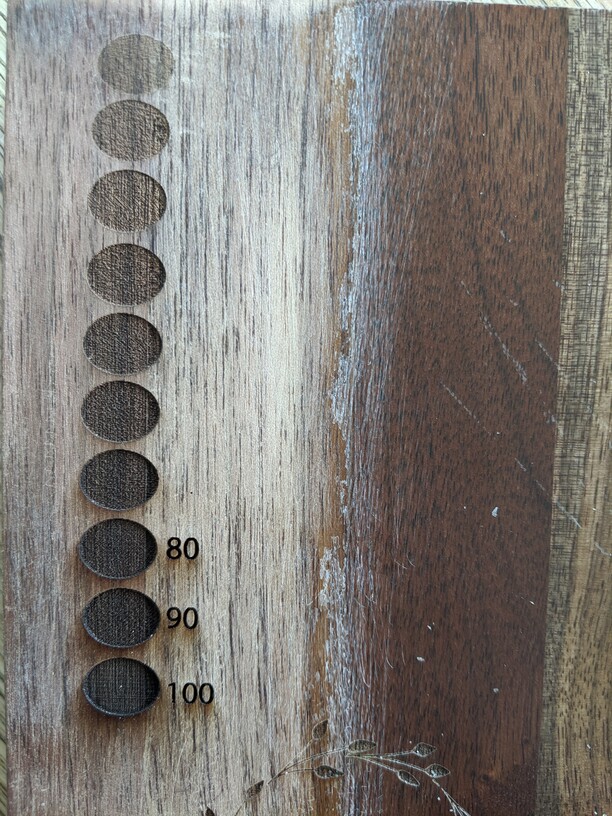
Speed: 1000
Power: 65
LPI: 340
Focus: 0.1
Also - I might add, I always had in the back of my mind, “I hope the GF can handle this” - Each engrave took 1.5 hours. So you can imagine I was running the machine for a lot of hours for a lot of days. I did have to clean/wipe down the GF occasionally as expected. I also have a duct fan that helps pull dust and odor outside. Huge shout out and props to the Glowforge Team for such a great machine. It handled this large project flawlessly.
Yes, 37 about killed me (and my hair!! from all the sanding!) I think by the end of the project I was just so happy to deliver them to my client that I didn’t get a picture of all of them together! Overall I was so pleased with them. Each piece was so unique. I loved working with solid walnut.
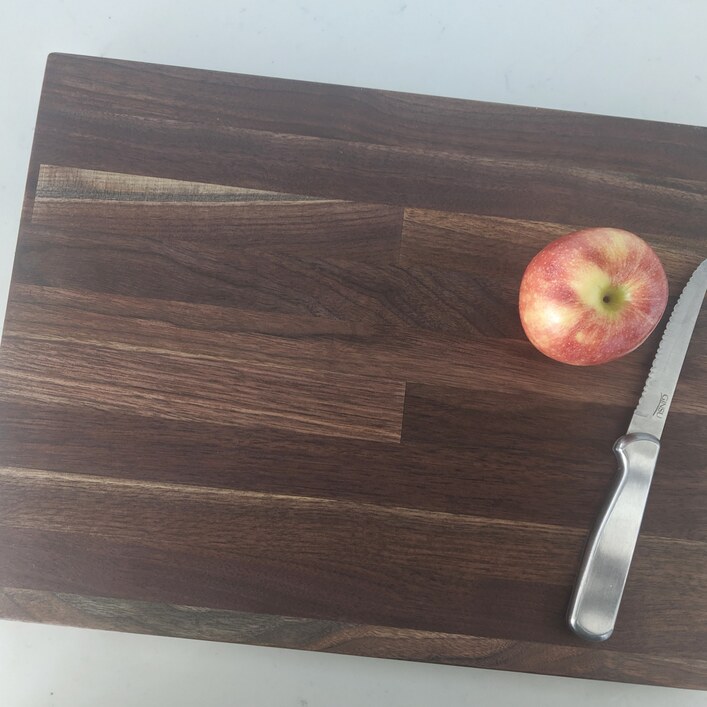
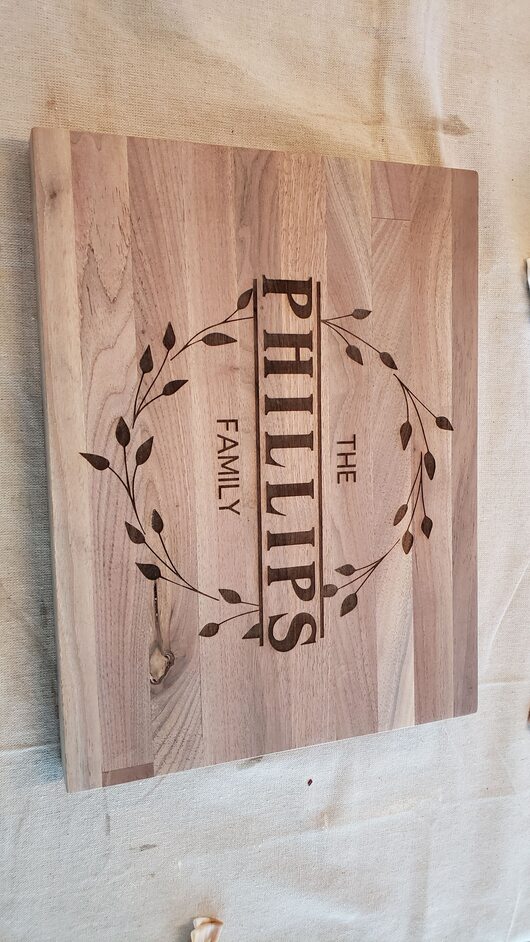
The oil doesn’t really change the engraved area. Here is a board right after it was engraved, but before it was treated. I think the even color of engrave can be due to a number of things.
The wood you are engraving. The machine needs to be clean. I am frequently wiping the lens/camera, etc…
I also always run some test settings with different power levels and speed. Then I can choose what level I want to engrave. In this case, I went with 65 power.
I slightly increased the LPI for better quality engrave as well.
Thanks! I actually found the walnut from a local warehouse that supplies hardwood here in Utah. I also agree with you, which is why I recommend my clients keep the engraved side looking beautiful by using the reverse side for cutting. Hopefully they get the best of both worlds.
That’s an awesome project and the Walnut cutting boards turned out fantastic. Also great first post, and thank you for sharing. It’s really nice to see someone who has used the forum to their advantage and knocked out a project based upon what they found. The boards do look very nice!
These are stunning…well done! Would you mind sharing your sanding process? I know you said you sanded before and after the engraving, but what grits and for the sanding after engraving, were you able to sand right over the engraving without damaging it?
Also, was it the mineral oil or the Good Stuff that gave such a warm color to the blocks?
Apologies for not responding sooner. I prepared my cutting boards by sanding them with 150 grit, then engraved them. The engrave left a very subtle “over-burn” so I finished them off with a 220-grit. I simply sanded right over the engrave. It takes of the over-burn and leaves a super smooth surface.
I finished them with with the Good Stuff or Mineral Oil. I found both worked just as well and left the same result. I personally prefer the butcher block oil.