Recently I posted about the 737 warning light/button display I built for my son’s flight simulator based on the design from 737diysim.com. I made some changes to his design based (why I always buy the CAD versions) on a) my son does not have room for an entire 737 instrument panel in his apartment and B) I own a Glowforge. But this taught me a new trick.
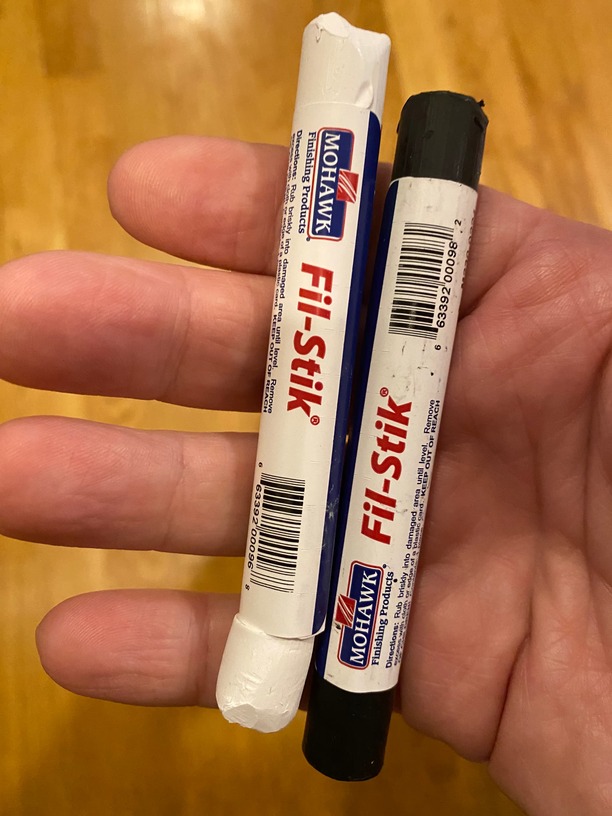
First off previously I had tried to fill in the engraved letters with acrylic paint (almost impossible). One of the techniques Karl had mentioned was filling in the engrave with wax (which I learned is a fancy crayon). This allows the letters to be seen when the backlighting is off. The other challenge even with diffuser LEDs is the transparent red and yellow acrylic means you see 2 bright dots and not the whole sign.
Wax:
With the wax fill you basically engrave as usual and then color over the engrave with the appropriate colored wax. The nice thing is the wax wipes off with a paper towel (no need to mask) and a final wipe with IPA. Then you seal it with matte lacquer.
Diffusing the light
So next problem was to make the LEDs not shine like spotlights. For that I redesigned the guts to have little 1mm shelves to hold an inset square of frosted medium acrylic 2mm below the colored transparent acrylic. A tiny dab of CA glue holds it in place (although honestly friction was sufficient) and voila. Of note the real one in the 737 has 2x 28V lightbulbs in each so some slight point of light is realistic but at least the whole assembly is readable. If I really wanted it diffuse I could block the tops of the LEDs and then mirror the back of the holder with chrome rub-n-buff

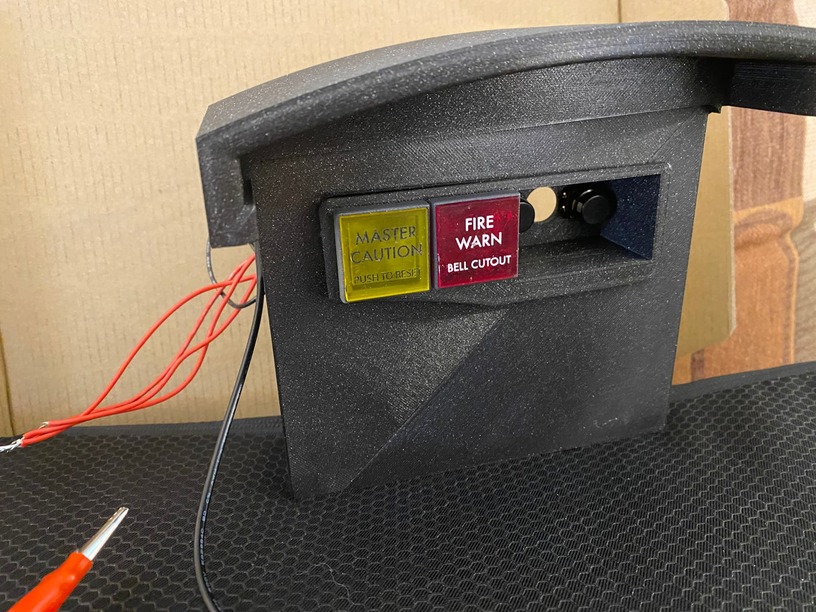
It looks more diffuse in person than the photo and obviously the white shows more than the black. The entire button assembly fits over 11mm tactile buttons (see the empty “6-pack” to the right which was in the last post which needs 2 buttons to move stably). As these lights are also buttons on the plane/sim.
The surrounding black thing sort of simulates the glare shield at the top of the instrument panel and the face will get painted Boeing Gray.
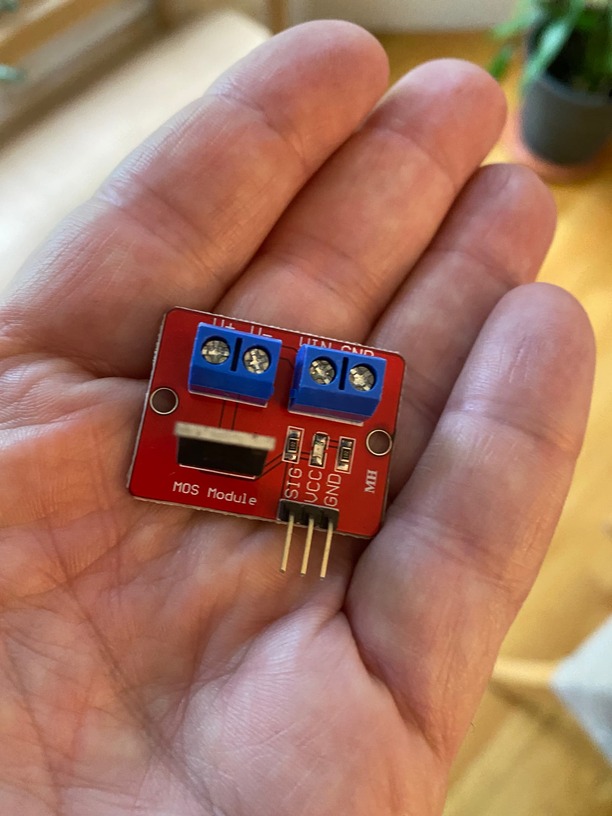
These all get hooked up to a Arduino Mega and I use these MOSFETs to drive the 12V LEDs, as a pair draws double the max current of a Mega’s output.