As I understand it you could put a sacrificial piece under the piece you want cut. That should eliminate the issue.
3 Likes
Thnx… hopefully will try this soon… 
We will probably offer one, but don’t at the moment. I believe we’ve also come up with a tray cleaning method if you want to do that, although we never clean our trays and haven’t found problems.
8 Likes
Not necessarily specific to Wedding Invites, but can a metal mesh weave (with holes smaller than the tray, but not a fine weave) be placed underneath a paper cutting project to catch the small cutouts, in order to prevent the from falling into the tray holes, smoke/stain the backside of the project and/or create mini fires?
What material should that mesh be (for minimizing laser reflectivity/damage, cleaning from stains/smoke, catching small pieces) and weave density?
I remember links were given for mesh screens awhile back, but now as the reality of delivery has come about, I wonder if testing (in house and beta units) has revealed the need/functionality of a mesh screen.
2 Likes
Thanks @dan and @tbelhumer for the reply! I’m sure both options will work. Looking forward to the trial and error 
1 Like
The look great! What settings did you use to get such a clean look? Thanks for sharing!
I would also like to know what configuration I use
I see there wasn’t any notes (unless I missed them, forgive me - if so) about the settings.
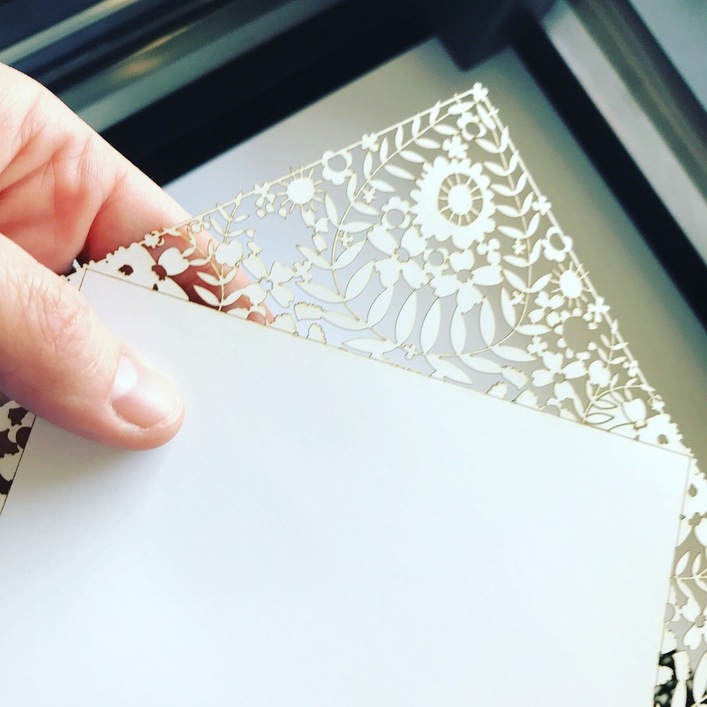
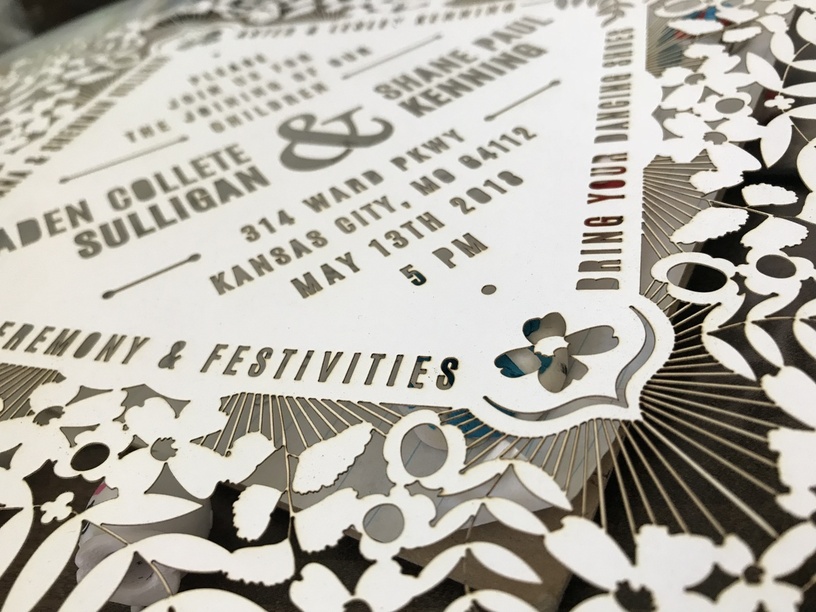
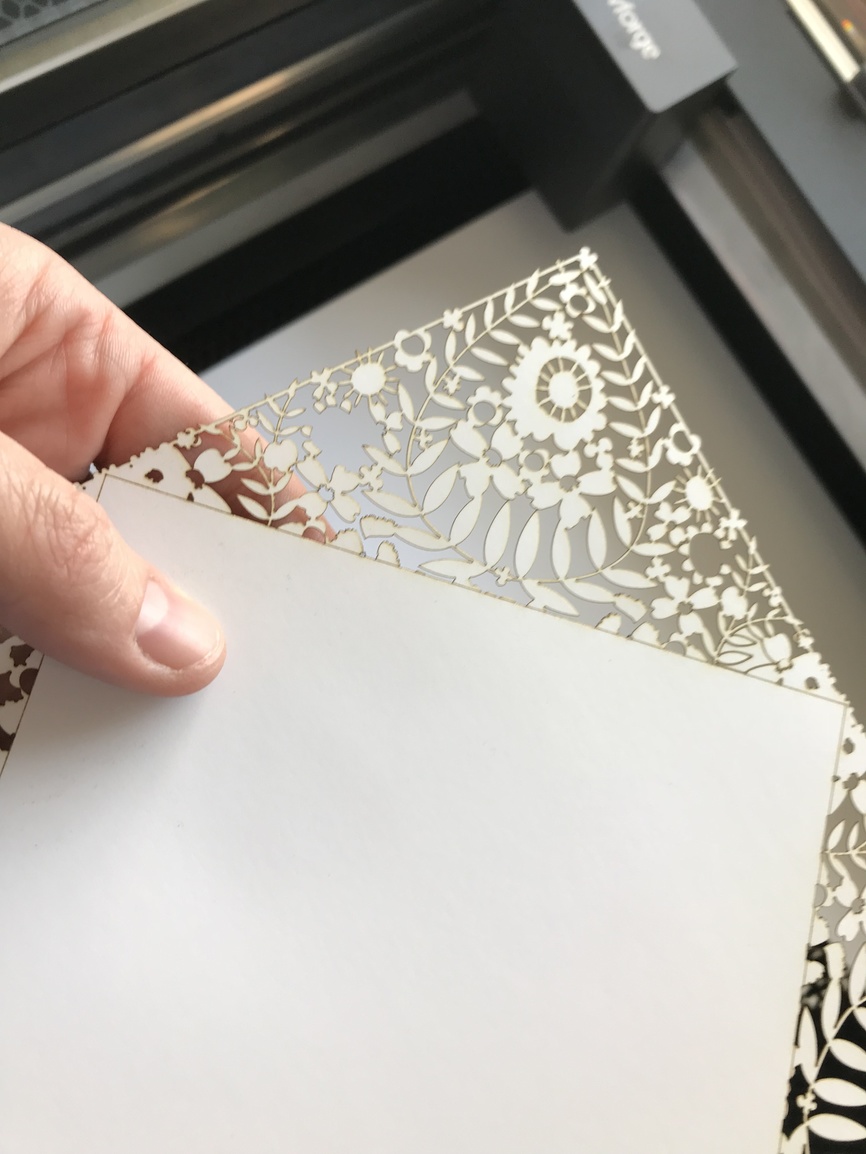
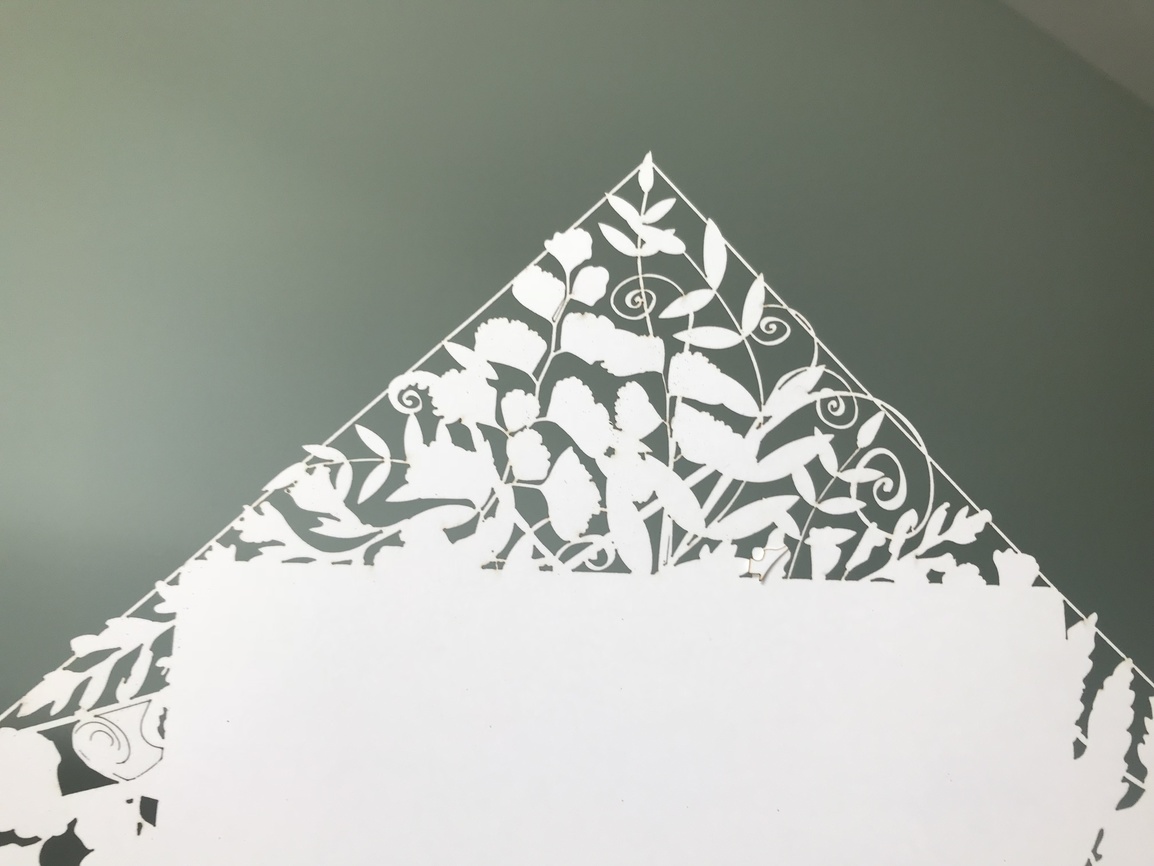
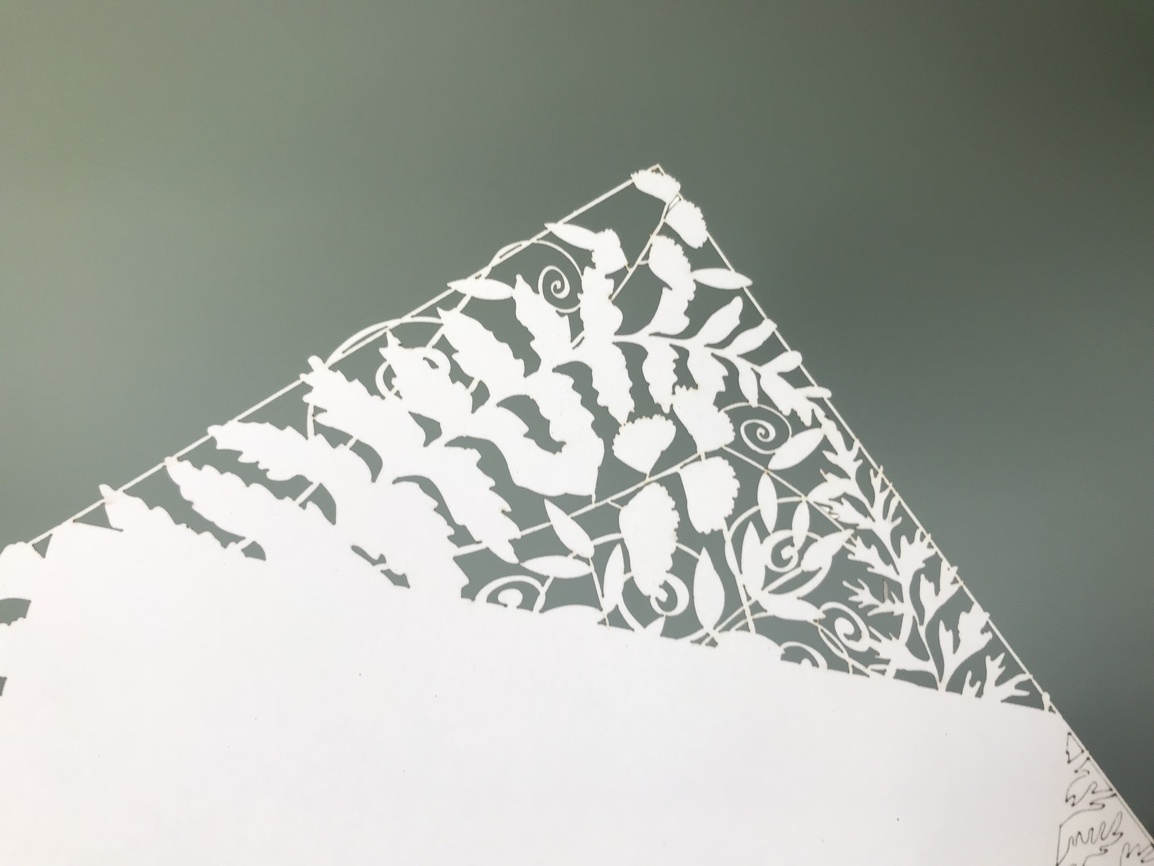
Please note this was without a mat under my paper - but I used Speed 200 / Power 12 for this project - on Heavyweight Matte Premium Presentation Paper by Epson (.0016" thickness).
I am ordering a engraving matte to help reduce the charred edges. Fingers crossed it helps. Still not super noticeable.
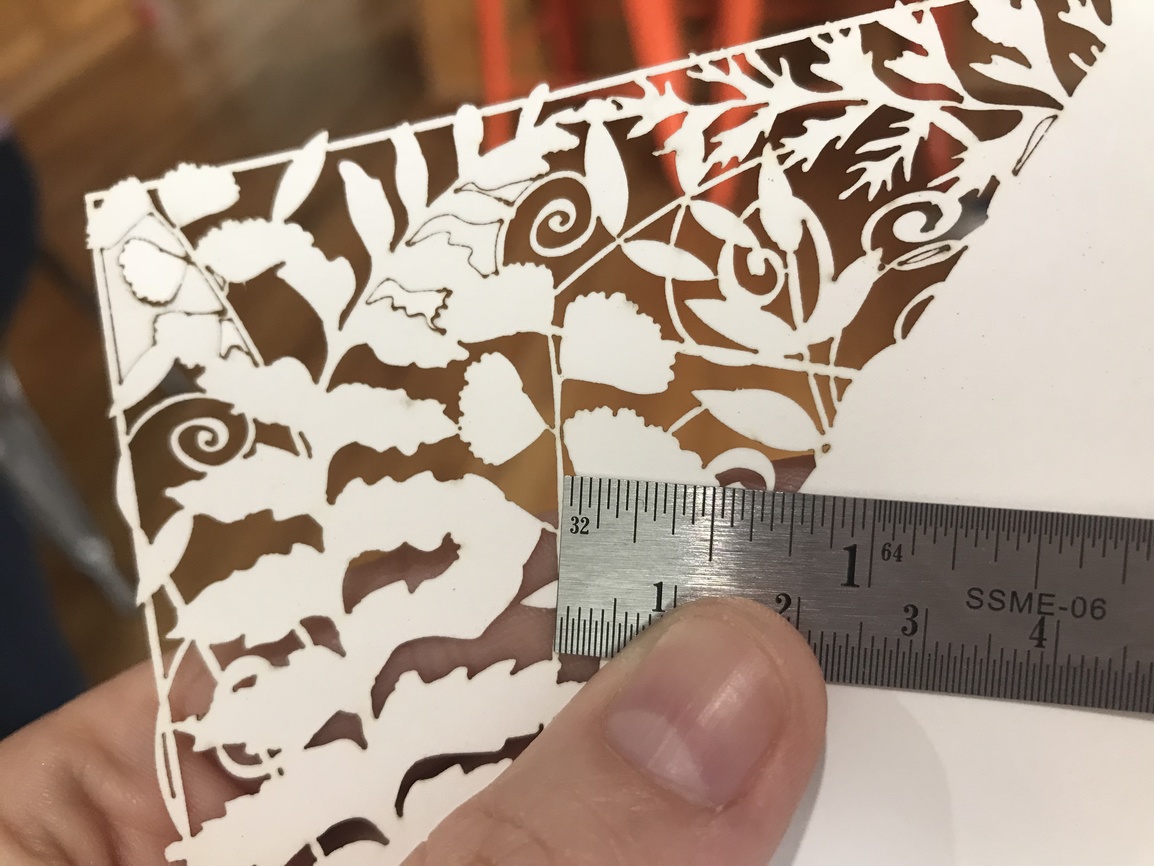
I also wanted to mention my threshold for a minimum width paper cut (such as a thin line) is 1.5 mm and that also has to have a 2.5 mm between each 1.5mm cut. I hope that made sense. No lines smaller than 1.5 mm and no gaps smaller than 2.5 mm.
I hope this was helpful for anyone wanting the info!

15 Likes
So you’re saying that Bill loved Sara so much that he changed his name for the wedding invitations? Wow…true geeky <3 … Bob will make her happy for their anniversary parties and all parties here on out with his “new name”. 
let me say first…GORGEOUS! Second, did you get the engraving mat, what purpose did it fulfill (I think I know, but want to make sure) — Third, you have TRULY inspired me. I am getting married soon and I think (provided I can come up with a laserable design) that you have just made our wedding invitation potentially MUCH more beautiful! Thank you. (P.S. pssst please tell me about the mat, if you are happy with it, and where to get one)
2 Likes
I’m so sorry I just saw this! Thank you so much, first! And I am so happy I made your day! If you need any advise or help, I can totally do that as well! I have many examples of things that have worked and thing that didn’t to help you design yours in your endeavor!
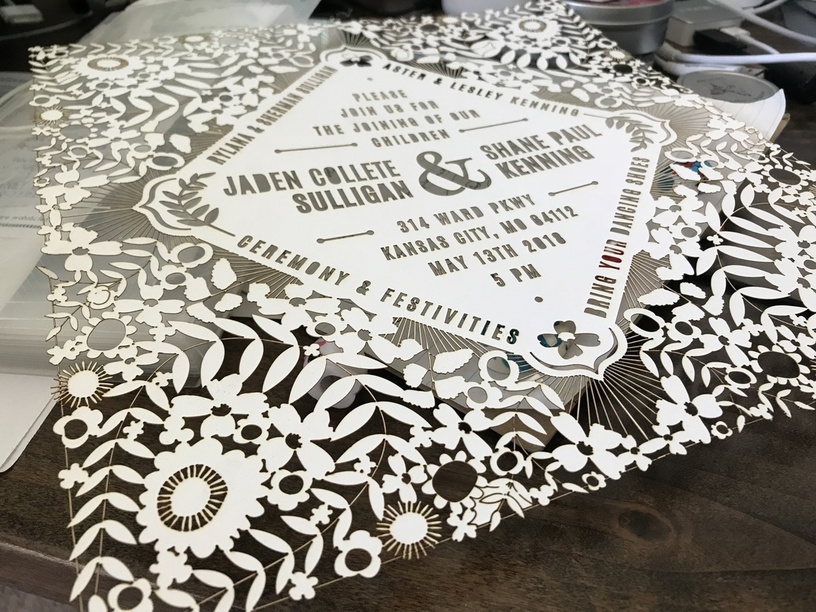
I got my mat at Johnson Plastics - link below. I use the mat to help keep the tiny pieces in place after being cut. If you don’t, they fly off and get int he way of the other things that haven’t been cut yet. And with these designs being so detailed, you really NEED to do it, you’ll waster too much time, energy & money otherwise, I’ve learned.
More examples below. I also have a masterlist of settings and materials if you’d like it. I’ve been sharing that info freely as it’ll save others the time and frustration & mostly materials. Just email me at shawnastobaugh[at]nonnaiandd.com and I’ll replay back with the list.
Shimmer, glitter and textured papers all cut well! It’ll not only give you intricate details, but the paper you choose could also add a little something.
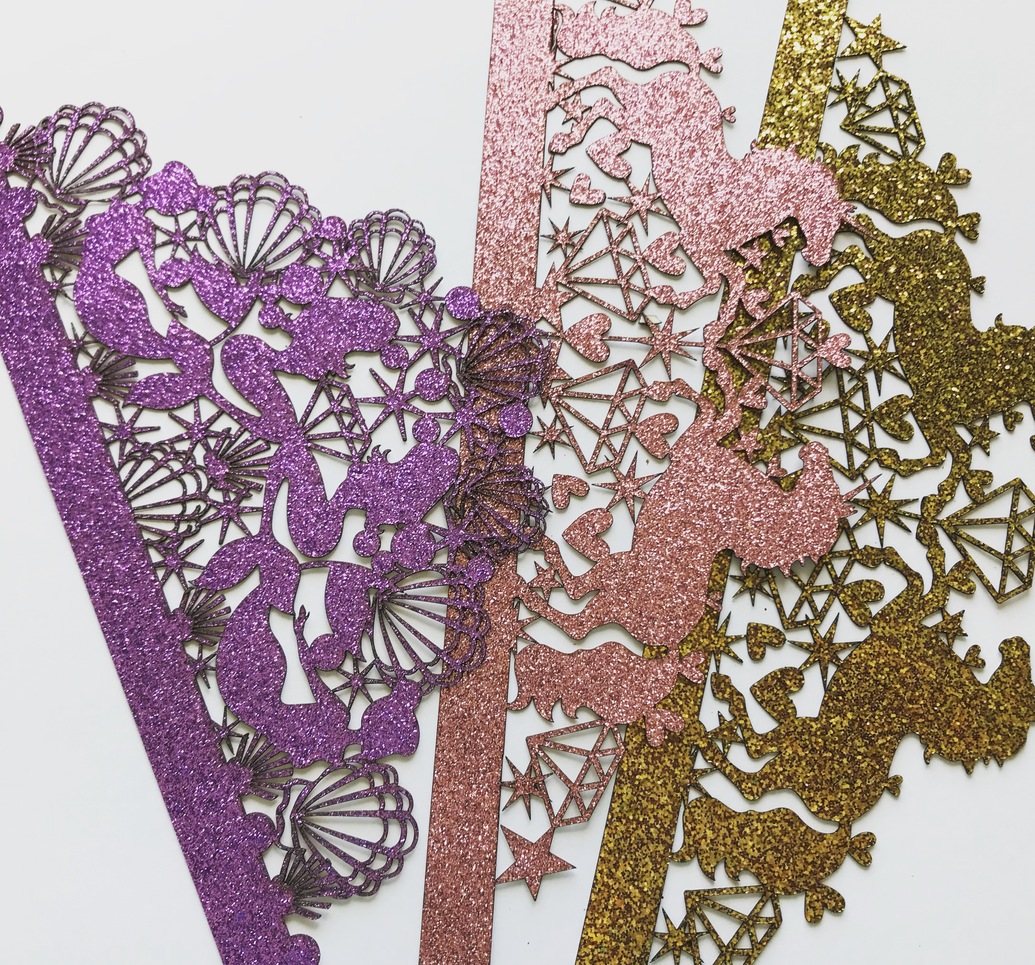
Let me know if I can be of any help! Good luck on your wedding invites!
14 Likes
Hi There,
I am new to Glowforge and new to Illustrator and Photoshop. I am a cricut user but want to get more intricate with the glowforge.
Is there any video you can share of a start to finish lasercut invitation? I am so lost and havent used my machine yet and its been 4 months. I am taking a screenshot or saving an image from online but just do not know where to begin.
Hello n.rana7! I totally understand what you’re feeling! It is quite intimidating at first. I don’t have any start to finish videos of the invitations, as they are a very long process. 7-15 minutes depending on the detail. But, I can however share a few things I’ve learned.
- Using a sticky mat is a must, it holds down the little pieces and they won’t get in the way of the laser. The one I ordered got destroyed after 12-15 uses. I’ve found spraying it with light grip adhesive still works after the sticky stopped working.
- The smallest width of line you’re going to get is 1.5-2mm. This is fragile as well.
- You need 2-3mm between thin cuts as well.
- I have many settings for a variety of papers & such. If you’d like them I can share via email. Just leave me you contact info.
- I have some short video clips on my Instagram of my paper invitations if you wanted to see those, search #nonnaiandd they are all labeled.
If you have any specific questions, let me know! I hope this was helpful.
Shawna Stobaugh
Nonna Illustration & Design
1 Like
This topic was automatically closed 25 days after the last reply. New replies are no longer allowed.