Inkscape and GIMP, but I think we are going to move to Procreate so that should be fun getting familiar with that program.
The most frustrating thing was the UI was not responsive, we only guessed when we used the drop down menu options.
We were grateful tho, that we guessed correct and we got the successful print we wanted.
When I said WORK, I did not mean the actual programs, I meant working through the forge interface.
When it is loading, when you spend time pushing buttons that do nothing but acknowledge your press, is very wierd. Not being able use the square around an image for it to pop up and you can choose engrave or cut was frustrating. Maybe that is what took so much time, going back over and over and wondering why our files were not translating, when all along, it was the software not translating it to the image on the bed.
But it came out awesome for draft.
I am delighted to hear you got it working and so very sorry that our software and instructions were challenging out of the gate. I appreciate you taking the time to work through it and get to the other side!
I have a few ideas how we could improve things based on your feedback but if anything else comes to mind or if you can share screenshots that would make the difficulties clear, I would love to see them.
I noticed you stated that there is a PDF in the mix. I have not tried printing a PDF, but is the cut line part of the PDF?
I am in the process of learning Inkscape (YouTube training videos and the Tips & Tricks section of the forum). I have never used design software, but I have discovered that I am over thinking how to do things.
When I just do the basics, it has been much more successful. Eventually, I would like to be at the level that I have seen things in the forum (but I need to remember K.I.S.S. when trying what I have seen).
If we had known the image would not translate the cut and engrave lines, we would have saved a LOT of time, the work was going back and redoing our image over and over because we thought the forge would not read it if it was not translating.
Jobs will go quicker now that we don’t have to keep readoing
The PDF I was referring to was the GF laser instruction manual
Our file was succesfully completed, I think this was the file or one of the adjustments we kept making
It is critically important that someone using any laser cutter understand the difference between raster (or bitmap) and vector image formats and tools. Raster images are stored in file formats like .bmp, .jpeg, .png, .tiff, etc. The primary vector format is SVG. PDF can also contain vector information. Even this distinction is vague, because vector formats can also mix raster and vector. But none of the raster formats can contain vectors.
Rasters store pictures as rows of colored dots, pretty much the way you see them on your computer screen. Vectors store pictures by describing how to draw the image, like, “Draw a black line from here to there, draw blue a rectangle in the upper left corner, draw a red circle inside it.”
The Laser Design Basics PDF that @jules linked above describes these in detail. What may not have been clear is what programs can be used to create the designs.
GIMP is a very capable raster image editor. It can import some things from SVGs, but can only use them as “paths” or by drawing the SVG into a raster image (a process called rasterization), and from then on it is treating it as a raster. GIMP can not save an image as vector.
Why am I going into such detail here? It is because laser cutters only perform cuts and scores using vectors. Engraving can be done with either rasters or filled vector shapes.
You seem to have been trying to control cuts with rasters. That won’t work. Laser engravers use the brightness of the colors in the image as a measure of how dark to burn the material or how deeply to engrave. The goal with an engraving is to mark the surface, perhaps deeply, but not usually to cut through the material. The reason your image only showed in the GFUI as one operation is because it was a raster image. And the only thing the Glowforge can do with a raster is to engrave it.
Two primary vector editing programs are Inkscape—free, open source—and Adobe Illustrator (AI)—not free. The GFUI treats the colors you assign to the vector strokes As groups of shapes to apply operations to, such as cut, score, or engrave.
In designing your coaster, you did the first part correctly with GIMP. You cleaned up the image.
Then you needed to combine the image with the instructions on how to cut out the coaster.
Using Inkscape or AI, position your raster image and then draw a colored circle (red, blue, whatever) where you want it to cut. Save as a “standard” SVG file (not Inkscape SVG, and in AI, turn off the “responsive” option).
Now, load the SVG file into the GFUI and it will show you separate operation steps for the raster image and the cut circle.
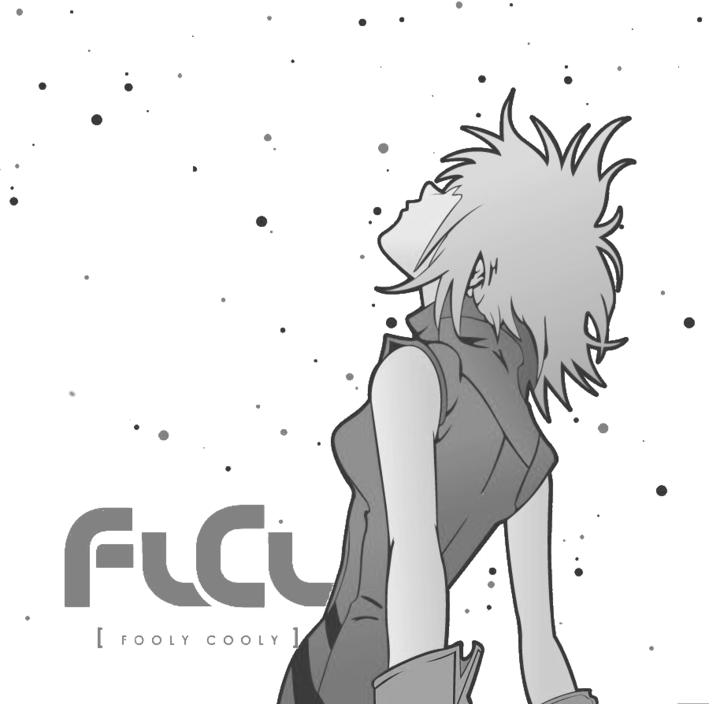
I am sorry, my husband was the one who did the original work, I was making coffee and half watching him. First he found the high quality image, and he processed it, then we cleaned it up, like, made the background white, duplicated some of the background to fill on her left side. He does graphic art so I left this to him so we could get the coasters printed out.
I am not sure which file we actually used. We made several.
Another note for @positiveforward. Mentioned that she may start to learn Procreate. I know nothing about that program but in reading documentation it looks like it is a replacement for GIMP but not Inkscape. The output formats for Procreate are several different raster type formats (PNG, JPG, PDF, etc.). Similar to what GIMP or Photoshop exports. That’s great for creating images to be engraved. But if she wants to cut out the image once it is engraved she will still need a vector based program like Inkscape, Illustrator, etc. I believe GF will eventually provide simple cut shapes like lines, rectangles or circles after the other higher priority features are enabled, but for the near term those do not exist in the UI.
Spot on. It’s the thing I make sure my students come away from class with. Understanding the difference makes everything easier in the laser world (not just GF). I used to compare rasters to dot-matrix printing but more & more of my students haven’t seen one of those Now it’s more along the lines that one is a map (discovered by driving the roads) and the other is a picture of a map.
We are using Inkscape now and GIMP, someone suggested to hubby we should also look at what we can also do with Procreate. Not giving up the other programs or anything else, just expanding capabilities
Whatever a user is comfortable with is the best program. There are lots of people that understand Photoshop, some that have used GIMP. Haven’t heard anyone talk about Procreate so the ability to lean on someone here could be limited. Lots and lots of people are Inkscape and Illustrator experts. If you need help the first response will often be to point you to a tutorial. If you can’t figure it out from the tutorial additional help may be offered as an individual’s time allows. It’s almost exclusively user driven support for the 3rd party S/W. None of us are affiliated with the company. Wish we were. If I had a penny for every post read I could have paid for my GF.
When I said this was not going to be on late night infomercials for QVC I thought I was being funny.
I thought the context was clear.
I think I meant, while the software is in BETA, this is going to be work, working through the little glowing pains as they come up, calibration, or UI. Learning your little go around or tricks.
I don’t want anyone who is even layman familiar with the tools to feel intimidated because that IS half the battle. I was familiar before but now I have slipped down the rabbit hole.
I’ll bet the Freddie Mercury task goes a LOT faster.
Now I have to call my home insurance and make sure they add our GF on their list in case something happens to it.
I USAA
EDIT:
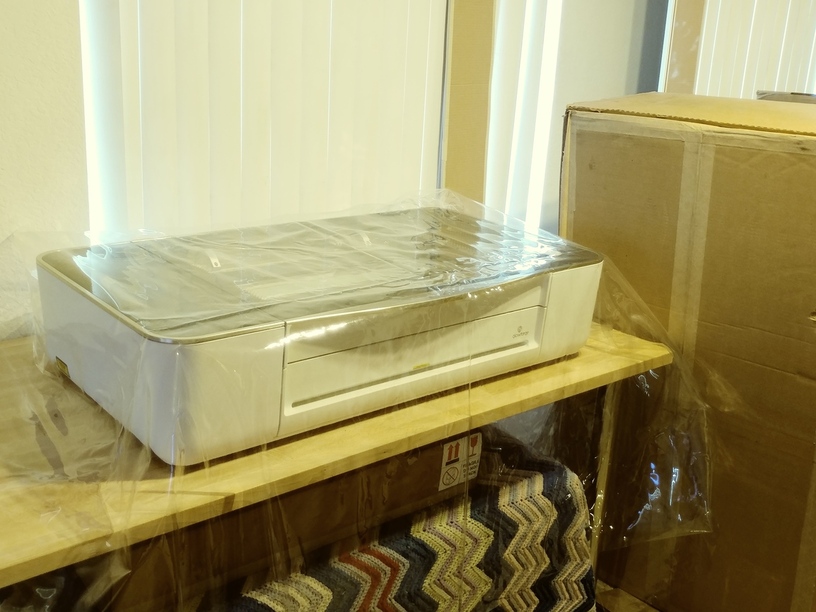
When we got the unit, could not use until cool down.
When it worked the next day, we printed out 2 rulers, no problem
Next printed out the key chain ruler, no problem
This was very user friendly / plug and play as far as load it up and cut away
We LOVED it when it started up and it ran flawless.
We encountered problems AFTER we were trying to test our own image.
This was our first try for our own chosen image for the GF to do.
Trying to get our file that we color coded to translate to the GF, which does not,
but I guess it still worked.
The most time consuming, frustrating things:
The files not translating or confirming the cut or engrave lines, you don’t know until you print.
Not being able to locate the simple instructions on 'what it should look like when you_insert activity here___ ’ for the first time user would REALLY be epic.
Redoing our file over and over in different formats ( as suggested by the PDF ) that were still never showing designated the lines we were looking for.
The S/W does not work like you expect it to. When you choose the UI buttons, nothing happens. Searches rendered no real help, but a lot of searches took us to threads full of nonsense so we could not even see what the link was supposed to show us because we see we would have to go through all the posts that veered off to anything but the info we were looking for.
If this happens to you, don’t be like us and try to make the file over and over thinking you are doing something wrong. Just run a test print and see if it works. That is how we plan to do it now on. Make that test print a couple of inches to get an idea if it will cut and engrave or whatever you want to do on a larger scale prior.
I hope I made it clear that it was a great experience when it started to to work, ours was just like the rest of you who fired it up and got prints in less than 6 min from start up. We did not miss that experience once the unit was cooled down and actually animated.
We had the problems with the S/W, the forum searches, and the pages that picked a fine day to get corrupted
We don’t expect to have that issue again in the near future, we hope.
With every mistake we must surely be learning. ( G. Harrison )
Someone watching the glowforge marketing videos would not be wrong if they thought “I can just plop it down in the living room, press a button and have beautiful things come out.” The glowforge is probably the easiest tool ever made for its level of power, but it does require a little more ability than pressing a button and lifting a lid.
What they should do, in large letters, on the GFUI for your first couple of prints is say, “Put in some draftboard, upload your design and see what happens. If it is not what you want change something and try again.” It only takes a few prints until you have a certain level of confidence and the indecision starts to drain away. You won’t learn everything, but you’ll learn a lot of the basics. Then when you search the forums you’ll have a reference point for figuring out what is bound to be a bit blurry for most folks.
Yah, there is a learning curve with every new tool, no one who picks up a chisel, a screwdriver or a hammer is a master at the first stroke. They all work the first time, but there is art in their useage that only comes from training the body and mind to wield them properly. Occasionally even a master will miss a nail and ruin a project.
For the difficulty in learning curve consider what it would be like if you had started with something like a K40. Unbox it, get a bucket of water, connect hoses, plug in pump, fan, laser. Install hokey software, and questionable USB Stick, import print file into Corel, choose engrave OR cut, interpret poorly translated UI and GUESS at the settings, manually set power by rotating a potentiometer on the control panel, manually position workpiece (I can still eyeball closer than 1/4 inch, so there is one advantage over GF) hit print, and watch it go!
Unless it got bumped out of alignment in shipping, in that case you will spend about an hour of trial and error getting it to cut at all in the lower right of your print.
My first K40 print was in about 45 min (minus software install) that was an engrave only. Cutting did require an alignment and the addition of an air assist.
I can make it work, but it is work to make it do so.
I don’t expect the first job I send to the Glowforge to go perfect, I do expect it to be better than the K40 in ALL respects , including precision alignment which still has a ways to go!
You know, Facebook GF forums where they boot any not nay saying it. Muse focused forums, Epilog forums, and I’m sure xcarve would be more than happy to chat about your GF and give pointers and tips about it and your software if choice…Oh…wait nevermind…
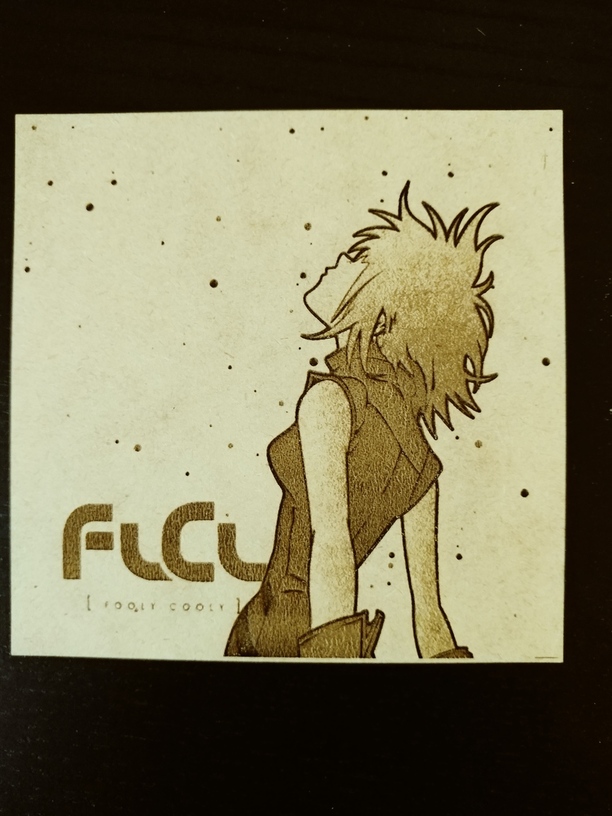
 print of this?