I just traced an item I want to cut but the only thing in the left hand column is engrave. How do tell the GF that I want to cut and what material I want to cut? Why aren’t all the options available?
Cuts will require a vector graphic. If there isn’t a vector in the image, the GFUI will only allow it to be engraved.
This topic provides a pretty good explanation of vectors vs rasters: PDF only engraving and need to cut
There is a search icon in the upper right of the site. It looks like a magnifying glass. If you can enter your search terms you can see the other topics that deal with the same questions. Many of these questions have already been answered in depth, so using the search is usually your fastest option to get quality answers to this type of getting started question.
Edit: added forgotten link
5 Likes
The short answer is, as @ben1 noted, that your traced image is a raster, or bitmap image, and can only be engraved. To cut, you need a vector line.
If you take a few minutes to work through the “Your First Three Prints” tutorials, you’ll gain a better understanding of this, and some of the other basics that will make getting started with your Glowforge a less frustrating experience for you. 
3 Likes
Thanks for the quick response to my question. Unfortunately I don’t have the foggiest idea of how to get a vector image to GF, The damn thing is a total mystery and it is getting closer to being shipped back for a refund.
There are several vector creation applications out there. A couple of popular ones are Adobe’s Illustrator (paid) and Inkscape (free).
1 Like
I make my drawings on an older Autocad product called Quickcad. Its files are SVG, Can I use these or am I doomed to use something else?
Likely you can. Give it a shot and see. Try a simple square and see if it’ll cut.
1 Like
I would if I could but as I said in an earlier post I have no idea how to get a file from my computer to the GF.
The process is really easy. Once your image is saved as a vector format, I prefer to use PDF as I often combine vector and raster images and my software makes PDF an easy way to do so, you just log into app.glowforge.com This is the dashboard. There is a button at the upper left called “Upload”. Click that button, browse to the file you want to upload, and click Open. The GFUI will change to the project view and will upload your file. Once it is uploaded you can move it around the bed.
When you are creating your files use colors to designate the steps you would like to take. For instance, I use red for the cuts that will be done first, green for engraves, and blue for second cuts. These colors are just arbitrary. This brings the images into the GFUI separated so you can assign actions to each image.
I also suggest you go through the Three Prints tutorial if you haven’t already as that will go over the basics of operation of the machine.
6 Likes
Have you bothered at ALL to look at the first three prints link?
2 Likes
Using a web browser, navigate to app.glowforge.com (and log in if you aren’t already logged in.)
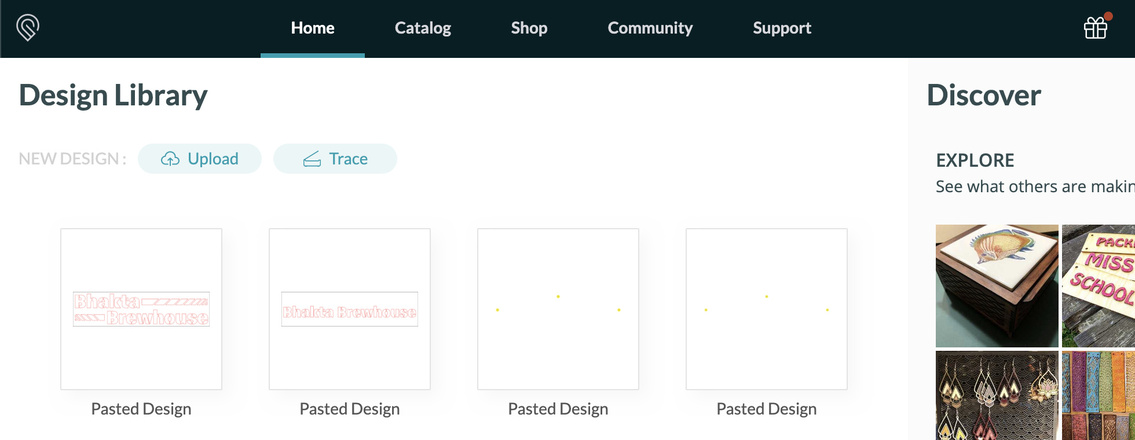
This is your Design Library (aka Dashboard, aka Home).
You now have four choices:
-
Click the “Upload” button, navigate to the folder where you saved the SVG, select it, and then click the “open” button.
-
Using the Finder (mac) or File Explorer (pc), navigate to the folder where your svg file was saved. Drag the file over to the open “dashboard” window and release (drag and drop method)
-
Select all the elements in you design software, press cmd-c (mac) or ctrl-c (pc) to copy, then select the open “dashboard” browser window and hit cmd-v (mac) or ctrl-v (pc). (I don’t know if this will work in quickcad)
-
click on one of the thumbnails already present in the Design Library
(this one is only an option once a design has already been uploaded)
When you are done printing a design, don’t erase it; click the “home” button on the top bar to return to the Dashboard.
3 Likes
That’s why I suggested working through the first three prints, because it will show you how. ![]()
PS - moving this to Everything Else, since it’s not an issue that warrants a support ticket.
You don’t need to use an application or create files to cut a traced design.
Place your drawing into the machine, select “Trace”, and it walks you thru the steps as you go.
Step 1 is to select the area you want to work with, step 2 is where you select the outline you want to cut.
When you are done, you will have the the design in the UI ready to “print”, and after selecting the material, you can cut and/or engrave as necessary.
You won’t have cut/engrave options until you select the material, or it detects Proofgrade material from the QR code sticker.
7 Likes
Yes, you caught this. It wasn’t about design software, it was about using the built in technology that the Glowforge provides so that you don’t need to use design software. I think we often assume a trace is a trace to bitmap in AI or Inkscape or a design program and don’t really think about the trace function in the GFUI.
This is certainly a valid question and one that hasn’t been attended too a whole lot. Most forum participants are highly design literate. That’s ok, but the Glowforge is pitched to people without any design literacy and they still can use it effectively. That is true. It may not be efficient, but it could even meet all their needs.
You can do a scan to cut and engrave. It is not always easy. I still have to click several times and try and the go back and do it again if it isn’t quite right. The image that is being traced does need to be adaptable for an exterior cut though with a clear outline that doesn’t have odd bits to cause a raster image instead.
1 Like
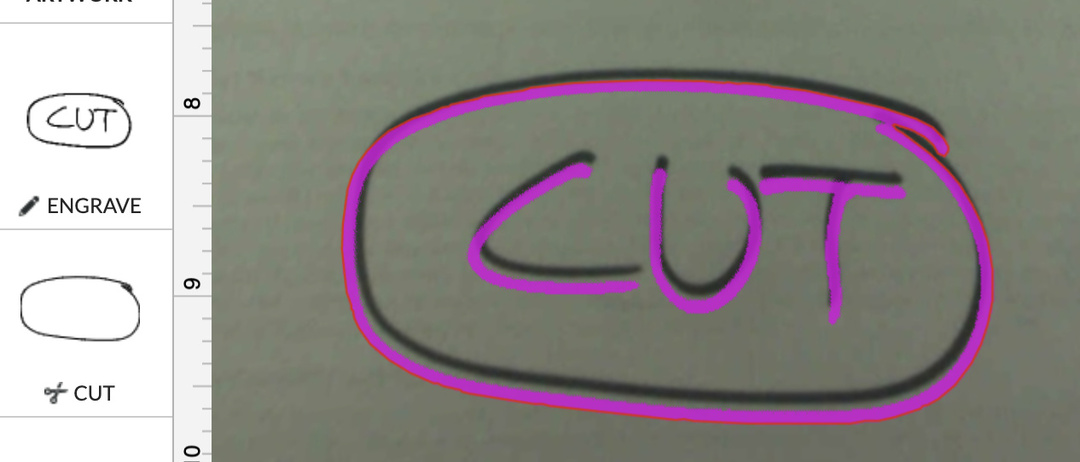
I picked up an envelope, wrote “cut” and drew a circle (sort of) with a sharpie, put it in the machine, hit “trace”. It asked me where to cut. The whole process took 30 seconds or so.
I’ve never used the feature, but I have gone thru this exercise several times to validate it works the way GF represents it.
2 Likes
Yes, it is a very simple process. It gets complex depending on what you are scanning. In your example, you had clean black lines on a background that was of one color. Some of the things people try to scan aren’t differentiated enough.
You at least understood that there had to be a definite outline around the whole shape in order for there to be a cut. That already is some presumed literacy.
And yes, folks need to read the manual and do the first three prints. That would allow us all to have a common vocabulary.
So there is no option to cut in the interface. Just as there is no option to engrave. These are triggered by a design that has to come first. That is a significant step for people to learn. People may look for it. The option to cut comes through the interaction with the scanned designed.
2 Likes
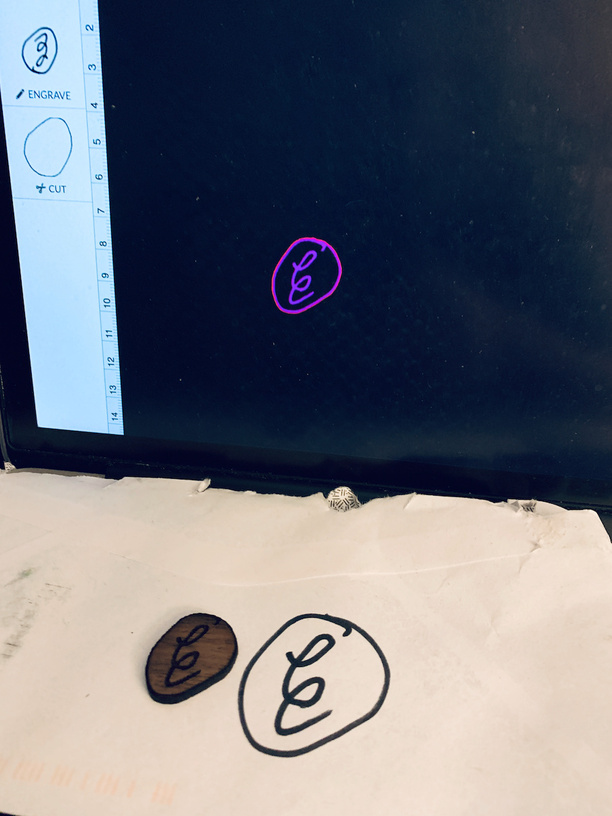
Yes, I thought I would make extensive use of the trace function due to my design ignorance, but I have used it exactly twice. Once to demonstrate putting a tablet with an image on it in the bed and traced it.
2 Likes
Totally agree. I am exploring the reasons why it wouldn’t appear simple to someone and the designs that aren’t simple outlines and contained shapes that are just black and white. Take this fabric. Seems reasonable enough to be able to scan and pick the gold outline of the poinsettia.
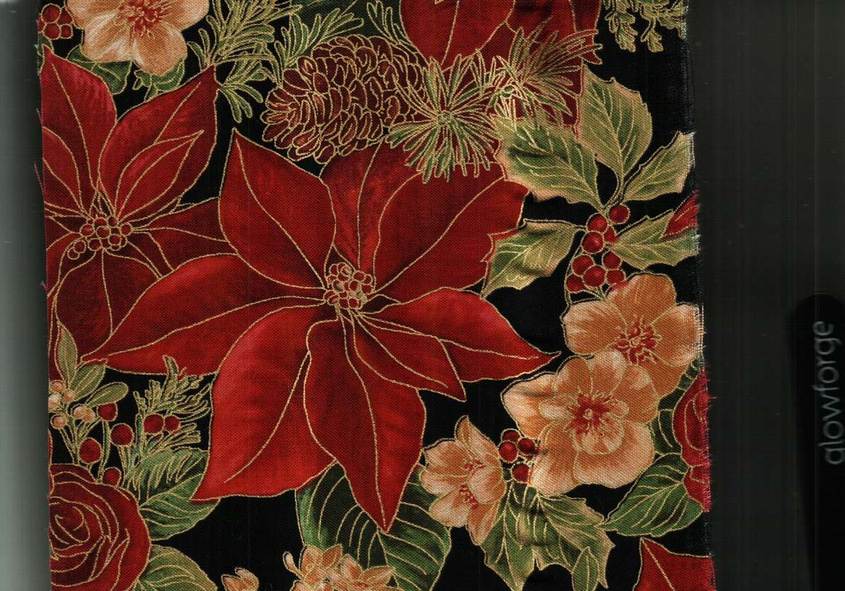
In either case using the most simple example and the most complex example doesn’t address all the variation in between.
1 Like