Let me start by stating that I have yet to encounter any issues with my Glowforge, it’s worked flawlessly since day one, but I am posting this because of an abundance of issues that I’ve seen reported in various Glowforge user groups, specifically regarding malfunctions associated with wear and tear of the white cable.
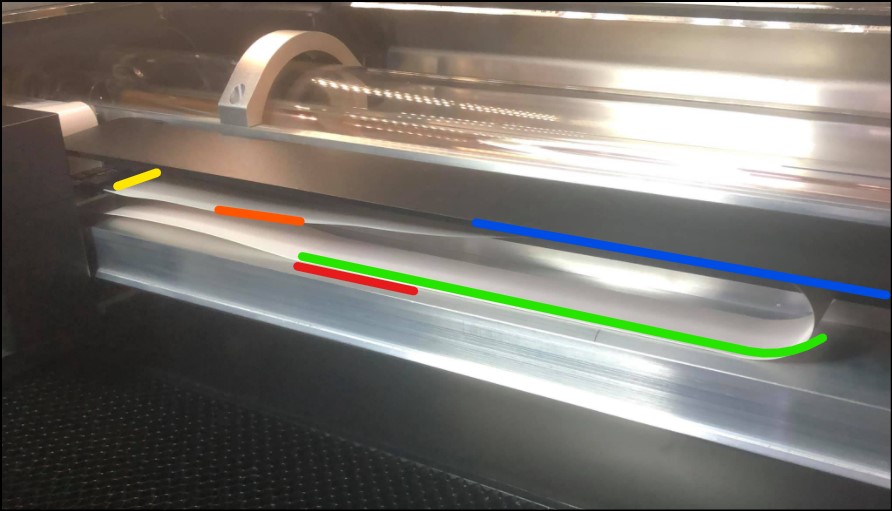
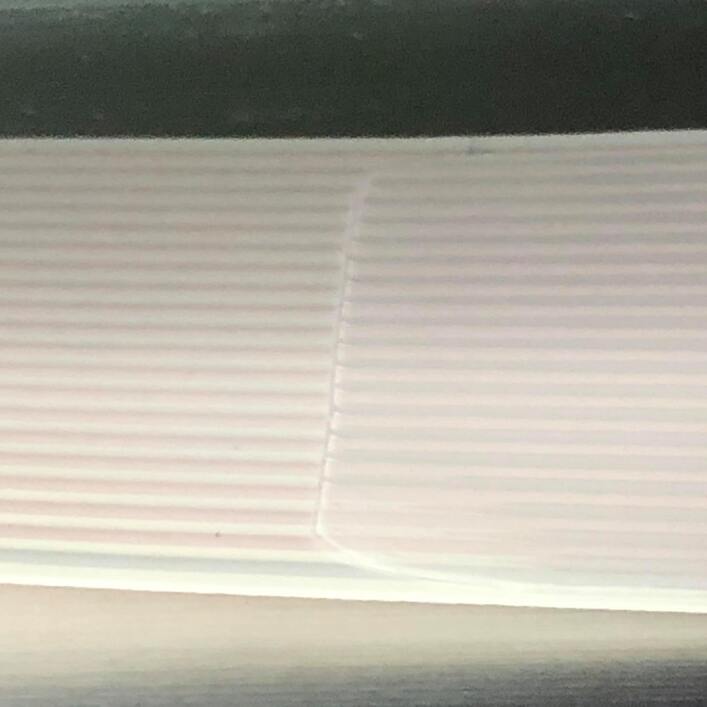
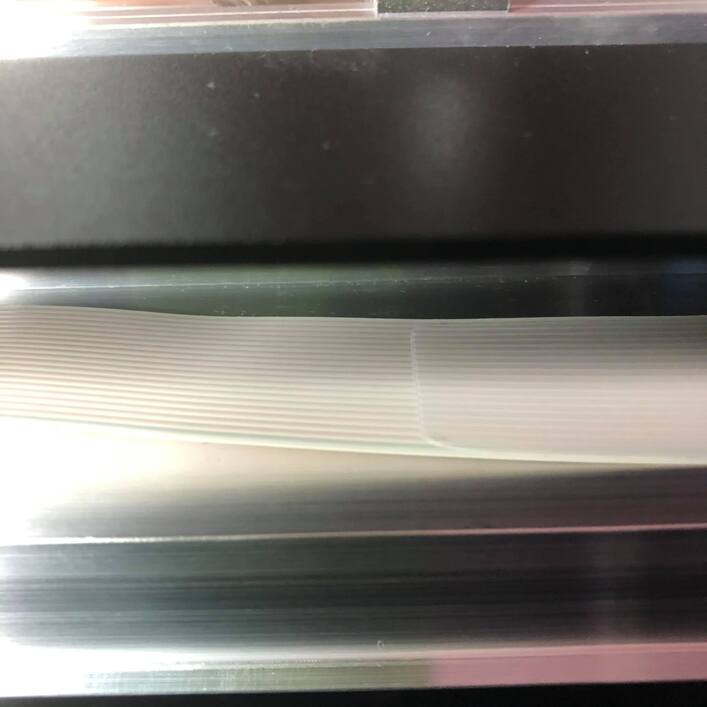
The Issue: One specific failure that I’ve been able to identify is a wear point (orange line) that is caused by the white ribbon cable coming in contact with itself as the printer head travels from left to right along the gantry rails. When cable stress is relieved, a slack condition presents itself and the ribbon cable drops to a relaxed state and rubs against itself (red line) until the forces applied by the cable being rolled back upon itself push it up against the gantry overhang (blue line). As the cable repeatedly slides against itself during the course of normal use, the cable insulation is worn away, ultimately exposing the conductor encased within. I have been able to speak with multiple users that have had to replace the cable for this very reason, each one providing pictures of similar wear patterns on the cable (orange line), indicating that the issue is common to all models of Glowforge.
The Solution: My first thought was to somehow construct a way to increase tension on the cable during left-to-right travel so that the cable was not rubbing against itself. As one would guess, there are many issues with increasing tension on the cable, one of which I am currently in the process of correcting, the possibility of causing the connector at the printer head (yellow line) to be dislodged or disconnected as a result of increased cable tension during right-to-left travel. With that in mind, I opted for a solution that simply provided some lubrication/protection to the cable contact area, and ended up sourcing some self-adhesive UHMW tape in a 1" width. I applied two strips of UHMW tape to the cable and overhead gantry. The tape was applied to the cable along the green line in the picture, to protect against abrasion of the cable against itself, and along the blue line, to protect against abrasion of the cable against the overhead gantry because as the printer head nears the right end of the gantry rails, an opposite tension issue presents itself where the cable rises and comes in contact with the overhead shield.
During my research into these issues, I visibly confirmed an abrasive reaction between the cable (the area indicated by the orange mark), and the left end of the green mark. As the cable made contact when moving toward the right, there was a noticeable resistance taking place. Once the UHMW was installed, the reaction was no longer present, the cable made contact with the UHMW and just glided along its path, no resistance at all. The same thing happened at the right end of the travel where the cable made contact with the overhead shield, but again, after installing the UHMW this issue was no longer noticeable.
In the end, not only did the installation of the UHMW tape resolve the abrasion issue it also addressed the tension issue. The addition of the UHMW tape added just enough resistance to the right end of the cable (the curved portion of the green line) that the cable does not drop fully when travel begins, which I’m sure has helped alleviate some of the wear forces previously in play.
So that’s it… I hope this helps someone, or maybe even leads to a design change. Who knows? ![]()
P.S… about that connector becoming disconnected… I’m working on something to fix that little issue as well. ![]()