I design this on Illustrator and the design is about 8x10in or so. However, it’s taking 1:50 to complete. When I took the engraving part and only left the “5” to cut, was just a few seconds.
Is it possible that because it’s taking so long because there’s a white background, to which the laser doesn’t do anything but does go over it? or is it just that slow on anything engraving?
If it’s the background, any idea how to eliminate that purple square? (technically the purple square has a 3pt line around to engrave).
For a raster engrave the glowforge will scan each line from side to side. It does try to optimize and only go as far as it needs to in order to cover the etched areas. So a circle, for example will be shorter/quicker at the top and bottom than in the center. However, if your raster includes a box around it (ie not a separate score operation), it will scan every line completely. So the time taken will be independent of the content. It’ll just be number of lines * the time it takes to go from one side to the other and move to the new line.
The quickest way to speed this up is to reduce the engraved LPI using manual settings. It will also speed things up to score the border rather than include it in the raster, but not as much as reducing the LPI.
The purple square shows that the entire thing will be engraved, not just the words. I’m not sure what the file type is for the text, but if it’s a PNG you should save with a transparent background to remove the white. That’s the easiest way to solve it.
If you just want a thin line, you could score instead of engrave. Maybe you could score the whole text, if you have it in vector format (I’m guessing not, since the picture looks a bit blocky).
You can also give a little more width to that line by defocusing. I did that for a job that used score instead of engrave to speed everything up and once I found a good setting, it worked well.
I get that it treats the white as transparent and doesn’t actually mark the surface of the material, but when I process two versions of the same image (white background vs transparent background) there is a significant difference in engraving time. I just did a quick test to confirm and the solid white image took 11 minutes to do, the transparent version only 6 minutes. Am I the only one experiencing this?
No – I’ve had the same experience. I now create a completely transparent background – and those where I didn’t, Ijust tell it to ignore the background “engrave”
If you have a 10" x 10" white-filled box with a 1" x 1" box to engrave in the middle, I believe if you turn the white to transparent, you end up with just a 1" x 1" box to engrave (and no 10" x 10" transparency).
Remove the white fill color inside the rectangle. (Just set it to none.) The Glowforge interface treats any vector Fill color as something to be engraved, even white fill color.
If you don’t want to cut the rectangle after removing the fill, convert it to a Score in the GFUI.
Here’s a little writeup that helps with setting up vector files for the Glowforge interface:
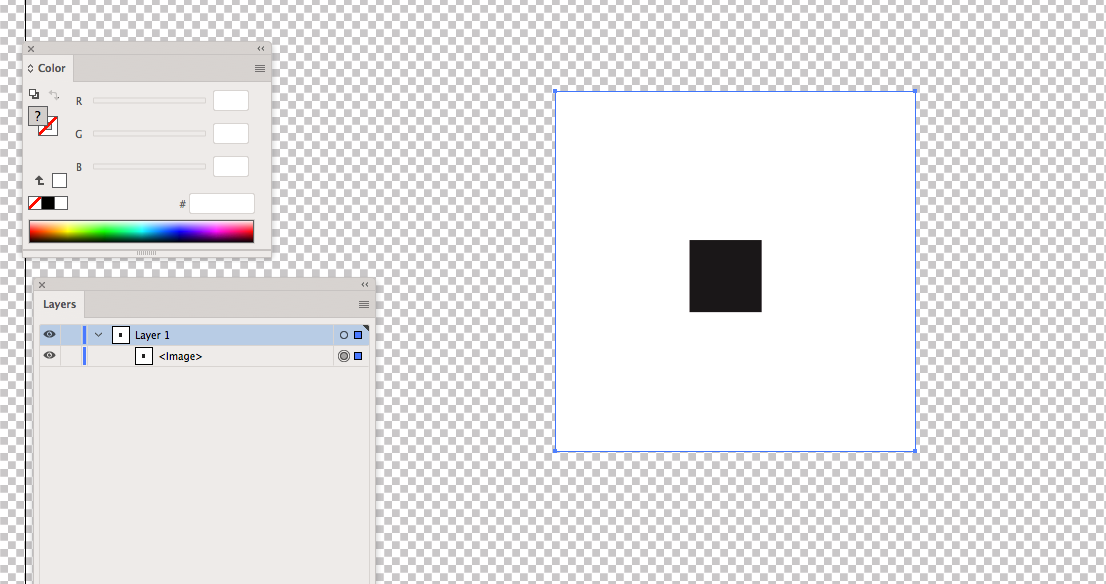
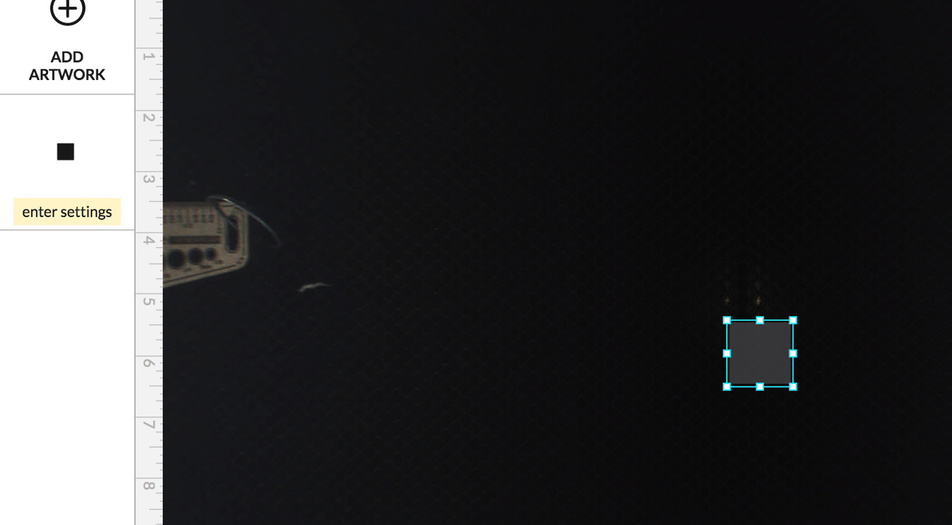
Here is a 5x5" white square with a 1x1" black square inside that is rasterized. As you can see on the layers palette on the left hand side, it is only one layer and one bitmap image.
The only thing the Glowforge cares about in a raster engrave is anything that is not 255, 255, 255 pure white.
As for the bounding box, I can make that any shape that I want and the Glowforge is going to ignore the white on the outside and take the shortest path across the X-axis that is possible.
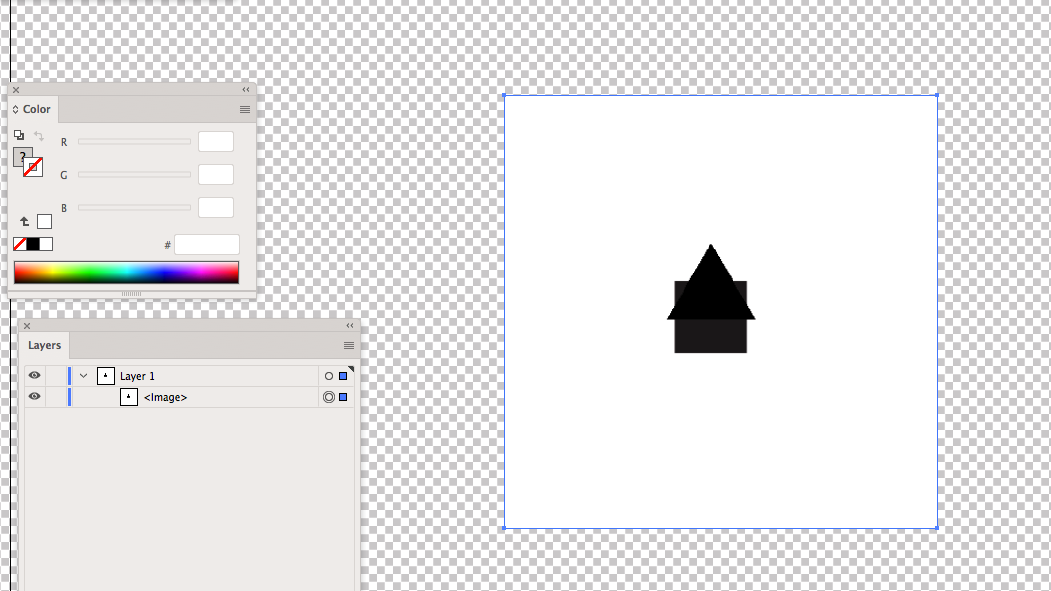
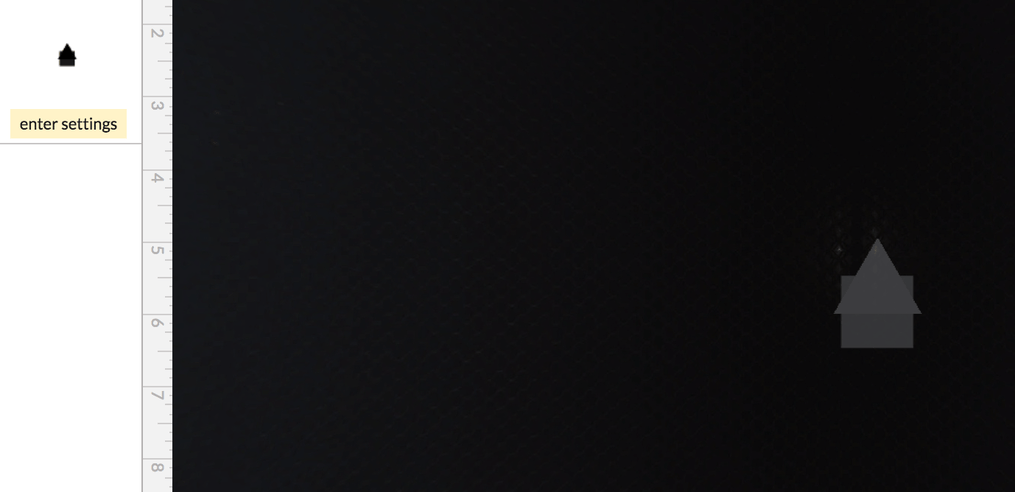
Here is a 5x5" white square with a 1x1" square and then a triangle on top of the square. It’s a single raster image. Maybe it’s a bad builder trying to make a house.
Thank you for clearing it up. I didn’t do that test since I wasn’t near a computer. I just repeated what I thought others were saying. Shows the value of seeing for yourself.
Maybe the people who saw a difference didn’t use pure white.
I didn’t need to do so to prove it to myself. I mentioned this not long ago - as I was pleasantly surprised that the software was intelligent enough to ignore it/255,255,255 and create a shorter motion plan.
If you aren’t using a swatch or setting it to 255, 255, 255 it can be a little more difficult to get white. You only have to miss pure white by a hair and then you end up with a tint, shade or tone (yup, all different things).