One of my next projects is silver inlay and I agree with you that silver will look fantastic with black walnut.
2 Likes
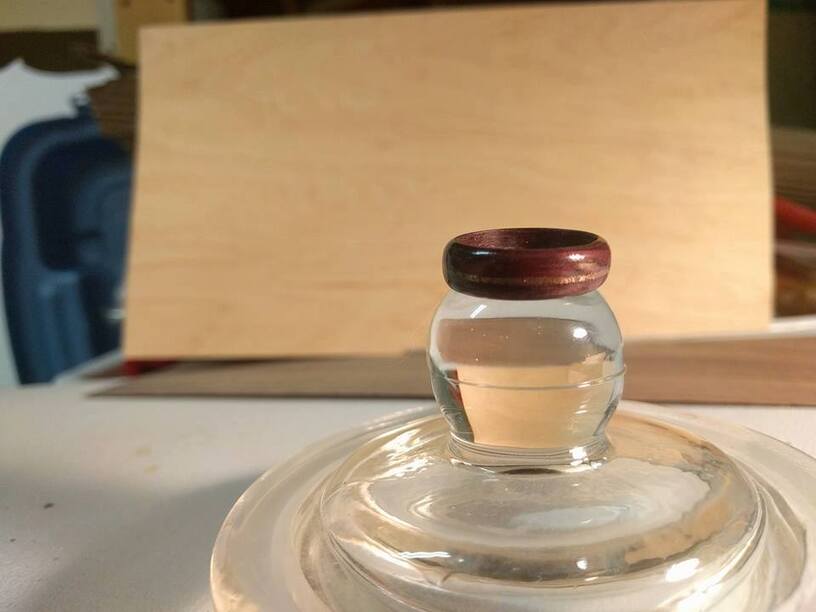
I did an inlay on a ring using a slightly different technique.
I filed down a section of copper pipe until I had a fine powder dropped it into a channel and then applied super glue. Sanded until it was flush and it came out pretty nice! I believe the is similar to how people do stone inlay
14 Likes
Yes, chip inlay is done like that, only epoxy is normally used.
That worked great! Did the glue take a Polish? Looks like it did.
Thing about epoxy is it is softer than the inlay so machine polishing tends to undercut, so I would wet sand after filing starting with 400 grit and progress through to 1500 before a final touch on the buff.
4 Likes
How do you scribe the channel for the inlay?
My process was a little odd. It was my first attempt at a wooden ring (let alone one with an inlay.
I wrapped my veneer around a socket that was the size of the ring I wanted and super glued as I went. After I had my blank I sanded to the shape I wanted using a combination of a belt sander and attaching the socket to a drill and using sandpaper by hand.
After adding in the inlay I did a coat of super glue on the inside of the ring and on the outside, wet sanded with a super high grit sandpaper and then buffed on a piece of leather.
It DID take a good polish and from what I’ve read online super glue will take a polish no problem but I also put it back on the drill, spun it at high speed and gave it a thin coat of spray shellac
4 Likes
I found a fine toothed hack saw blade just laying around in my dad’s garage while I was visiting one day. I ‘borrowed’ it and used that to cut the channel. I mostly eyeballed it until I had something that went all the way around the ring. I then put the ring on a drill, held the blade in place and spun the ring to deepen the channel. It worked surprisingly well but I think if I wanted something a tad more accurate I’d build a rig to keep everything perfectly aligned
2 Likes
I enjoy making the bentwood rings, I could never figure out how to accurately make the inlay channel without a lathe. I am now overlaying the laminated wood over coin rings and it comes out real nice. Thank you for the information, I will have to try it.
3 Likes
Yes Cyanoacrylate ( or super glue) will take a polish. That’s what I use on my acrylic pens when turning to seal them and it polishes very well ( actually I use CA on wooden pens as well to seal them).
3 Likes
Just for curiosity sake, how do you polish yours?
I have my little method that I just kinda figured out on my own but I’ve always wondered if there is another way
2 Likes
I tried the ca glue for a coating but for some reason I get stuck. I now use Renaissance Micro-Crystalline Wax Polish and then buff to a good shine.
2 Likes
Mini lathe is at the top of my Father’s Day list. Will be starting with pens… Need a new tool to keep me busy while I wait.
3 Likes
I have used the little Harbor Freight mini for years with good results. Hours of fun.
3 Likes
This has brought to mind another thing for my project list.
When I was a kid, my dad’s best friend used to have this beautiful wooden box that stayed on his coffee table. It was just phenomenally crafted with lovely dovetails and carvings, but the most stunning part was that it was covered in intricate copper inlays. Those inlays, however, held an equally stunning secret: they were all secretly connected to a hidden power source in the bottom of the box forming a precariously incomplete circuit. If you made the mistake of tilting the box while touching the inlay, that circuit would stop being incomplete you were rewarded with a staggering shock and a chorus of laughter from everyone in the room.
I’m starting to think that I might finally have the tools to make one of my own.
10 Likes
I would love to get a mini lathe and learn to turn some wood.
2 Likes
The person who made that box must have been someone with a great sense of humor.
5 Likes
Absolutely. And they sold it to someone with an equally good one (and just enough moral flexibility to be comfortable with letting a small child shock the bejeezus out of himself.) Sadly the original box, perhaps not surprisingly, was dropped a few too many times and broken, so if I can figure it out, I know who is getting the first one… and his is getting a 9 volt.
6 Likes
If you figure out how to make one…I’d buy it in a second!!!
1 Like
I’ll definitely be sure to document it as I go so, at the very least, people will have some sort of guide to make their own.
1 Like
Me me. Pick me
Inlay the copper so two unbroken lines are formed.
Use a battery to charge a capacitor.
Connect one side of the capacitor to one of the two inlaid lines, connect the other side of the capacitor to the other inlaid line via a tilt switch.
If you touch both lines while the tilt switch is engaged the capacitor will discharge through you…
2 Likes