Thanks. Yes, I thought about engraving countersinking around the fastener hole but didn’t follow up on. I did not even think about nail or screw size. There are several ways to do this. I will measure different types of fasteners, especially some round head brass screws and make a hole and slot so that you can insert over in the screw or nail and it slides up the slot and holds fast.Something like this but cut and engraved into the back. 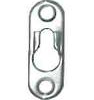
I think those are called a T slot. For now I will use that term and wait to be corrected 
Engraving that into the back won’t be possible, since you have to remove material underneath other material. One of those things that a CNC could accomplish, but a laser cannot. If you make a panel that attaches to the back then it would be possible, but the addition of a panel weakens things.
I believe how you made it, with a hole straight through, is sufficient. Should be able to fit over a penny nail, but since such a small nail is not likely strong enough to hold the assembly full of matches, you could just drive a large nail through (maybe design/drill the hole a little bigger though).
As I learned it (very recently), a nail is the right choice if the primary stress is perpendicular to the fastener, and a screw if it is parallel to the fastener. So a nail is the right call here. Likely you don’t need one exceptionally strong either, matches don’t weigh much. Having a flare on the head could help avoid pulling the whole thing off the nail when digging out a match without looking.
3 Likes
While I love my cnc router, it is the small kerf and living hinges that are exciting me about the gf.
I was thinking more like this on the front face of the back panel. A hole large enough for the head of the nail (yes, nails do better at shear) to go through, but then a slot that fits the shank of the nail, then a recessed spot for the head to rest in tight. Makes it removable.
3 Likes
This is a case where the label “genius” is perfect. I had not thought of that approach at all, but now that I see it… It is totally obvious. Well done.
Very nice work! I’m learning a lot from following your posts.
“Keyhole” slot is the term you are looking for. 
1 Like
Very slick!
Very cool project! You could stick some clock hands on the front and have a dual purpose match box clock 
1 Like
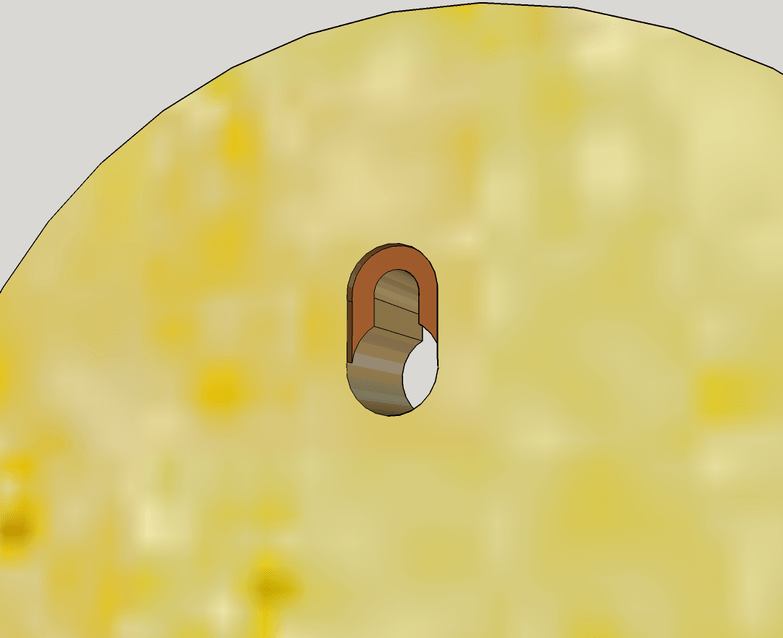
I tried to improve the joinery for the base. I made a rabbet along the inner surface of the bottom sides to receive the base and curve of the bottom trough. I would use glue, but with a little work to some of the finger joints, one could make a tight box that self-fastens. That wasn’t my intent. I imagine I’ve have to do some practice runs to get everything to fit tight. I didn’t get to the living hinge in Inkscape. Couldn’t get the living hinge plugin from the Louisville hackerspace to work.on my Ubuntu Linux nor my Windows 7 machine. That might have to wait for the laser cutter. I’ll work on the cut files eventually for this. It will need to be a precision cut with the rabbets and joints on a curved piece.
5 Likes
If you want to get away from glue completely, look at the Adafruit Raspberry Pi box. I don’t know what to call the tab and slot connector they use on the sides, but there is a small cut to make the material flex when squeezed. That serves as enough to hold the entire thing together with no glue or screws.
Since their SVG is available to download, you should be able to cut and paste out of their design and on to yours (or the other way around of course)
1 Like
They are called “dragon claws”. Some weird synchronicity is going on here. A Couple weeks ago I read this article on Adafruit on the case study of designing a laser cut Raspberry Pi enclosure. It was enlightening and is worth everyone’s attention to get a design process figured out. I was thinking of this type of fastening mechanism. Definitely will work out a non-glue design sometime. This would be great for flat-pack shipping and ease of install with no glue.
The whole design tutorial is worth studying:
1 Like
The box I have from them is a bit different from the case study box. You don’t use the inset of the data jack as a spacer, and the lid is on a novel swivel. They just have normal square tabs on the lid, which slot into round holes on the sides, and thus are able to act as a hinge.
This is awesome to see. Growing up we had a tin one just like this in our family’s hunting cabin. Unfortunately the place burned down (unrelated to the match box bin) and I’d love to make one of these for my Dad. So cool!
On another note, you guys have way more free-time than me. Or else you hate sleep. 
No. I’m blowing off work and staying up late. I tend to get obsessed over a project and then move on to something once it’s done. I help people all day in lots of ways. I always say: I can fix computers and but you can’t fix people. so solving a computer problem gives me the energy to tackle the intractable.
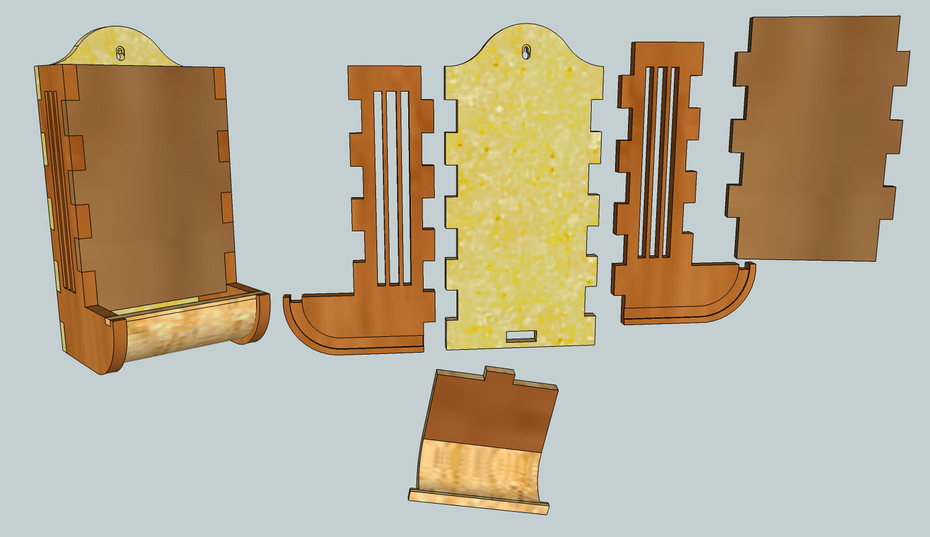
I finally took the holder home and slapped it on our mantle. Loaded a few matches this morning and realized a bit of an issue with the slots on the side. When I pour matches in, some wind up sticking out through the side slots.
Though if you have some pilot light match sticks this may have been an intended feature.
If the holes are meant for airflow to keep matches dry, thinner would help. I did have a thought of putting card stock in each hole to form channels that the matches would flow down, could reduce clogging due to matches being skew to the hopper
“Pour”? Did you try the whole box with the bottom end of the box open to allow matches to flow? Couldn’t see if from this pic. The idea is that the whole box should fit in and the striker strips go down the sides that you can access for striking the match. Yes. Those gaps in bottom back join is an issue that I’ve worked on since. Thanks for posting.
Nope, I didn’t try sticking a full box inside with the end ripped off. That would have made sense. I just pulled handfuls of matches out of my box and dropped them straight in.
1 Like
What size matches and box did you have? They seem like the smaller box match size rather than the kitchen match size. I got the matches three boxes to a pack, they were “Best Choice”. Don’t have them here at my office to post the dimensions, but you get the idea. Again, great to work with you! I think this weekend I’m going to use a saw and chisel to make the second design. Just can’t stand not having my Glowforge!
I’ll try shoving the box in when I get back home tonight, and be sure to make note of the type and brand of matches.
The match box I have is a Diamond brand Strike on Box greenlight. Box of 300. The width of the plywood holder is sufficient, but not the depth. Easy enough to trim down the matchbox to fit inside though.
The celtic knot isn’t quite enough to strike the matches on it. So I would need to glue the strike surface on the bottom or front of the holder to use these particular matches with it.