Wow, I would never have thought of that method! That is fascinating.
Do you think it would be possible to make the two books together, like braille above the text or something like that? The reason I ask is that it could help someone learn braille, or share a book together, or just have more tactile input if they need more sensory input. That might be really interesting.
My daughter is not visually impaired, but she has Down syndrome, and has nystagmus. Her eyes are constantly jumping (especially when she’s tired). I’ve wondered about how that impacts her ability to process visual information.
Well that opens up a whole new rabbit hole for me! Embossing with my vacuum sealer! And welcome to the community! What a way to make yourself known to us. We do hope you visit and share often, as we learn so much from each other. Congratulations on all you do for the blind.
Welcome @jimballard to the community and for sharing your work for such a worthy cause.
You may have discovered that this community thrives on the creativity, inspiration, technique and craftmanship that our members share for the benefit of the rest.
As for everything else, the link from my previous post leads to a lifetime of rabbit holes. Because of the way it works, most of the Magic Canvas images do not show a clear light source and so show mainly shadow by angle that what is directly facing you is lighter than where the plane approaches perpendicular which works better than light source images where the lit side of a person’s face is high and the shadowed side is a pit.
It is possible to have both text and braille on the same page, but unfortunately you cannot resize braille. In an 8 1/2" x 11" page, if text were at the bottom and consisted of a paragraph of only four or five lines, the braille needed to transcribe that text will take up the rest of that page. I know this because I created a braille/embossment book titled “Spineless Critters – A First Book of Invertebrates” and I had to carefully figure out just much text I could create at the bottom of the page. This book did have both braille starting at the top and text beginning near the bottom. It worked, but I couldn’t make the paragraphs too long or the braille would have flowed onto the next page which could not work because of the book’s layout.
I created a YouTube video titled “Make Detailed Paper Embossments Using
a FoodSaver”. This will give you a good idea of how I make embossments
even though this video doesn’t use a wooden mold. (I couldn’t find a way to
create a link to this video but just type in the title.)
An off-and-on side project since getting the Glowforge has been to transfer a relief-carved design from the Glowforge to thin sheets of soft copper that I could embed into carved boxes.
Vacuum was my first thought but it became clear that one atmosphere of pressure would be the most possible.
I became aware (mostly from folks here) that there is a cottage industry of folks using those machines to emboss paper much as we make stuff with a Glowforge, though the opportunity is more about using pre-purchased designs than designing your own stuff, and the copper takes more force than paper, so there were more issues than I figured out and the local market for finished work way below my expectations.
This is incredible work–your description opened up some new thoughts about how we process information. Thanks for the description of how you make the designs in the paper itself. (I’ve bookmarked it…)
Thanks for the youtube video. I bought a Food Saver on a whim last year, but haven’t used it. Now I have a good use for it! Your video showed me how it’s done. Can’t wait to play…
Interesting! I have been playing with that a little, except I 3D-printed my test form instead of using the Glowforge. It works pretty well with just rubbing the copper into the form:
Another thought was to make both a positive and a negative mold with some additional tolerance between so that they could clamp together to emboss the design.
If you plan on making a lot of vacuumed items using paper or metal, there are vacuum systems that are more powerful, Unfortunately, they are more expensive. (A disclaimer here: I’m not receiving any money from any tool makers that I mention. These are just tools I’ve purchased in the past.) Besides a FoodSaver, I also use a Weston Pro-2300 vacuum sealer. It has a more robust vacuum system than the FoodSaver and can seal items 16" long, but it costs around $440.
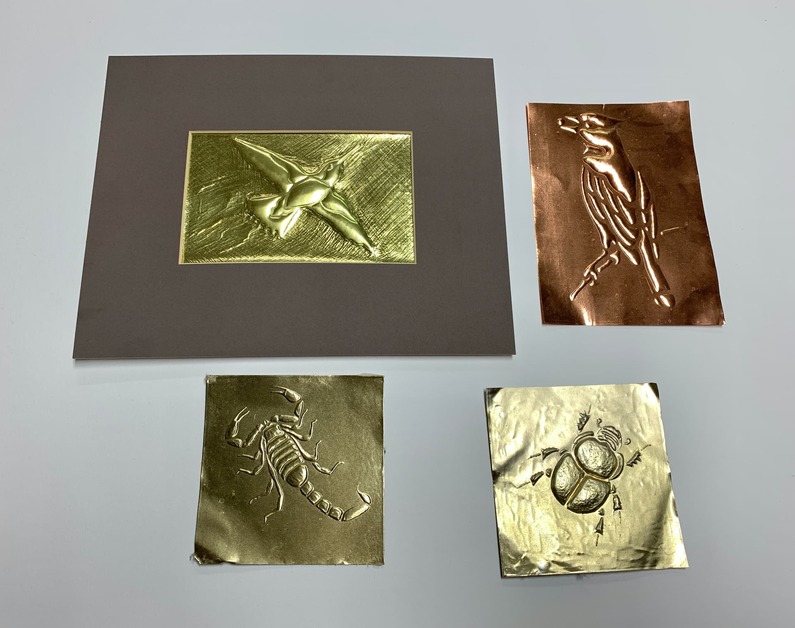
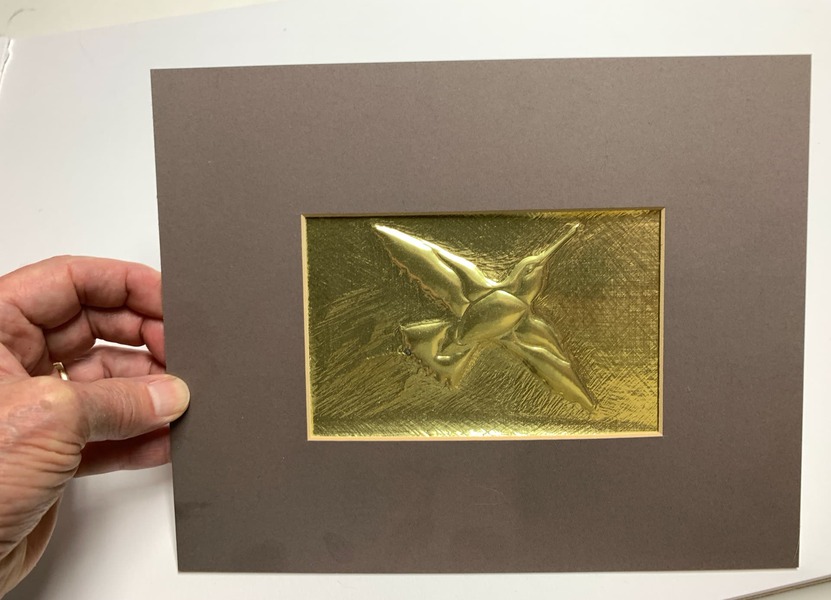
By using the plastic clay-working tools that I show in my YouTube video
“Make detailed paper embossments using a FoodSaver” you can get very detailed embossments using thin metal sheets. Below are a couple of photos of metal embossments I made many years ago following the technique described in my video:
Thank you so much for sharing your work. We have many close to us with (dis)abilities including low vision and blind so this was of special interest to me. Of the many ways our friends and family have learned to adapt and learn, it seems learning braille is one of the most challenging.
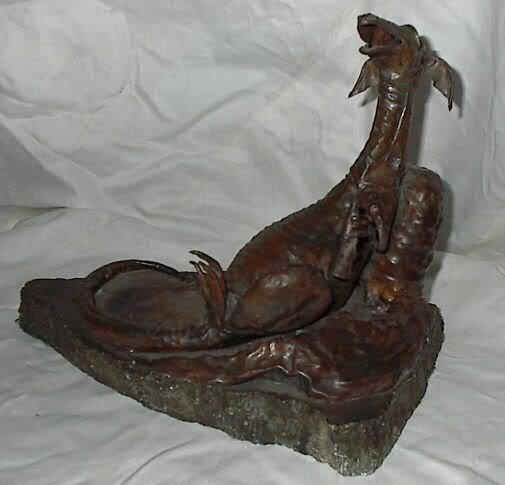
Doing a bit of googling, I find I have 23ga copper and aluminum and some 26 ga copper. Way back in the day this is what I did with it…
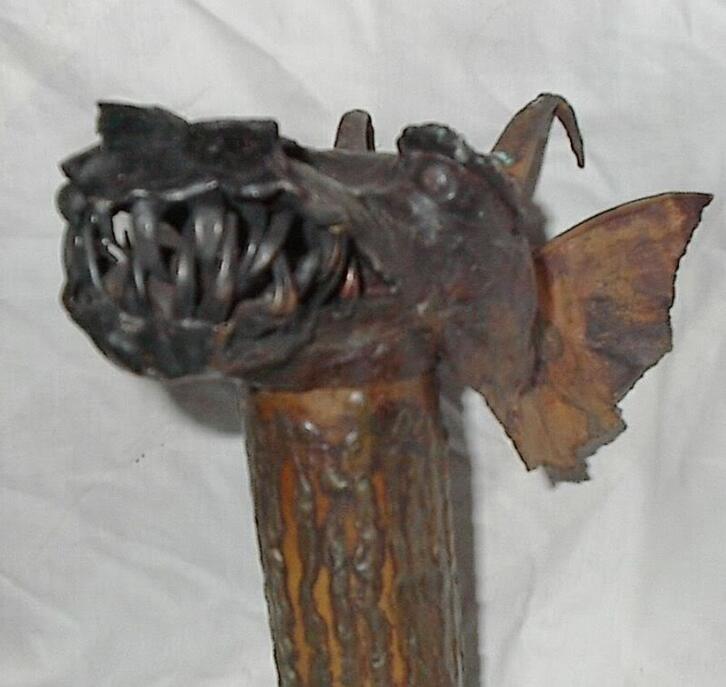
and I still have this…
That stuff is really awesome! Particularly just using a vacuum system. But no matter if you are getting 90% or 99% vacuum the psi difference is minimal and still maxes out at 14.7 psi where 100 psi would be a lot better and a start to what I was looking for.
If you had a box with sides of copper that you could rub into shape, unless it was backed up with epoxy or something, normal handling would mess it up. Even with 23ga copper, the ears on the staff dragon keep getting knocked about and messed up.
Wow! Very interesting and inspiring! Just when you thought there was nothing more you could do with a GF something wonderful like this pops up! Not just the technique, but the positive impact! Great stuff!