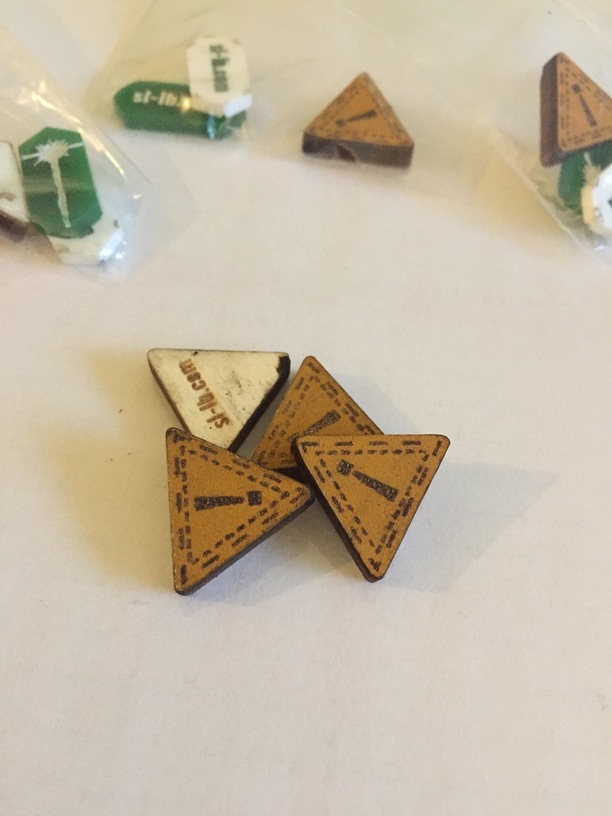
Also, I made a special set of stress tokens. It‘s leather, glued to 3mm plywood.
This was an experiment. The amount of detail is pretty good but the smell is… more than just lasering wood
Also, there is much more carbon black (if this is the right word for it…?) for which I had to use Sterilium to get rid of it.
But: it looks good and it‘s made from leather which I did not see for X-Wing tokens so far.
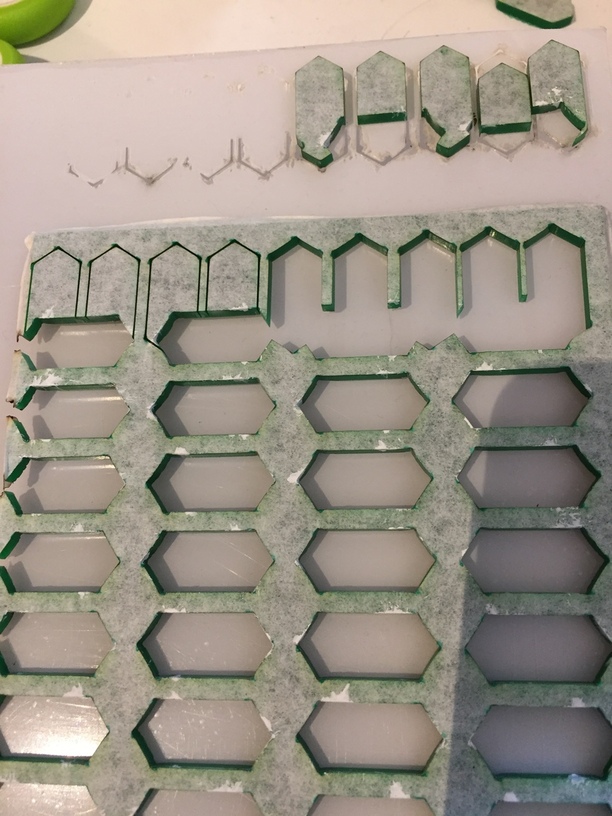
As you can see: there are scorch marks on the back of the tokens. I “cut” with Speed 500, Power full. I need about 4 to 5 passes to get through the acrylic but after the second pass or so the laser already got through the corners of the tokens.
It seems the laser is resting a few tenth of a second when changing the direction which ends in scorch marks on the back.
Is there a way to ged rid of that, other than Speed 500, Power 20, Passes 10 or so?
If not done so, you can mask both sides to remove a lot of the char and flashback from nailing on the crumb tray.
As to corner burn, I try to make them non-square to eliminate the tiny dots.
A lot of times, it does not matter, but for a money design it can get critical and other than time spent, it isn’t that difficult to remove a sharp edge.
I had one that always left a dot. Finally added a double path to it that trailed on and off away from the design. Not elegant but it worked.
All my leather gets masked both sides. Just too hard to remove any smears on the roughened backsides.
Thanks!
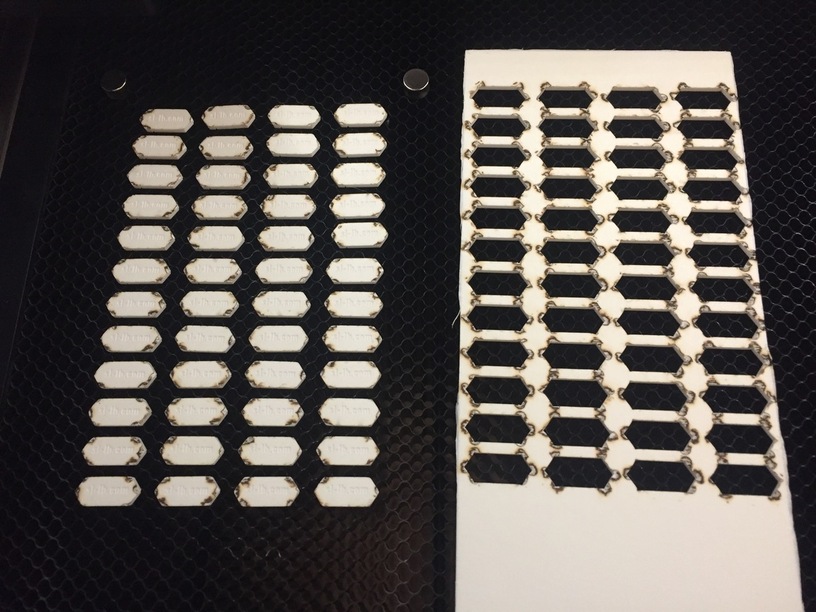
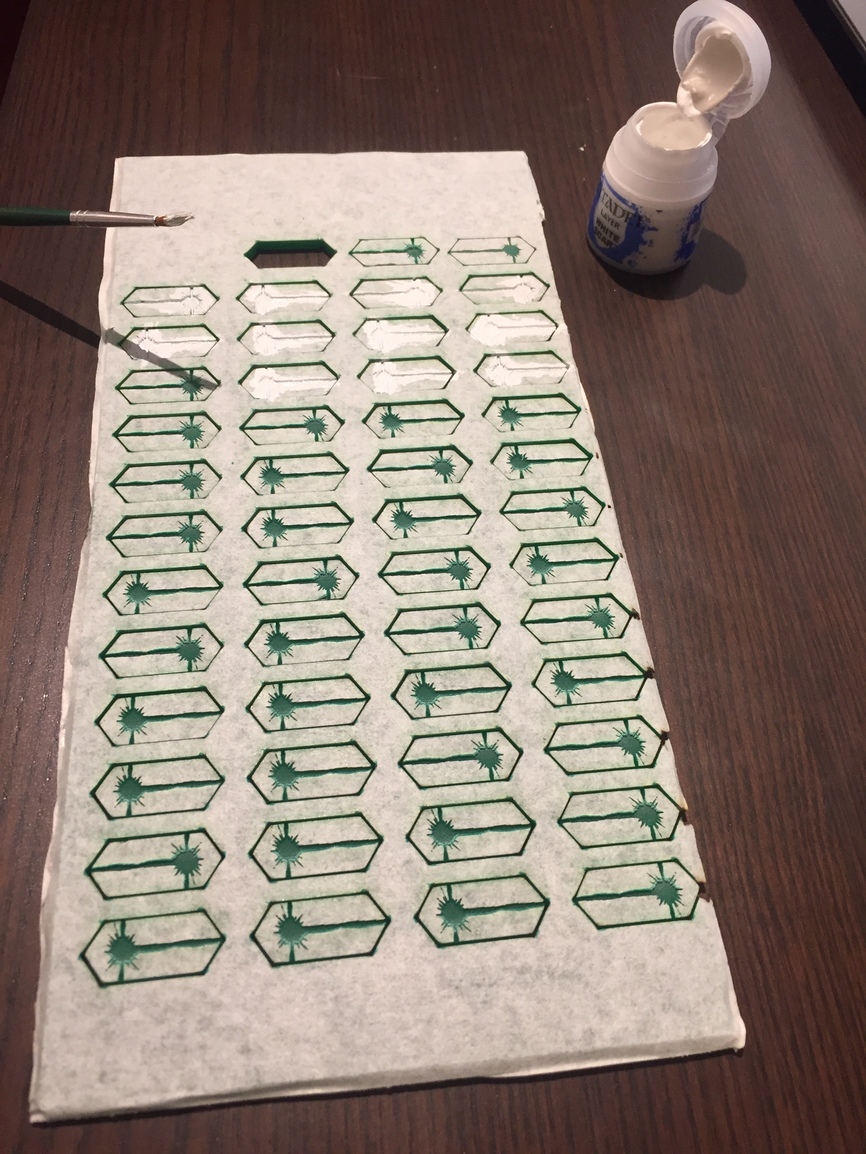
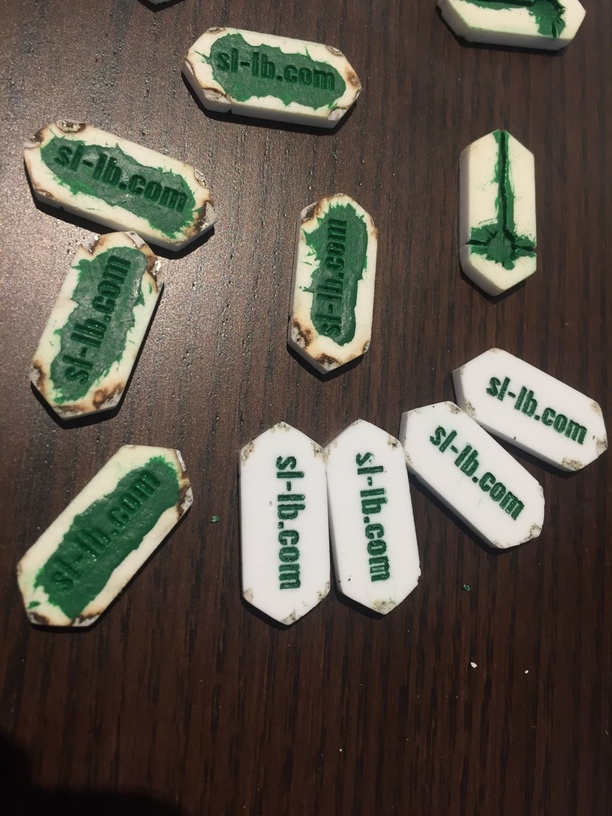
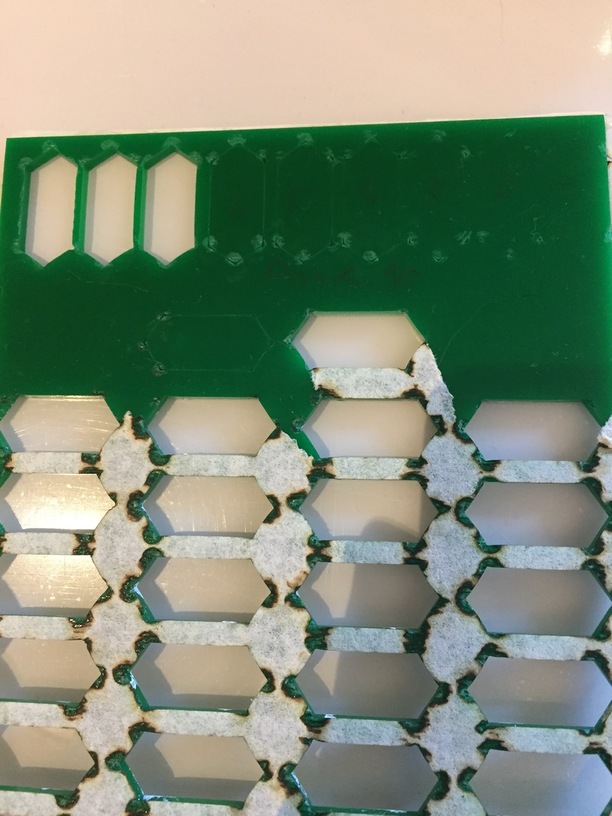
I masked it all (as you can see in the picture showing the acrylic) and that helped a lot but not 100%
It’s not only the scorch marks “in color” but the corners are kind of melted away, too.
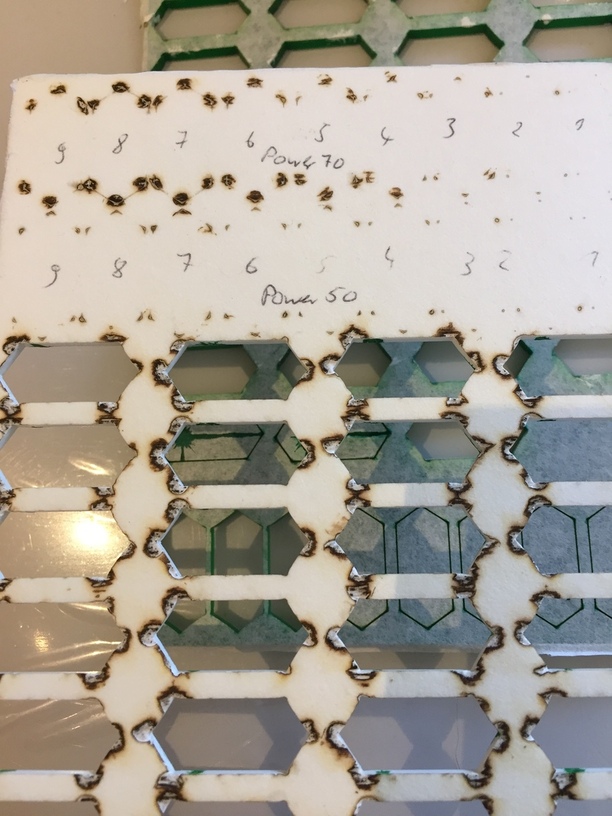
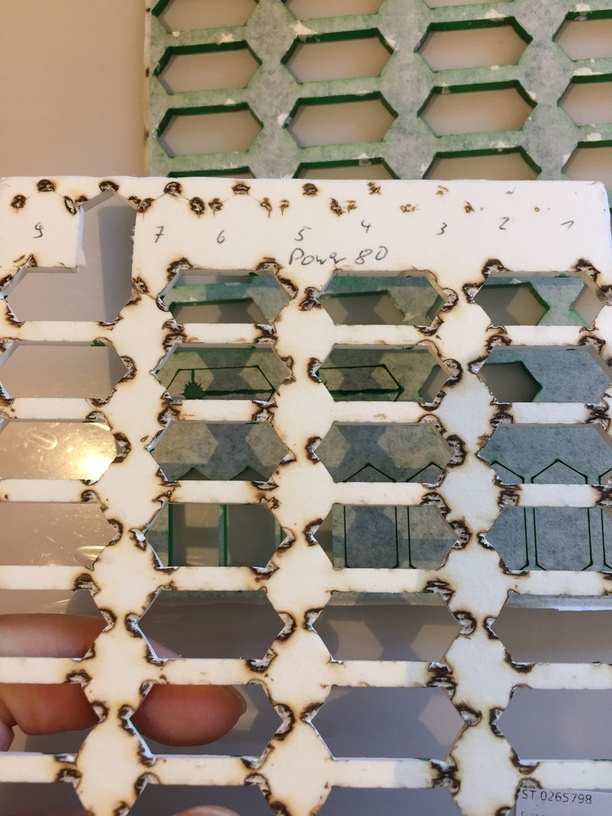
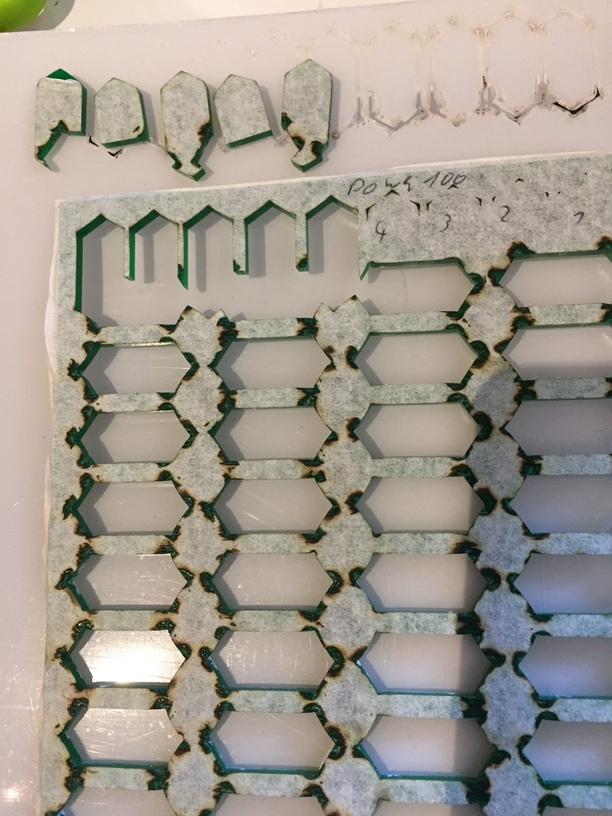
I made some tests:
I used the same acrylic.
Passes 1-9
Power 50, 70, 80, 90, full
With power 90 I tried to don‘t usw the transerpaper on the backside. The scorchmarks were less but still there. So I thought, maybe the paper ignites, which results in the acrylic melting away.
On the last run with full power I backed the 3mm acrylic with 0,5mm acrylic. It‘s a method I learned from CNC routing wood to get a better surface quality.
And what shall I say… no scorch marks
It‘s not the solution for my problem I hoped to get but it is A solution…
Nevertheless I would be happy to get another one from you guys
I’m getting some new tokens done right now, these are the settings I use:
Cut
Settings:
Speed: 500
Power: full
Passes: 3+2 (I copied the cut-layer)
Picture: .pdf
Transferpaper: both sides
Material: 3mm acrylic + cardboard beneath
thickness: 0.244
engrave
Settings:
Speed: 1000
Power: full
Lins per inch: 225
Passes: 1
Focus height: 0.250 (so you get a muuuch smoother surface)
Picture: .pdf
And as always: write down your settings. I’ve an excel sheet for it so I can track my settings. In addition I always comment on it, how the results went.
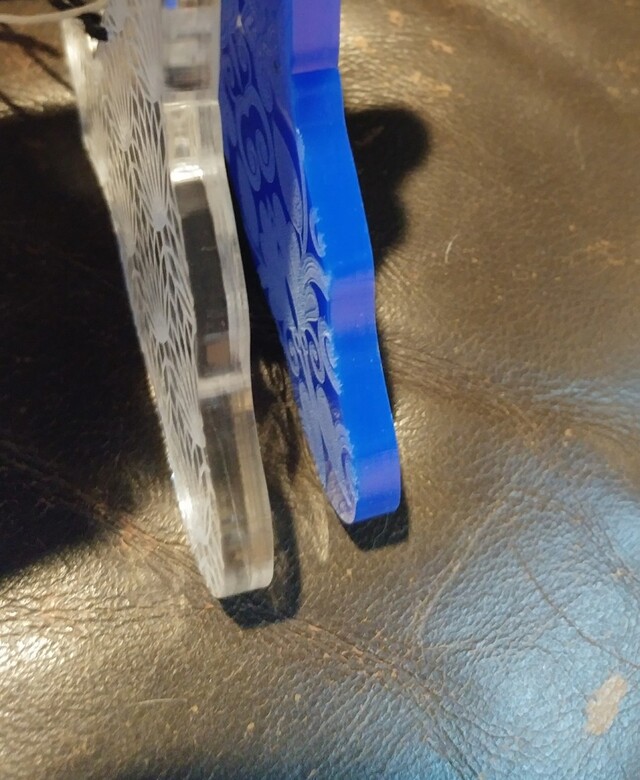
FWIW, I cut .25 acrylic with one pass at 120 speed/full power with masking on the back and it cuts cleanly. I take masking off the front when engraving.
In looking at the burns on the corner of your tokens it kinda looked like maybe a file issue. Are the cut lines one continuous lines or are they segments? (It’s a long shot, but thought I’d ask…)
LOL, I hate when that happens Yeah, take down the speed and I think you’ll be happy. It was just a long shot about the cut lines. It just looked like the laser is spending too much time in the corners and disconnected lines are a common cause for that.
Taking the speed down may be the solution for my problem.
I think I’ll test it tomorrow… as I learned today, to laser 100+ Tokens in one single run is not what the cooling system of the glowforge wants I’ll give the Laser-Brain a rest for today.
Fast cut / score speeds are also a cause, which is I assume why HQ Proofgrade score settings use slower speeds. Having to decel from fast to slow and back to fast increases the dwell time over slow to slower back to slow.
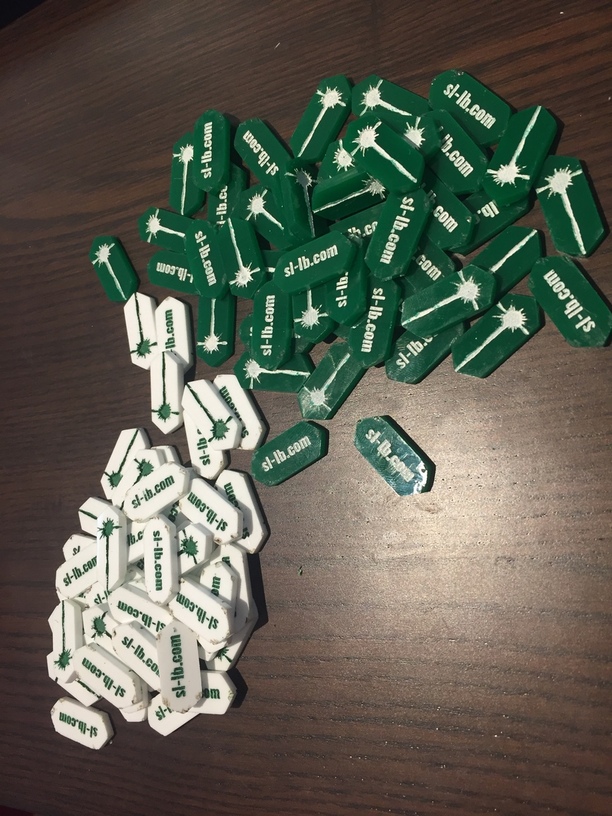
I feel your pain! I have about a hundred quarter inch acrylic ornaments to get made. They are all engraved and painted with one of ten different patterns. I’m about to go bonkerz preparing all the files.
I did speed things up by just doing one big sheet of just the engraving and then spray-painted the engraving fill color on the entire thing in one shot. I had used a jig and just lined it all it back up to cut the shapes out. It sure was a heck of a lot easier than trying to hand paint each ornament separately. Still a pain to do though
FWIW, here’s a look at the edges of the acrylic I cut using the settings I mentioned. Just one pass.
I just tried the cut with speed 150, power full… it looks gorgeous!
At speed 200 it didn’t get through but with 150 the edges are very smooth no sign of scorch marks on the back