picture? It should close rather well.
Although there should be enough negative pressure that any smoke does go out the exhaust.
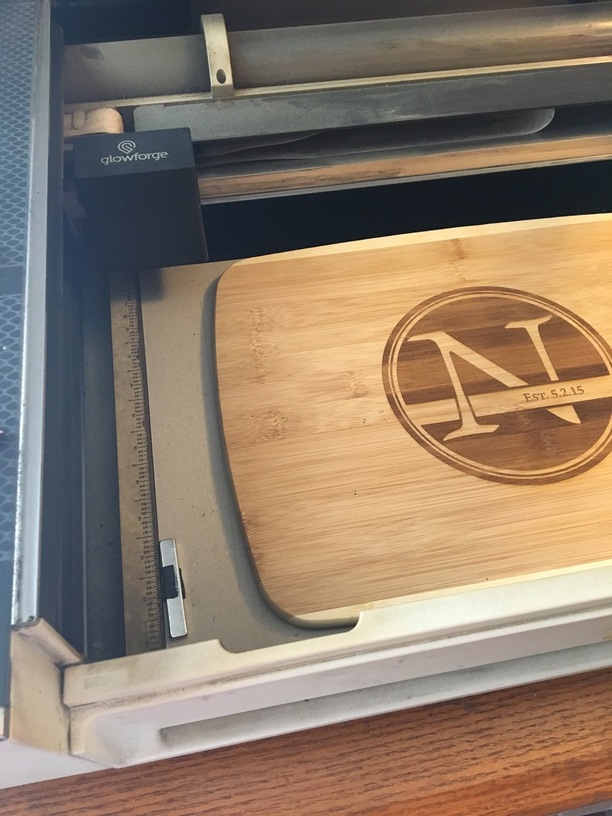
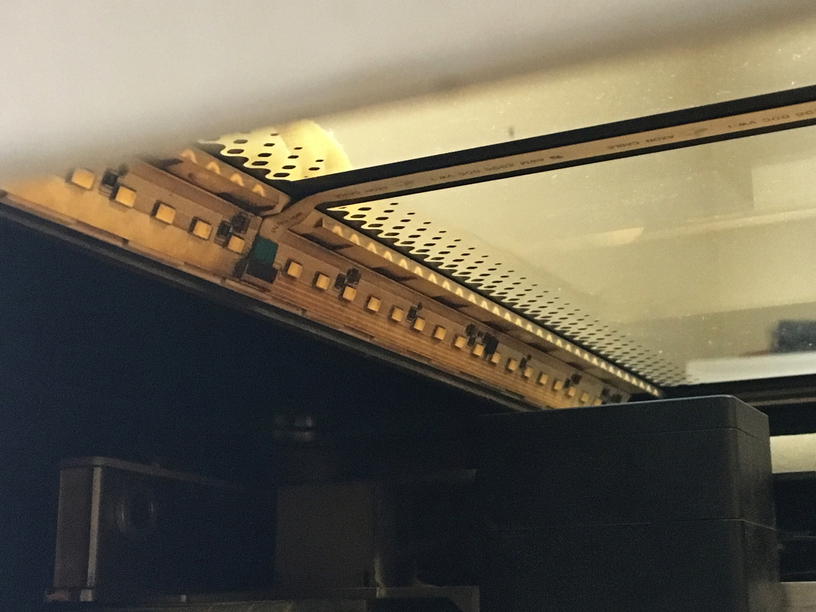
Isn’t flat where? They all have a slight ridge/hump/insert adjective where the edge of the glass lid sits higher near the middle of the machine.
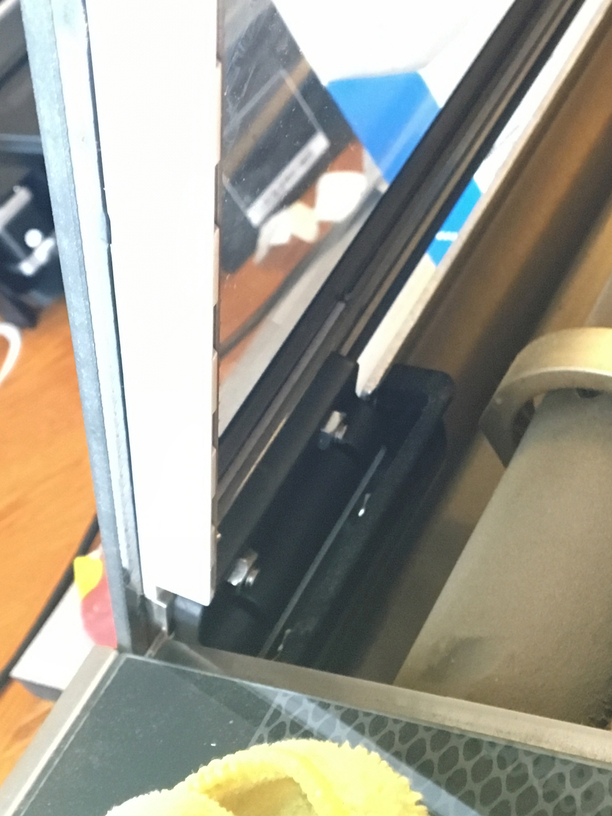
The bottom of the lid though sits flush against this rail (pictured on the left)
1 Like
That is just it, it is not sitting flush against the rail. You can run your hand along the top a feel the difference. That is why we were trying to level it.
So front and back are all that needs to be flush? The middle won’t be? That is what sort of sticks up.
Mine doesn’t sit flat either in the center glass portion. It’s about 1/16th of an inch higher on the right side. That has nothing to do with smells. I get ZERO smell until I open the lid.
If you’re experiencing smells while the laser is running, you have a leaky exhaust setup.
Mine is flush only to the front solid area, from there on back it isn’t. I guess I just need to tape all connections really well to help cut down leaking. Would a short span from the glowforge out the wall be better than a longer span?
That’s what I was saying - but that doesn’t mean it’s not sitting on the rail. In fact, there are two levels of protection here. The glass edge is sitting on the rail and then a piece that comes down into the case next to the rail.
2 Likes
Ok, thank you.
Doesn’t matter as long as it’s air tight - and that’s a lot harder to achieve than you would think.
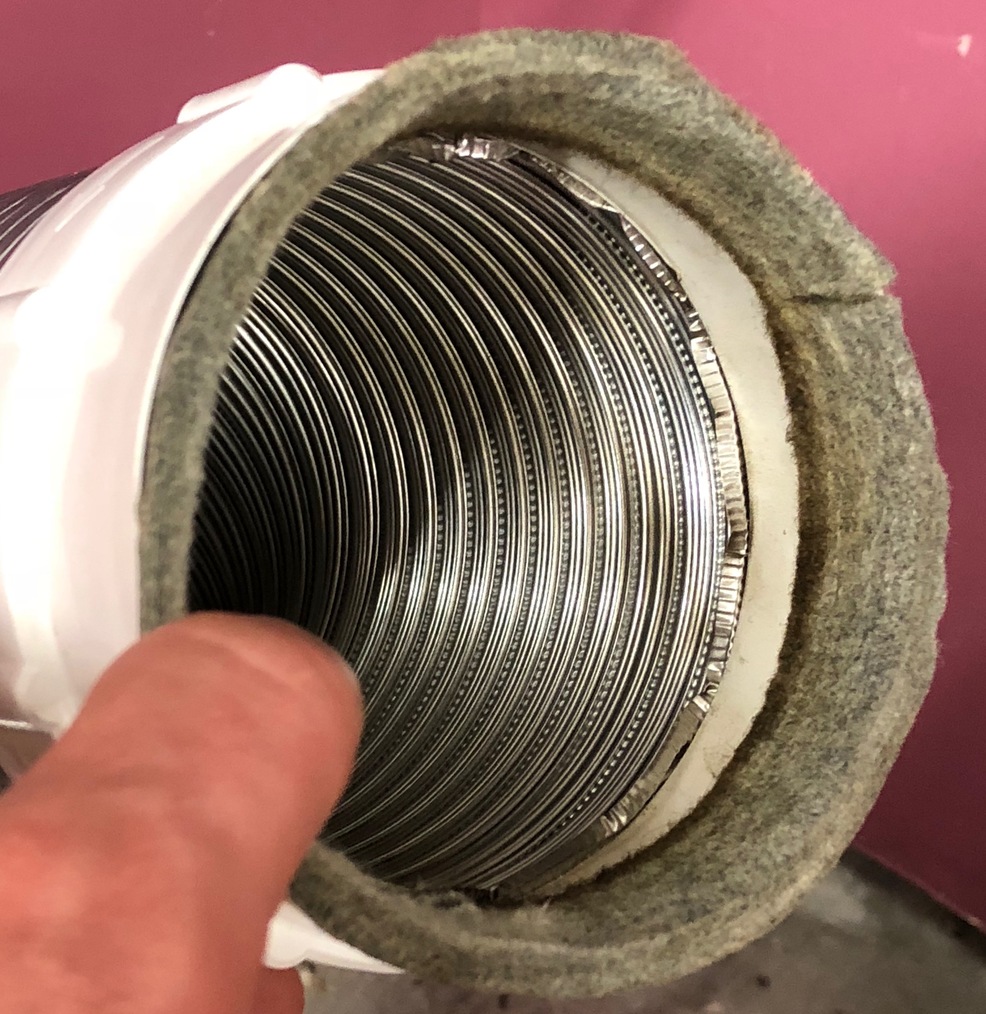
I wound up using a much more solid hose and got rid of the little foil one that came with the machine. The problem though tends to be air leaks around the parts that you connect them to - they’re not designed to be air-tight, they just direct air from dryer hoses. Use clear silicone caulk and the foil tape to cut down on the leaks. Really helps. 
In case anyone wants to try it, I had excellent results with this setup, BUT… it required a couple of small modifications.
[https://www.amazon.com/gp/product/B000IJTBFS/?th=1]
The mods were - in order to get the larger plastic connector to seal around the stub on the Glowforge case, you need to apply a strip of high-density weather stripping foam to the inside of the connector. It blocks any smoke leakage and is actually needed to make it fit.
The other thing was to cut down one of the connectors that fit over the stub on the Glowforge, because it is just too long to be stable on that small of a stub. The weight of it tends to pull it down and off. If you cut it back so that only about 3/4 of an inch is left, it just snugs up over the stub without a problem and tends to stay in place. I use a couple of small pieces of foil tape to make sure it stays attached, since bumping it might knock it loose, but it’s very stable with the tape. And absolutely zero leaks.
If you don’t want to cut it back, you can use foil tape on it to keep it in place.
You can’t use a crimping clamp on this one - it’s hard plastic.
Anyway, I like this one 'cause it’s a little quieter too.
3 Likes
That helps. The shortest, most direct route. If you have a bunch of excess, either cut the tube shorter or tie up the excess with zip ties so that it’s just not drooping down.
Smell can be pushed back in the window where it exits.
Smell can also be the result of a bad connection to the flange. I push a couple of rings of the vent tube up over the flange and then put the clamp on. I’m using just the standard Glowforge provided stuff and I get zero smell.
That’s what I’m using, too, and it works really really well.
I added a BBQ felt seal around the inside at both ends to give a tight fit to the GF and to the booster fan. I use gaffer’s tape to hold it onto the back of the GF (though it is a pretty tight fit otherwise).
Any one of these will work. I used a bit of hot glue to hold the felt on as the sticky back on the one I happened to have on hand (I have a Big Green Egg) had long ago ceased to stick.
1 Like
Did you cut yours down? It stays on a lot better. (Whipped out the Japanese pull saw this morning to cut the other one down as a spare - the tubing just screws into the outlet so no end-cap needed on that side.)
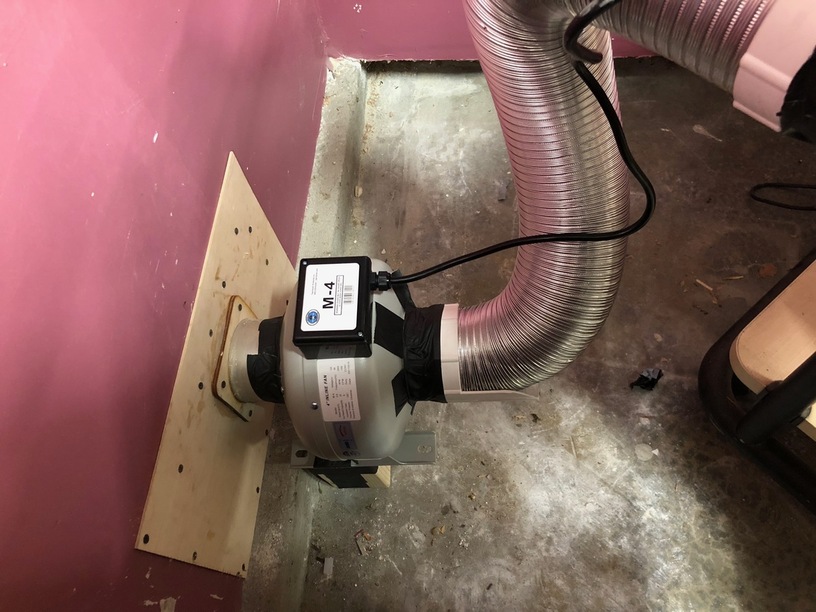
I’m also using this fan as a booster at the interface between hose and wall. It serves two purposes.
(1) As the name implies, it boosts the airflow during cutting and really doubleplus ensures that everything nasty goes outside. Since I have a flapper style vent, it also ensures that the flaps and the bends in the hose don’t restrict the flow in any meaningful way.
(2) I leave it running after cutting and it eliminates any residual burning smell quite effectively. I’ll even leave it running for a bit when the GF is off to allow the campfire smell in the crumb tray to dissipate if I’ve been doing a bunch of fine cuts that leave behind little bits in the tray.
With that gasket in place, it is quite tight on the back of the GF. Tight enough that, like yours, it stays on just fine unless I move the GF, which is why I used a bit of gaffer’s tape to hold it in place.
It is also super tight on the fan in, again with gasket in place, but I really like using gaffer’s tape. In fact, my wife gave me gaffer’s tape for my birthday. 
3 Likes
If I missed a comment I was speed /skim reading.
Unless you can see smoke coming from the lid sides or there is more than 1/4 in gap with the case (which would set off the lid open sensor) that is not the reason for smell or fumes. The fans create a negative pressure inside the enclosure so air is actually coming in through any small gaps due to lid not closing 100% in line with case.
If you see or can smell fumes while operating specially heavy engraving they are most likely to be coming from the bottom front lid which means it needs to be cleaned. (Know from experience, most likely a clogged honey barrier behind fan)
If that is not the case you’re exhaust line is leaking somewhere along the line and needs to be sealed. (As mentioned by others) or exhaust is coming back into room via nearby window or door.
1 Like
Thanks for reaching out. I’m glad you contacted us about this.
Even with proper filtration, small amounts of smoke and fumes can enter the air around your Glowforge, producing a detectable odor. You may also smell an odor when you open the Glowforge lid, even long after a print is complete. This is not harmful.
However, if you detect a strong, sharp smell that also causes eyes, nose, or throat irritation, or if there is visible smoke escaping while the lid is closed, shut off your Glowforge unit immediately. Smoke and fumes could be entering the room in excessive concentrations.
We’ve created a troubleshooting guide with illustrations. You can see it here: https://glowforge.com/support/topic/troubleshooting/print#excessive-smoke-or-fumes-during-print
If you’re still seeing or smelling excessive smoke or fumes when using Proofgrade materials, we’re here for you. Reply here or email me privately at support@glowforge.com and let me know:
- A description of where the smoke/fumes are coming from: the door, lid, or hose
- When you smell the fumes: during the print or after it has completed
- Photos of your Glowforge and your exhaust system.
It’s been a little while since I’ve seen any replies on this thread so I’m going to close it. If you still need help with this please either start a new thread or email support@glowforge.com.