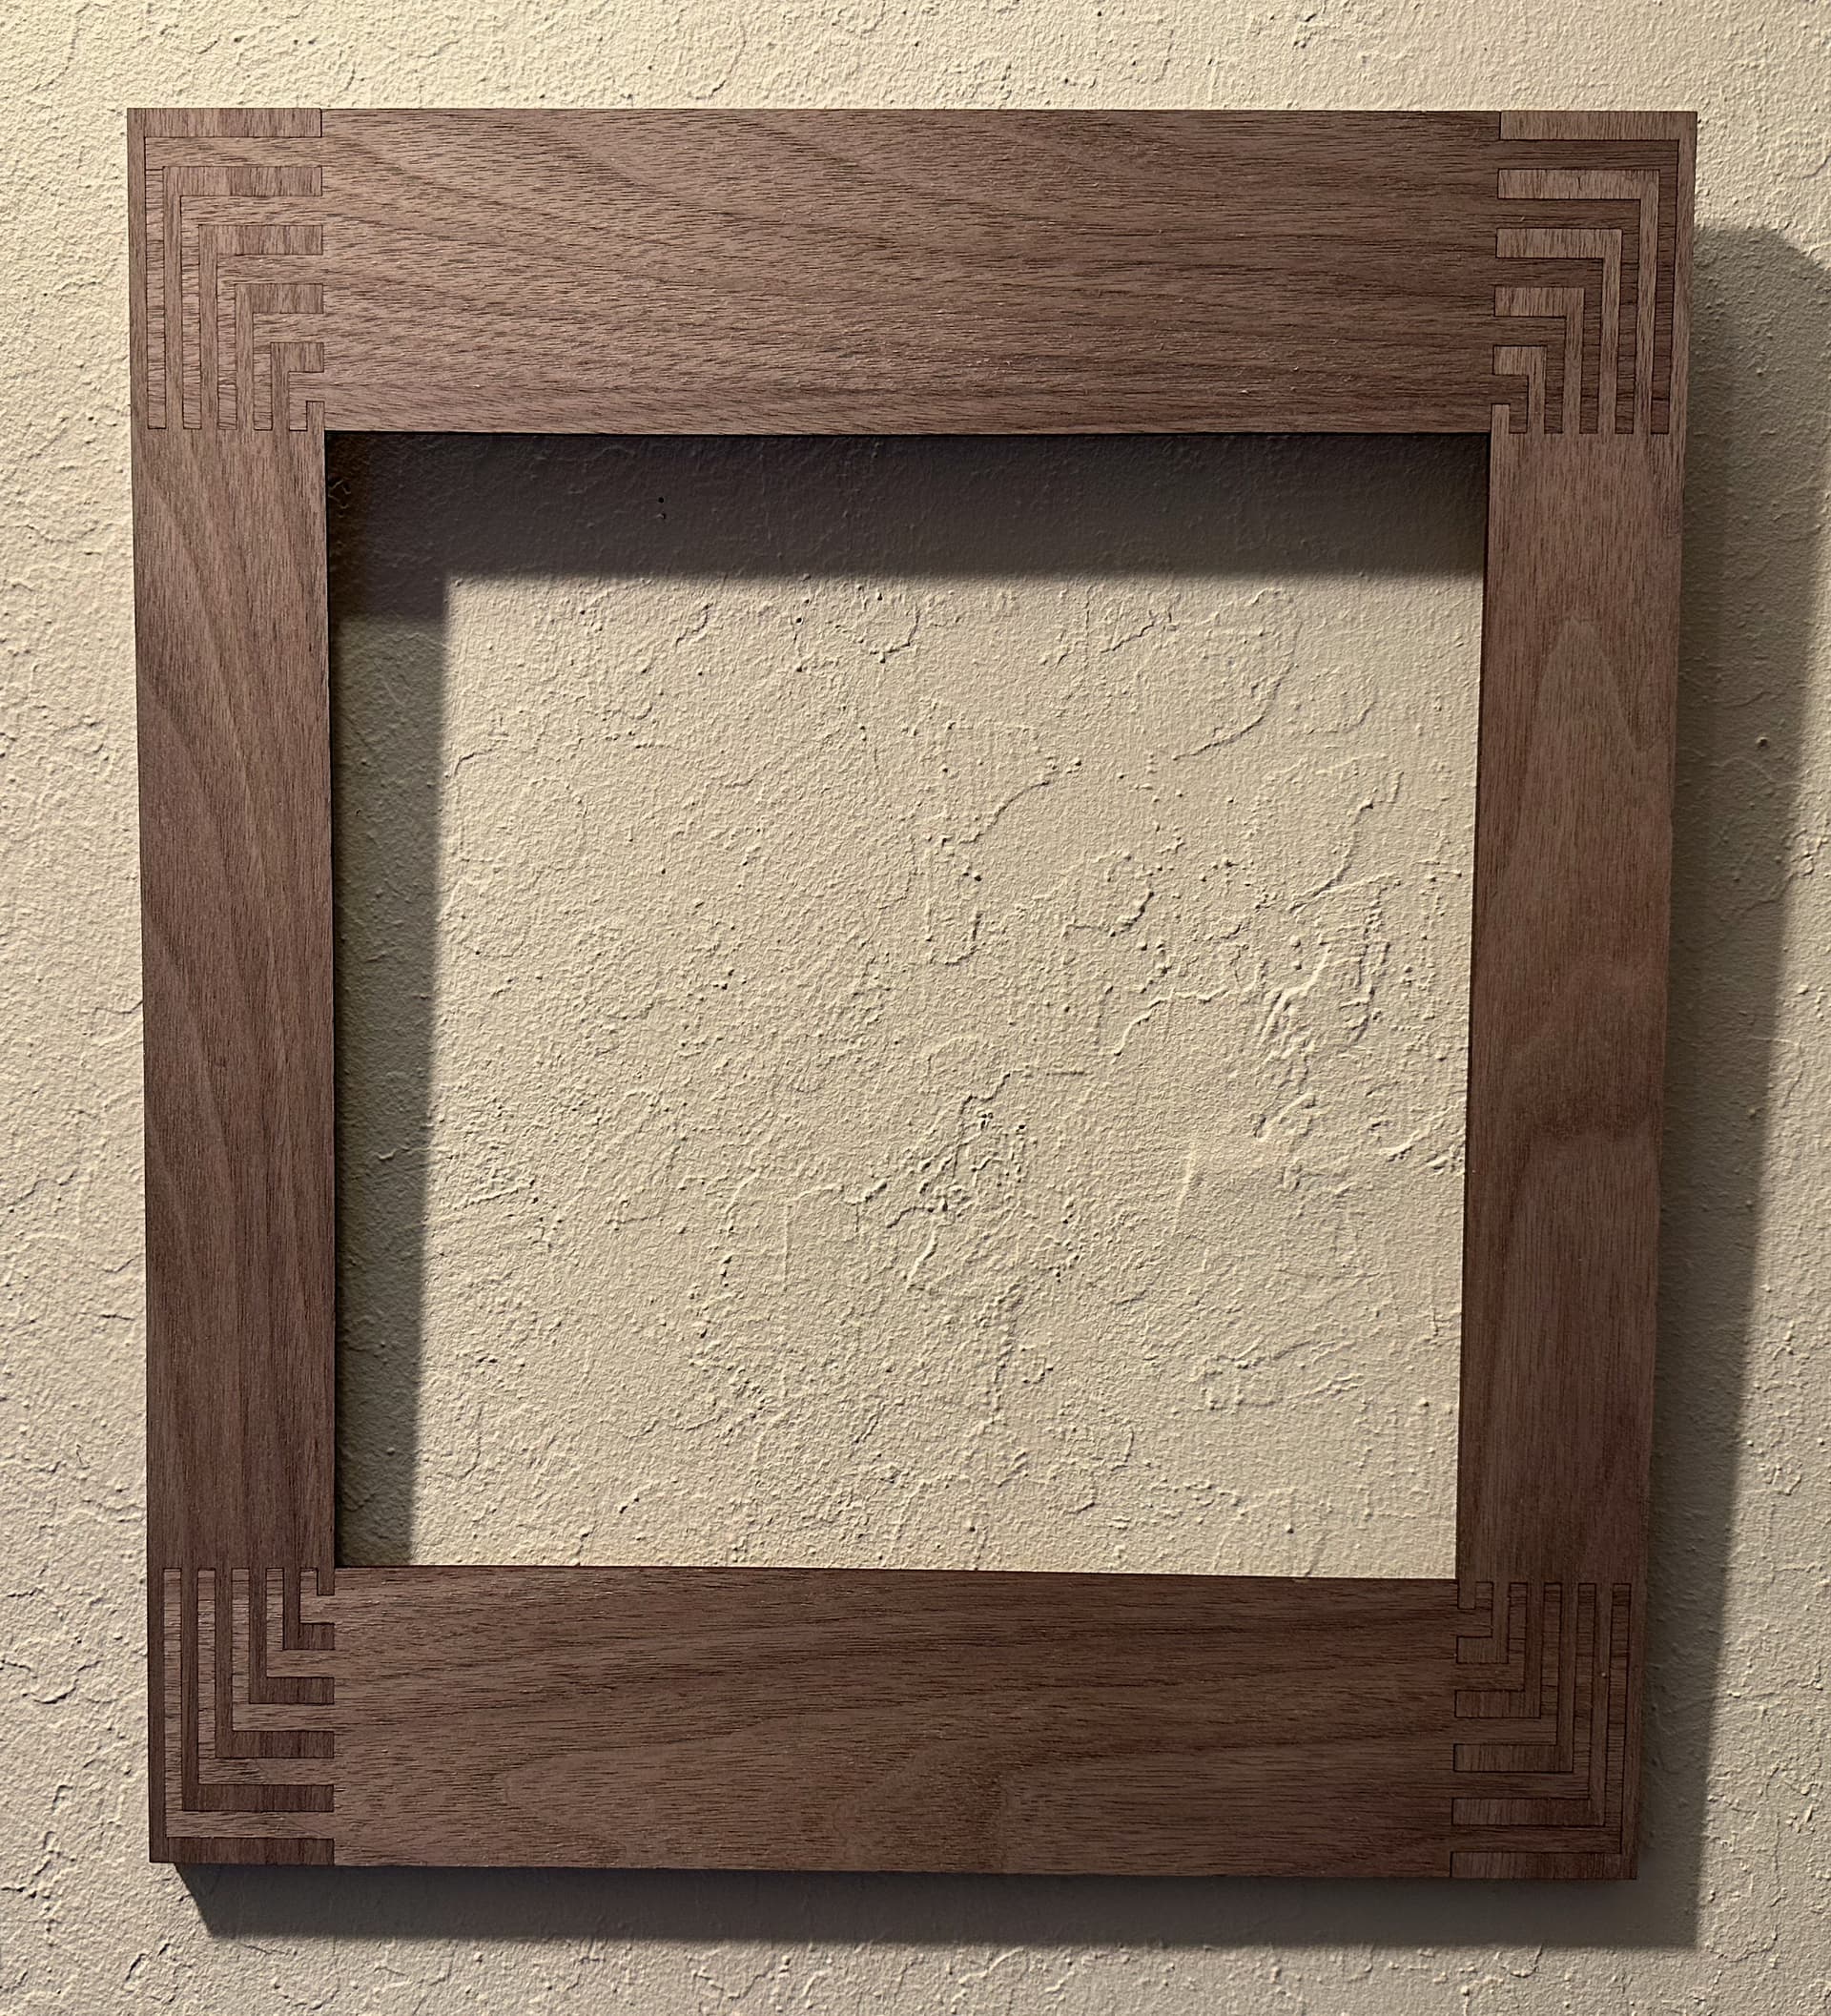
This one is more like a traditional frame, with the 8"x10" picture fitting into the back side, and a 1/4" overhang on the front side. It’s made of three 1/8" plywood layers. There’s a hole for hanging, and small pilot holes for screws for turn buttons.
The joined pieces in the corners might seem to be made of different types of wood due to the visible contrast. Not so! The difference in lightness and darkness is a natural lighting effect. Since the pieces are at right angles to each other, light reflects differently off the grain, creating the illusion of contrast.
That’s gorgeous! That planar butt jointing techniques thread is one I keep bookmarked with the idea that someday I’ll come up with a reason (and gumption) to try it!
You absolutely nailed it
Yes ! Right-click on the schematic in the original post above, and “Save”. It’s an SVG file. You’ll need to:
Separate the pieces from each other (in the file, the pieces are interlocked to demonstrate the final assembly). Make sure to drag the screw holes along with the pieces.
Apply kerf adjustment, so that the pieces will interlock snugly.