3D Printers

I like that we’re all talking about the bed when there’s also a 240ºC hot end to contend with.

But anyway, here’s a closer view of my enclosure.

This is a fairly common setup: STUVA cabinet, SINDVIK door. Some hidden LED lighting controlled by the Raspberry Pi and a relay box. OctoPrint lets you add commands, so I can turn the printer on and off right from its menus. Unlike the Glowforge, sometimes I start a 3D print when I’m not even home. Also added a temperature/humidity display. And if something were to go horribly wrong, in theory this thing is supposed to pop open and put out the fire.

9 Likes

Nice setup! (I see you’ve got your fire-stop in there…I picked up a couple of cans of those to use but never bothered to install them since I usually monitor prints…even long ones.)

2 Likes

I got my first 3D printer earlier this month. It is a Mini Delta from Monoprice. It was around $160 with two 1kg spools of PLA. I have been printing things every night. I had a few problems with transferring file from my mac to sd card. But I soon downloaded and installed octopi on a raspberry pi zero, it has been perfect.

The workflow could not be easier. I either download .stl’s from thingaverse or use tinkercad in one tab, then switch over to octoprint in the other tab, upload, slice, and print!

1 Like

See if the 3D printer has a dedicated forum and then check to see how people react when/if someone suggest something about the 3D printer is imperfect. Having a customer-base who are unwilling to peek out from under the covers of their confirmation bias is a very bad sign.

2 Likes

My biggest concerns for a new 3D printer are reliability, print accuracy and the ability to use a wide variety of filaments. It’s probably best to check out reviews or user forums for a particular printer to judge reliability and accuracy. There are a few options to look for to maximize versatility. My first printer was limited to ABS filament due to proprietary filament cartridges, and was frustrating at times because of the difficulty in leveling the bed. I bought it because it was the first pre-assembled printer to sell for $500, and didn’t research it thoroughly. These are the things I would look for now, in no particular order.

All Metal Hot End - Some filaments require higher temperatures and can’t be used with some hot ends that contain non-metal parts. An all metal hot end should take care of any temperature limits.

Heated Glass Bed, easily leveled - Adhesion to the bed is critical to a good print, and most common filaments will adhere well to a heated glass bed. If glue or tape is necessary, glass makes for a nice flat surface to apply it. A level bed plays a big part in adhesion, so the leveling process should be precise and quick. The process of leveling the bed in my first printer was tedious, repetitive and could take an hour to get right. It was by far the most frustrating part of printing. Printing became fun again when I upgraded to an Ultimaker 2 and could easily level the bed in just a minute or so.

Reliable filament feeder - The filament feeder can limit the types of usable filaments. I couldn’t reliably print flexible filaments on my Ultimaker 2 because the feeder mechanism would sometimes chew up the filament to the point it couldn’t be fed forward. Flexible filaments are difficult to print especially with a printer that uses a Bowden tube (i.e. the feeder mechanism is separate from the print head and feeds the filament through a plastic tube into the head), but it had issues with other soft filaments like BronzeFill and nylon as well. I’ve since used a kit to upgrade the machine to an Ultimaker 2+, which addressed the feeder problem as far as I know, but I haven’t tried flexible filaments again. Check reviews and user forums for any known feeder problems. I should have been a little more diligent with the Ultimaker 2, the feeder mechanism was a known issue.

Easy access to the print head - Clogged nozzles can be an issue, particularly when switching between filament types that have different print temperatures. Using cleaning filament can limit clogs, but sometimes it will probably be necessary to use the Atomic Method. This requires feeding filament manually into the print head, so easy access makes the process easier. The ease of changing the nozzle is also a consideration. On some print heads the nozzle can simply be removed with a wrench, while others require some disassembly to access the nozzle. I’ve never had a clog so bad that I had to remove the nozzle, but it’s a possibility. And the ability to easily change to a different size nozzle can be useful in some cases.

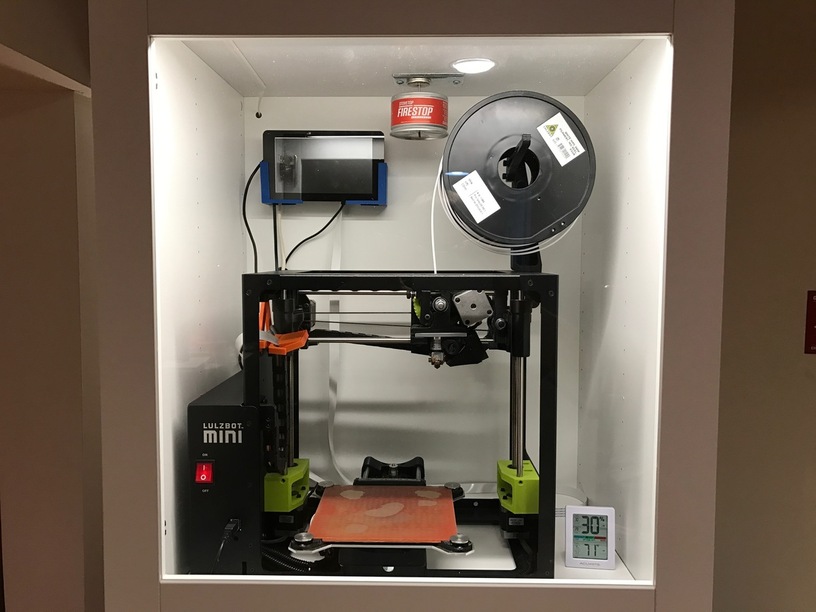
An enclosure might be a consideration, but I wouldn’t rule out printers that aren’t enclosed. As others have pointed out, it’s pretty easy to build your own. In addition to being safer, an enclosure can help prevent warping when using filaments like ABS or nylon.

Hope this is helpful and I didn’t repeat advice others have given, I didn’t read all of the replies. Whichever machine you choose, that first successful print is going to be a thrilling moment.

6 Likes

Thanks @johnawerner! I appreciate your insight. Having a bunch of folks repeat things is a good thing. It helps bring themes to light as well as big watch outs. I have a list to go through! I am excited to get into the 3D printing game and can’t wait to get the choice done and have it delivered!

up front I will say I dont have a problem …

I own a Cube X 3D printer (British version of the makerbot) good prints but required there filament which cost 4-5 time that of hatchbox off amazon. Price of the printer was a huge investment. breaks and issues I learned to fix my self.

Up2 3D printer. Kit never was able to get to work and some of it was my lack of know how on tuning at the time. Then it just starting falling apart. Cheap price

M3D: small print area 1st failure was within 1st month and PET feeding tube clogged and replace didnt happen again. Cheap price, drag in drop printing. Slow

M3D Pro (new bigger build area) lot of features were missing, had lots of shifting. Once fixed the few issues I had with it it worked for a month and choice of repairs are send it in or do it myself (its back at M3D shop for board replacement )

M3D micro+: 13 year old daughters printer. She learning still small build area and I also used it to do test print for a 3D printed airplane (working on landing gear wheels and flex printing).

Prusa Mk2s: This is the work horse in the house. 1/3 the cost of the cube and even though I have to fix it myself. It done better prints than any other printer I used. I am getting the 2.5 upgrade and MMU (multi material unit) .

I am looking at taking spare parts from different failed printers and from the Prusa upgrades to make a Mk2s MMU harbio version.

I also own a PEN for doodling in plastic (good for small fix’s in prints off one of the M3D printers.

over all I have about 9 printers in some form of failure to working.

3 Likes

Thanks for sharing all your insight and experiences. I appreciate it. I am seriously considering a Prusa MK3 + MMU. This looks like an exciting printer from a reasonable reliable place. Just curious, what software do you use? Does your daughter use a different piece of software? I am curious as I am interested in introducing 3D printing to my son and I want a good piece of software for him.

The M3D has its own software and the Kid just gets things get thingiverse. its a cheap 200.oo printer.

If your just starting wait a bit on the MMU. It is good to learn some of the steps 1st. MMU is more fidgety.

Drawing I use the program that came with my Cube X (its a cheapers version of Solidworks and some things are easyer to do in solidworks). Its one I learned 1st and have the most exp using. I did get a copy of solidworks last year but haven’t spent enough time in.

for Gcode, I use Slic3r PE and mixmasher. Cura I am starting to poke around with as I want to adjust some of the airplane files I have and thin wall printing not working with Slic3r and 3dlabprint files dont work with it.

1 Like

With all respect, these points are great for a user going for an advanced printer. For a first printer, I have to disagree on several points:

  1. All metal hot end - not needed for most filaments. When you need temperatures more than 300C you are getting into advanced materials and you really need to be aware of what you are printing as many of these higher temperature materials release some nasty byproducts during printing.
  2. Glass print bed - PETG is known to break glass print beds unless perfectly prepared. I suggest a PEI print bed instead, as it will work with nylon, ABS, PETG, PLA, and polycarbonate. Many PEI sheet printers have removable sheets so that you can flex it to remove the print. A glass sheet requires a lot of care to remove your prints without breaking it, is more expensive to replace, and can provide a dangerous situation when it does break. There are advantages to glass with certain materials, but for a beginner user these are not worth the risk in my opinion.
  3. One of the reasons I like the Robox is that it is a Bowden style printer that will feed all of these materials, and doesn’t need adjustment between materials due to its unique extruder design. If you want to print filled materials, you will also need to look at a steel nozzle as the brass ones will wear out in a hurry.
  4. I agree on this point completely. If you are just looking to change between large and small nozzles, the Robox will do it without touching the software. If you want to change nozzles frequently, you will have to be able to hold the heat block steady while you wrench on the nozzle with the whole unit hot. The Prusa isn’t good for this; I drilled a spanner hole in the back of the heatblock on my latest one so that I can stuck a screwdriver in the hole to hold the heatblock.

One thing to keep in mind on the Prusa MM is that you will end up wasting material due to the wipe tower.

4 Likes

There are many different options available nowadays, as you’ve probably figured out. My take on the classes:

High end and open. I would put things like Ultimaker, Lulzbot, etc. in this category, as well as the printer I have (and recommend!), the MakerGear. Generally, all these models are solid, tweakable, and you are not limited in what you can feed them. They are also, relatively speaking, in 2017, expensive. They also all, to one extent or another, require experimentation and learning how to use them.

High end, closed. I’m thinking here of the Zortrax M200. Closed ecosystem, custom software, you must buy their filament. I guess the Cubes also fall in this category. On the downside, the flexibility of filament choice is limited since you must purchase from the manufacturer, and they are generally more expensive than bargain brand options. It’s as if the Glowforge would only accept Proofgrade. But on the upside, since they have control over every element, they can optimize the heck out of everything and are a lot easier to make Just Work. I have a designer friend who has experience with 3D printers and has no problems dealing with any of them. He got a Zortrax, and has put hundreds of hours on it without a single failed print. Also generally pricey. Oh, and I guess MakerBot also belongs in this category, although their latest models have had many teething issues and they have taken a reputational hit.

The Cheap Ones. Lots to choose from if you want to get your feet wet for ~$300: Monoprice, Printrbot, FlashForge. For slightly more, like $500-700, you can get things like a Prusa or the Dremel. Options and features vary, and you need to do some research. One thing that’s kind of confusing is that many of the branded printers are really just relabeled Chinese printers from Wanhao or Flashforge. For instance, I believe the Monoprice printers are rebadged Wanhaos, some of which are modified Prusa designs, and the Dremel is based on a Flashforge printer. But you can get a working printer for crazy cheap these days, like $160 for a Monoprice Select Mini. If I had that option a few years ago when I bought mine, I might well have gone for it. Limited build space, questionable support, may take some work to get good prints, but 10% the price.

3 Likes

For what it’s worth, I just got a discount/promo code from Fry’s on the Dremel 3d20 Idea Builder Printer.

$899-$250 discount = $649 w/ free shipping

https://www.frys.com/search?query_string=8546999&nearbyStoreName=false&site=16email110917

Discount code is: 7446915

Price Good Through 9:00 PM PST 11/11/2017

2 Likes

Thanks @jbmanning5! I will check it out. That is a pretty god deal it seems.

After reading your comment I found a used like new RoboxDual on my local craigslist for essentially half price with additional filament. I previously had a Prusa mk3 clone, that I didn’t use often at all because it it took forever for the bed to heat up, the bed was always misaligned, and it was difficult to change filaments.

The Robox has been great so far and it just works. The only issue I have is related to control over the slicer because I’ve printed some things that were awfully inefficient.
Thanks again for your comment.

1 Like

I am glad it works for you. If you have questions about how to use it or anything else, please open a support ticket at www.cel-robox.com/support and the support team will assist.

1 Like

I get 2mm picture glass cut to size by a glass shop on the local high street for about £3. I can get a lot of those for the price of a PEI bed!

Glass bed printing with ABS is a game-changer! Occasionally adhesion is so good the glass flakes off on parts that have large areas of contact surface.

1 Like

I was 8 years old when a friend we were living with decided to build a HeathKit color TV. He was an electronics tech planning to start an electronics repair shop (this was ‘68, so repair was actually a thing!)

He had me help. I learned to read resistor codes, helped sort capacitors, diodes, transistors, etc. 49 years later, I still remember this.

Seven is likely old enough to share the build with your kid. It can be a truly bonding and memorable experience.

Just my 2 cents.

3 Likes

I have lots of PETG prints with glass flakes in them (I use borosilicate beds with WolfBite on them). I found if I lay glue stick over the wolf bite it doesn’t flake.

2 Likes

I tried glue stick. It never worked as well as ABS wash for me. I use plate glass. As I have a near unlimited supply. I’ve wanted to experiment etching a pattern onto the glass, just haven’t got to it yet.