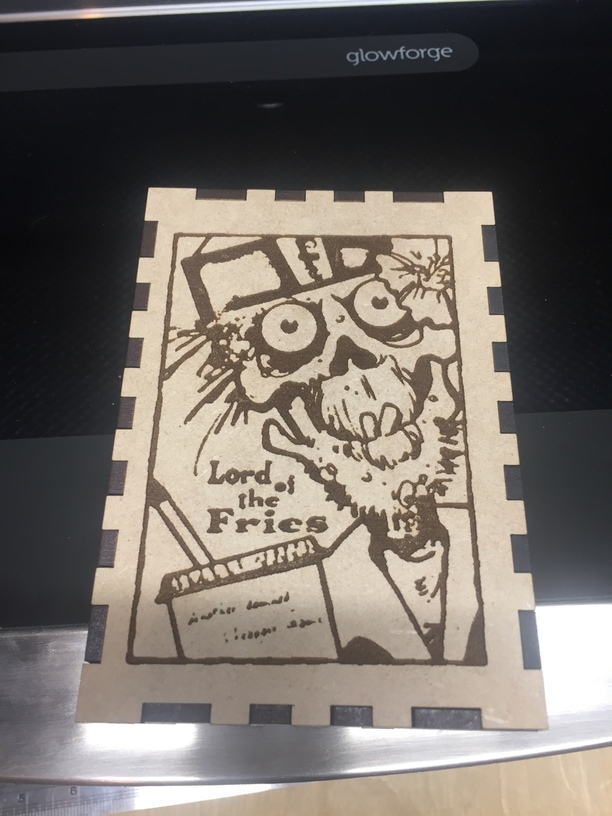
One of my most desired uses of my glowforge is making boxes for games that don’t have a box, or have a bad one. This is actually my second attempt at doing that, for an old Cheapass version of Lord of the Fries.
Quite a few years ago, they sold very inexpensive games that game in very low cost packaging and made you print off some of the pieces or repurpose them from other games. Lord of the Fries was one of those with cheap packaging, it was basically a paper bag. Not great for transportation / storage amongst the other wall of games.
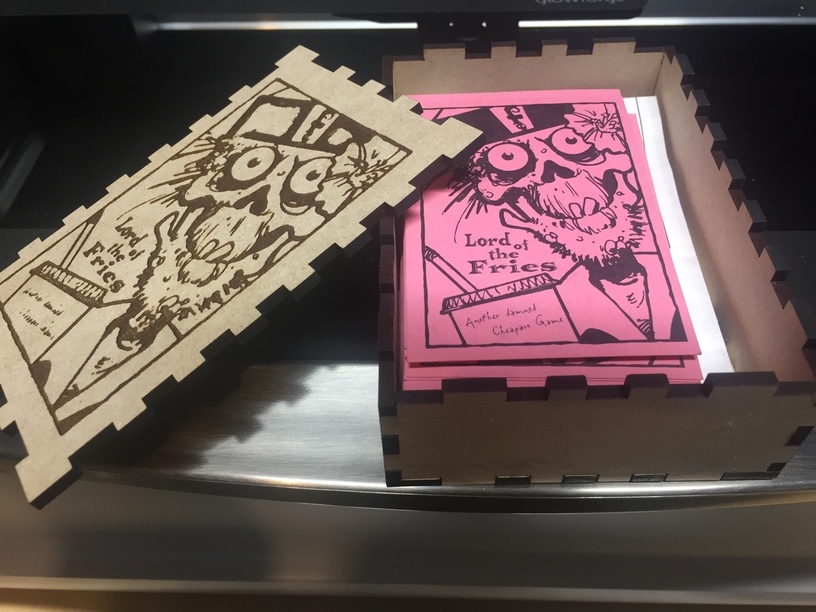
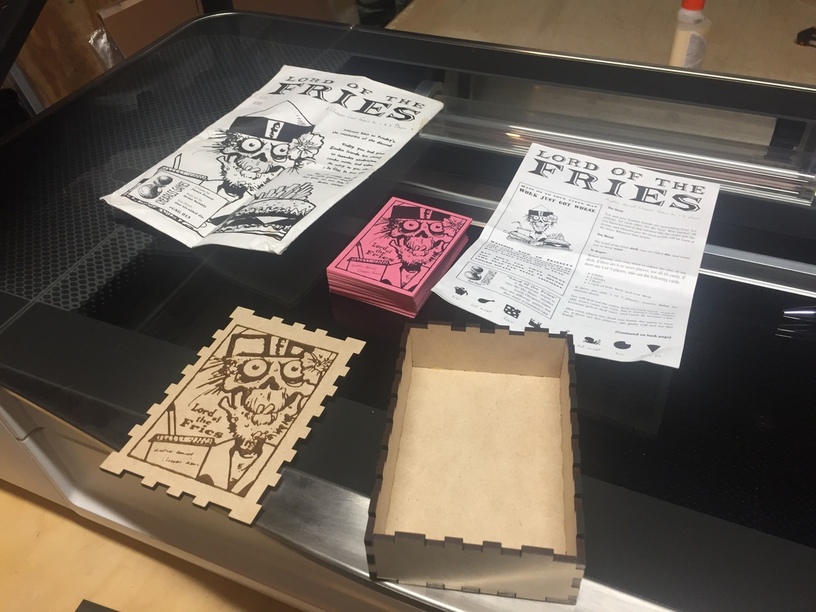
So, I pulled out my calipers, measured the cards, instructions, and old bag, and whipped up a box design for it all. I took a scan of the card back and engraved that on the top of the box to serve as an identifier. I think it turned out great, and I’m going to try working on a few more boxes next. I’ve especially got ideas on how to improve the lid.
I think he said it was a scan? I’ve found the trace feature tricky to use. Your graphic has to be just right, and can’t be on colored paper or must have large borders so you can select within it. The cut boundary has to be bold enough to register as closed, and any imperfections or shadows outside of it will be engraved. Hard to click to remove specks.
That said, it is situationally useful, but for most things I think a trip through a scanner and an added vector cutline works better. Make sure to output SVG with a high raster DPI or the scan will look all blocky.
The trace feature will be much much more useful once they have the camera registration issues worked out, so that you can cut exactly over the drawn image.
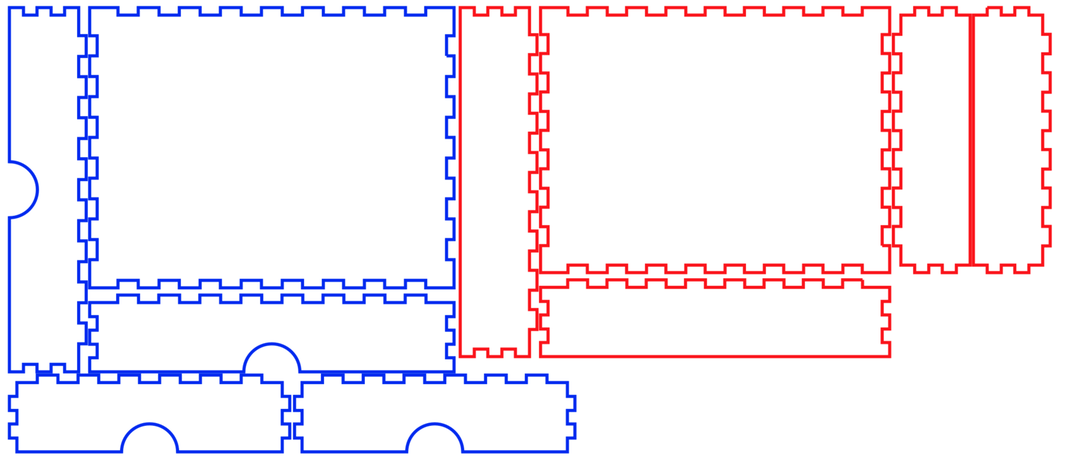
I’ve been designing some boxes for projects I have planned and the design I’m currently working on is a two-piece design where the lid and bottom are two separate boxes (five sided, with one side open) where the lid is a bit bigger than the box so it can fit over it.
I’m also putting cutouts in the sides of the box so you have something to grab easily with your fingers. In some cases it might be cute to engrave something in the bottom piece to peek out through the opening.
Example: (The bottom part of the box is red; the lid is blue.)
Note:This is intentionally not SVG because it’s not tested and would need to be modified for kerf and material thickness, so I don’t want anyone trying to actually use it. I hope to make a box-generating CGI for these at some point.
It was actually/technically a trace in GF parlance. I’m sure if I used my scanner it would have turned out better but the trace was good enough for this use case.
It looks like the top and bottom portions of your box are the same height right? I’ll probably try that at some point, but even with the medium thickness materials I feel like it would end up being too thick for my tastes. I wish there was some thinner proofgrade, but I can get thinner hardwoods and use them probably.
I’ve been using makercase.com for my raw box layouts, and a lot of trial and error to get things just right. Mostly it’s been error due to width/kerf adjustments not making sense.
I went to a cigar store they other day and picked up a couple boxes there so I can use those designs as inspiration for my own.
Yes, the inner dimensions of the box will end up being about 1/2" smaller than the outer dimensions. I also have some designs where the bottom is much deeper than the top (probably don’t need the finger hole cutouts on those).
I may also end up cutting chipboard boxes and folding/gluing them into shape.
One of my first sets of projects will be to make game boxes for games that either need more structure (Gloomhaven) or have too many parts and are hard to travel with (Dominion & Expansions… looking at you).