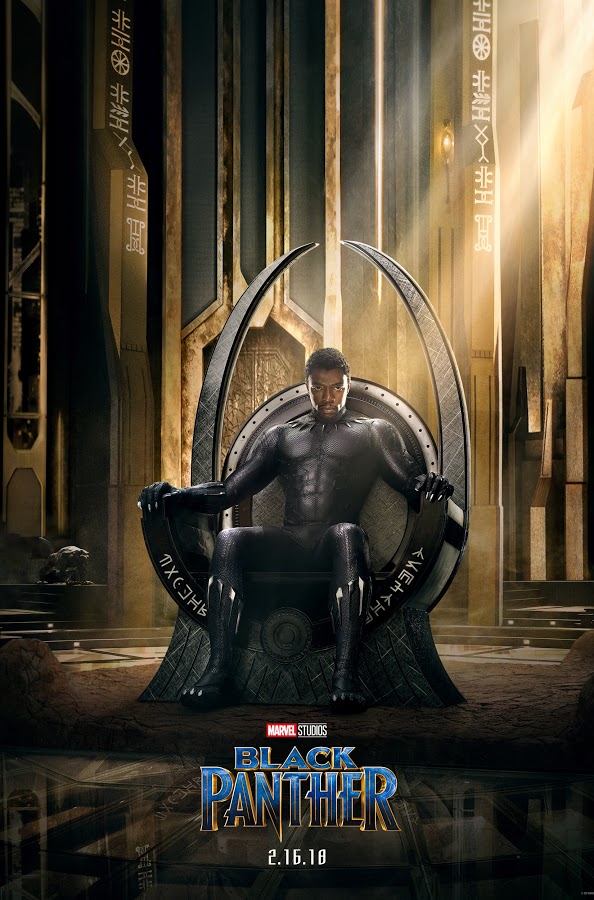
So me and my brother are both avid collectors. I’ve been primarily focussed on Transformers for the last 30 years but my brother has spread his wings and has stepped into the real action figure pool. A few years ago I gifted him a real gallery quality display case and it’s done wonders. Now we’ve alwasy been into making accessories and customizing our figures with kit or paint. I wanted to make something for him on my new laser and I found just the project.

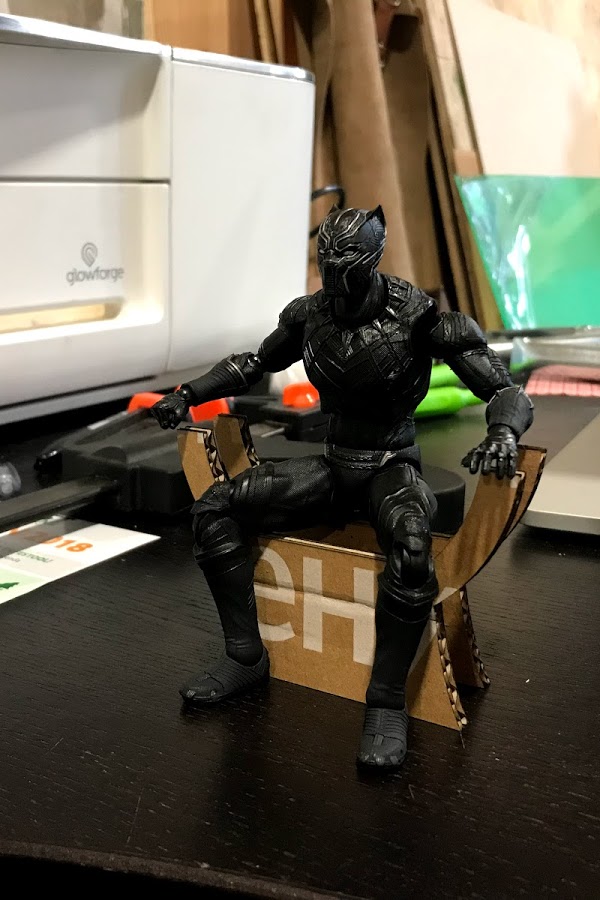
So I asked him to borrow his figure to take measurements and I found a nice model on thingiverse that would get me started. I imported the model into 123Dmake and found out after a few days that 123Dmake is not supported anymore and has since been rebranded as Slicer. Great software to slice up 3D models into 2D parts. But after my first cut I quickly found out that the model was too inacurate to continue with. However it did give me a solid understanding as to how to tackle this project and I started out drawing one from scratch in Illustrator.

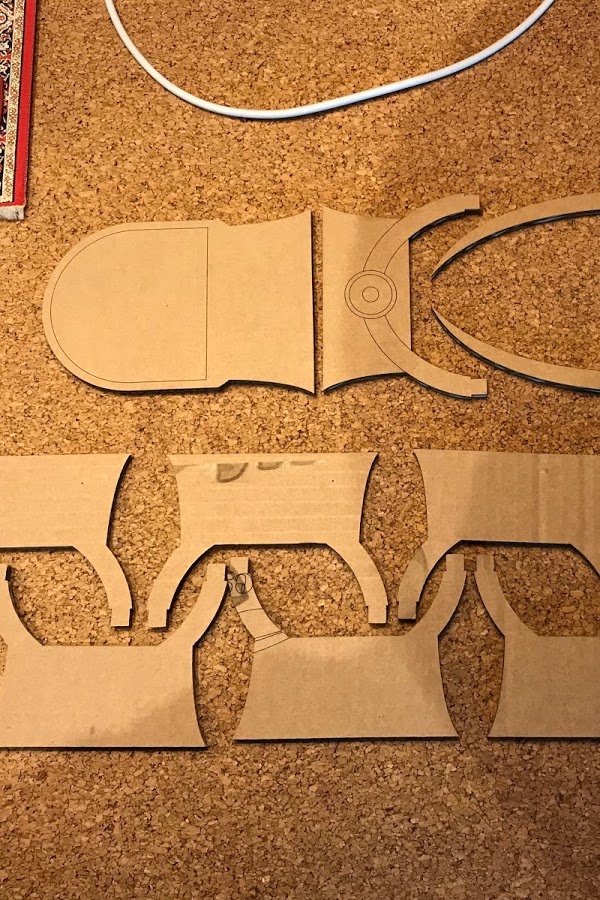
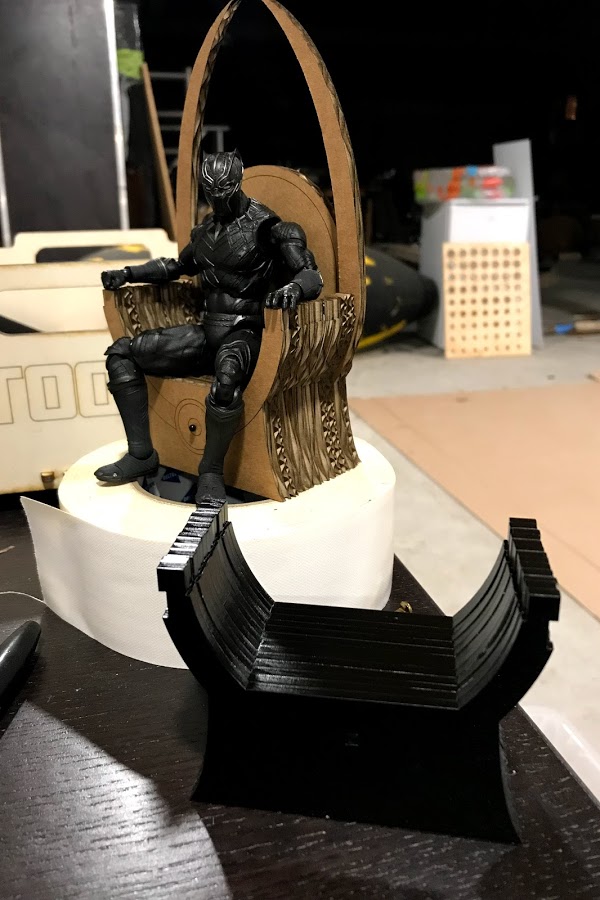
Always prototype in cardboard!
After a few trial and error cuts I quickly found some great universal settings for corrugated cardboard (175/80/1 to cut, 150/1/1 to score)

and it put together

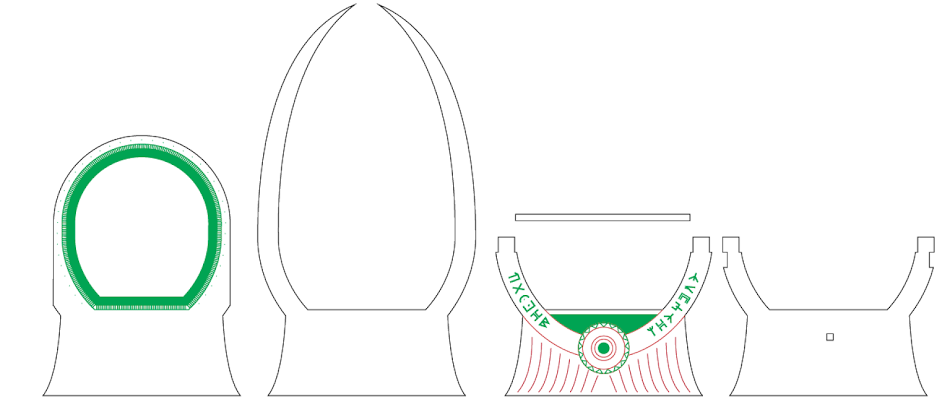
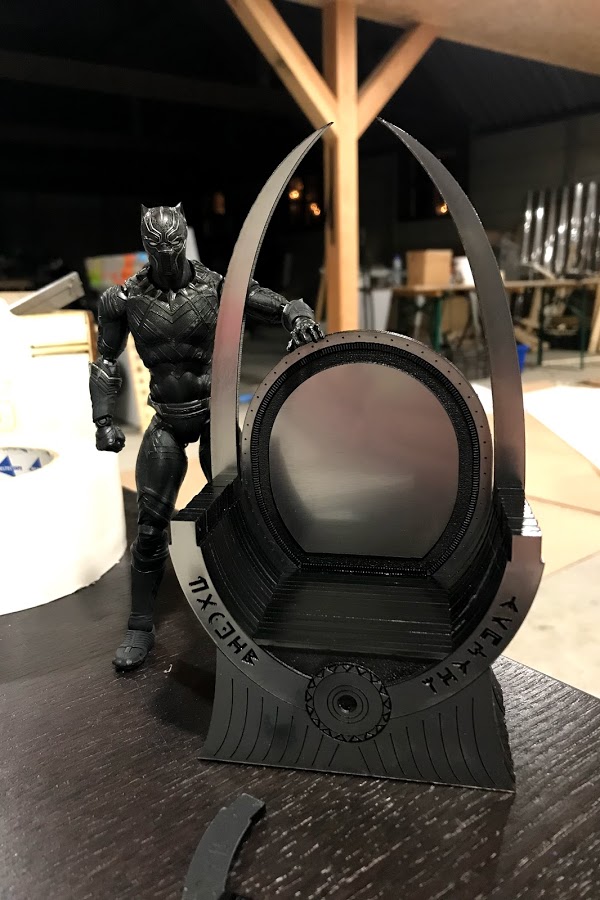
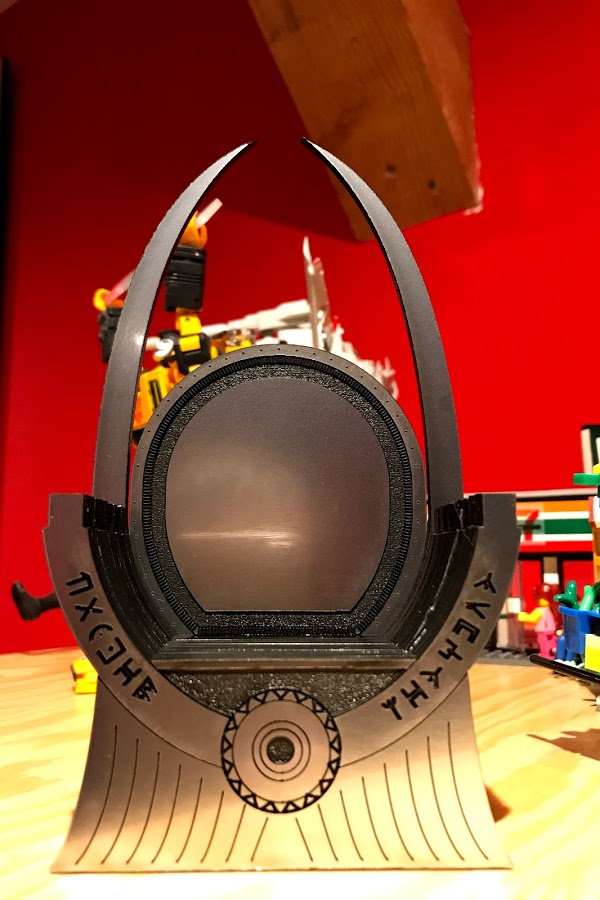
Now I was happy with the size and the construction I started thinking about engraving details. The throne has some but is not overly complicated. I went with a few score lines and an engrave for the real small details. I had to learn some new tricks in illustrator but after a few nights I felt I had drawn the best I could. Thinking about it now I could go into multiple levels of engraving but in the end I don’t think it’s necessary to pick up more detail.

Thinking in colours and layers was the new challenge.
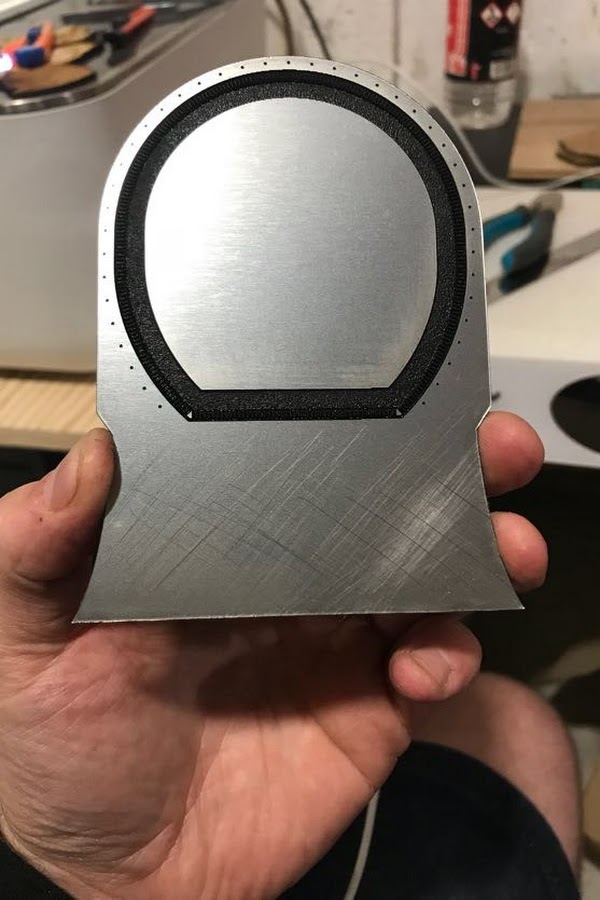
I had decided early on I wanted to make this in acrylic but I wanted to try some new material too so I bought some Rowmark metalgraph Brushed stainless plate. I hoped it was a little more obvious on the brushed side but it’s a neat product. Another night of trials and errors and I have come a long way!

Trialing in miniature size to see what my settings do to the 3.1mm Rowmark material. (185/full/1 cut, 300/41/1 score and 600/80/1/defocussed x2) Engrave without the protection foil!
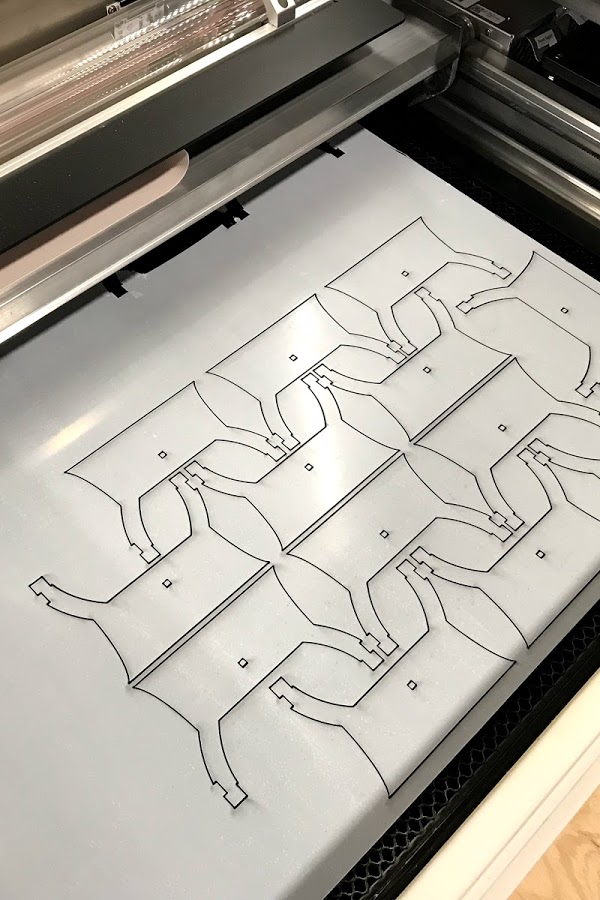
The first real cut for this project in 3.2mm black acrylic

I decided to create a 3x3mm dowel using the thickness of the material to align all the pieces. That’s what the hole in the center is for. I conluded a 3.1mm size hole (in illustrator) will tightly fit a 3x3.1mm rod (illustrator x material size)

The seat put together with the prototype in the back.

The rowmark engraves beautifully however the cut settings (185/full/1) do ignite. Not as much as mdf, but it did create flames. I tried cutting with less power but it did not go through. I also tried to recreate the meteorite effect on a hidden piece using a piece of 40grit sandpaper and tracking it across two diagonals over the material. I’ll probably end up doing this on the whole thing.

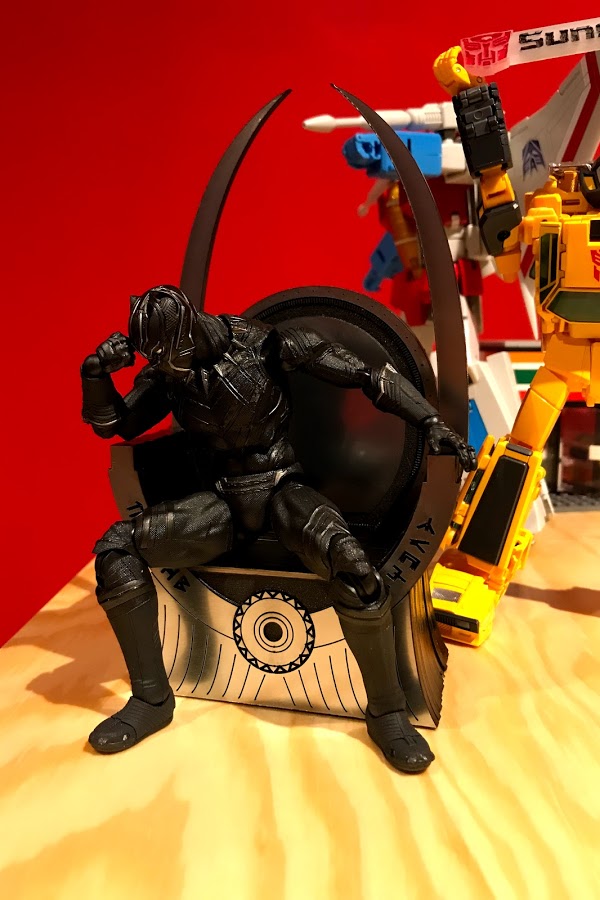
The completed throne. This is one hefty paperweight and my workshops smells like burnt plastics! I’m really satisfied with the outcome here. This went together like I planned!

The detail is fantastic.

Kitty pondering the world problems.