Adjusting for Kerf in Illustrator.pdf (711.4 KB)
36 Likes
Holy cow! I thought I’d have figure this out but Jules to the rescue. And the bonus logo is really clever.
Thanks but I can’t take credit for the logo… @johnwills , one of the Design Team members, created that for us. (Excellent, isn’t it?) 
Thanks for the credit @Jules but this one wasn’t me.
EDIT: Oh yeah, the logo. Yes, that was me.
2 Likes

This is very useful! Thanks for posting! 
1 Like
I finally got around to playing with this today, thanks for the tutorial. I had a couple of comments for future readers, specifically folks who may want to make arbitrary press-fit shapes, which also require kerf compensation.
All is Not Always as it Seems: Use “Expand Appearance”
If your shape has any effects applied to it, like the handy Effect > Stylize> Round Corners, then the paths created by Object > Path > Offset Path will follow the original shape, not the stylized shape.
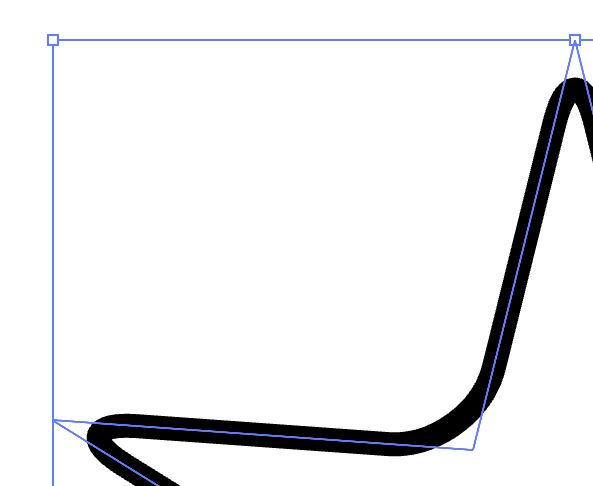
Here’s what rounded corners on a pointy star look like when you zoom in. You can see the original pointy paths are still there.
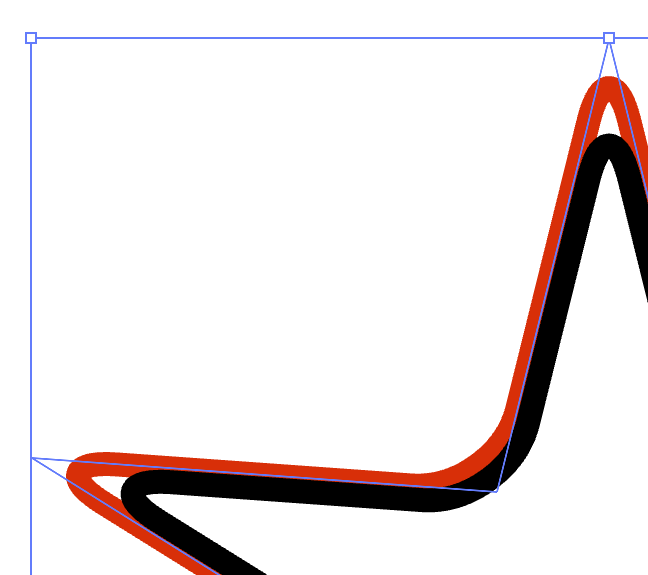
And here is what you get when you do Offset Path. It is easy to see this isn’t what we want–the offset path is not perfectly hugging the inside path.
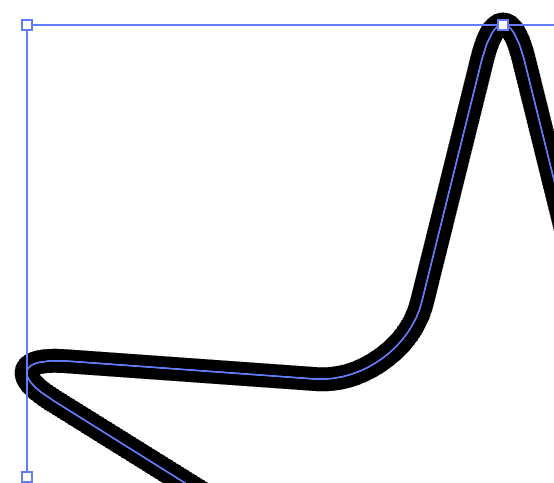
If we do Object > Expand Appearance, the path we see in black becomes the true path, and then Offset Path produces the desired result.
Offset Path and Miter Limit
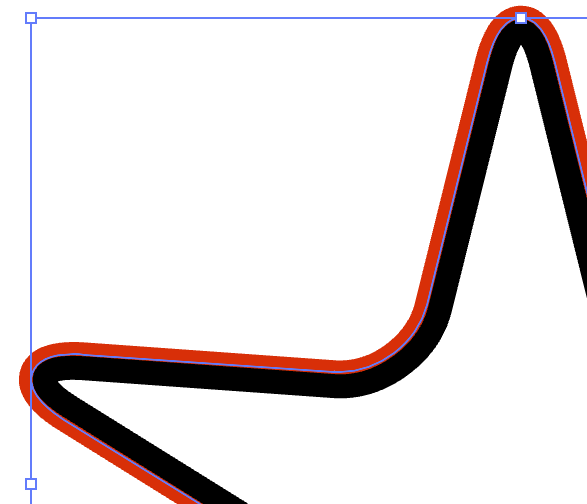
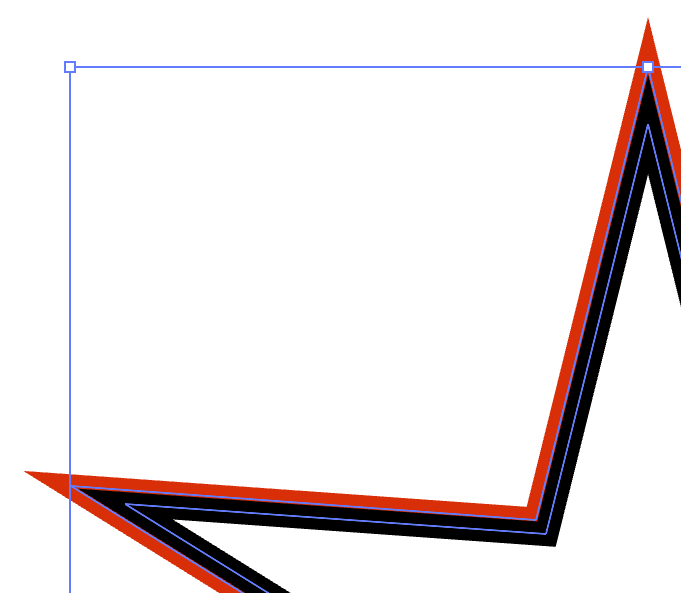
Some sharp angles may not give you the Offset Path you expect. Here’s a pointy star with an offset path in red, which you can easily see is not quite right.

The culprit here is the Miter Limit in the Offset Path dialog. It defaults to 4. If you get a weird-looking offset path, try increasing it to 16.
Press-Fitting Arbitrary Shapes
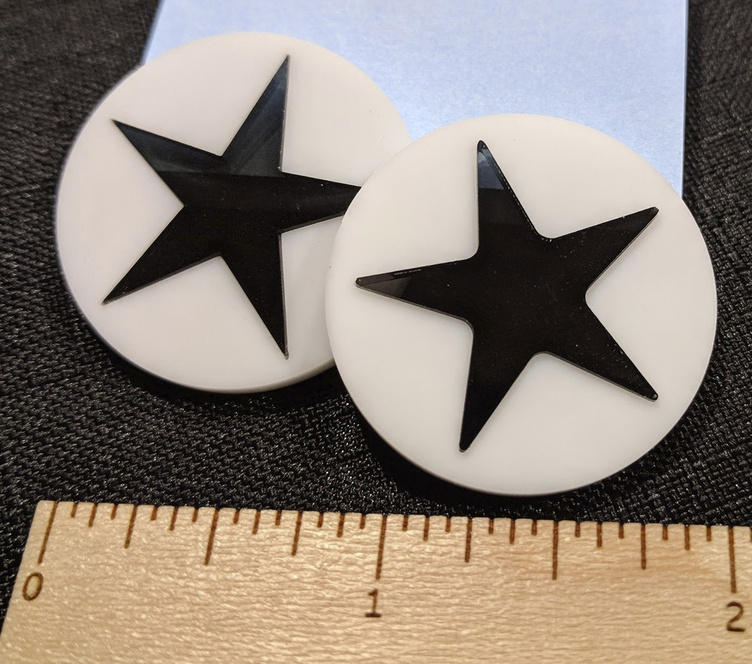
I found that to get a good tight press-fit, like embedding letters into letter-shaped holes for a sign, I still had to determine the right kerf compensation experimentally. I cut a 0.5" square box in acrylic and then started cutting ever slightly larger boxes until I found the size that fit correctly. I determined that the inner shape needed to be .016" bigger than the enclosing shape. In other words, I had to use an Offset Path of .008" to get this result:
Hope this helps someone!
19 Likes
Great Points! 
(see what I did there?) 
(There is a separate tutorial on Expanding objects in the Matrix if anyone wishes to learn more about it.)
2 Likes


1 Like
This sounds like it will work just fine. Before I found this post I was going to try a different approach. Let me know if any one has tried this. I was going to set my stroke to inside the path or outside the path and then expand my stroke. I know I’d end up with 2 paths for 1 cut but I’d figure I’d delete whichever one will make a fit too tight. But looks like adjusting the kerf by half of the cut width is a lot faster. Good thing I got a pair of digital calipers.
1 Like
Both methods work, as a matter of fact, in Inkscape you pretty much have to use stroke width to set the kerf.
It just depends on which way you prefer doing it. 
1 Like
I found this thread, like most, trying to solve a kerf issue. I am creating (hopefully) press-fit designs and have just gotten to the kerf adjust issue. I am currently working with PG Acrylic. On my first design I simply added stroke, set to center, then expanded appearance, to make the trap color ‘fatter’ so the interior shapes would fit snug. This method doesn’t seem to work well on more than one axis, especially where complex shapes are concerned.
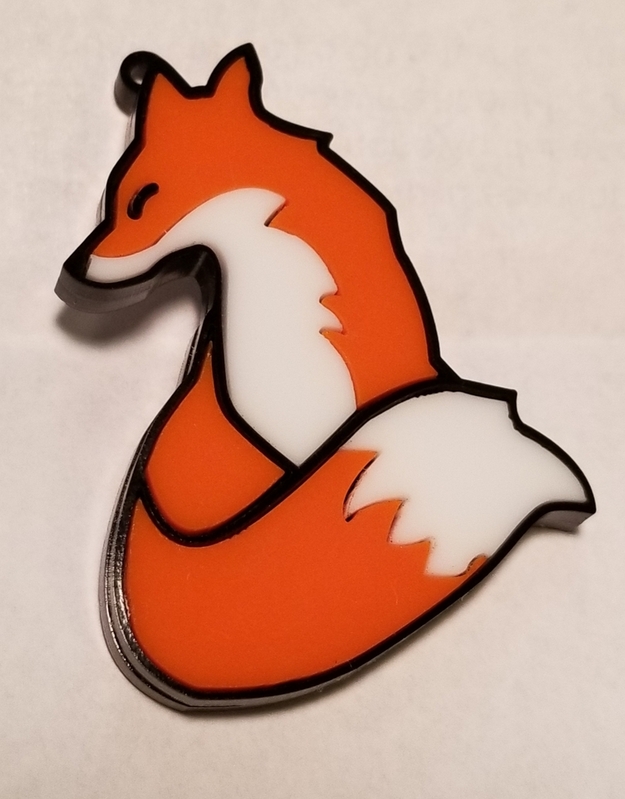
As you can see, there are gaps on X or Y caused by equal encroachment of the black trap object, as well as issues within the orange and white, which were offset via stroke as well.
In my head, offset and expanded stroke would do the same thing, am I wrong about that? I understand that expanded stroke (set to center) will expand 50% interior and 50% exterior. My assumption being that the interior parts need not be adjusted if the trap item is expanded to compensate for kerf.
Am I way off base, or just slightly missing the mark?
1 Like
You’ll need to adjust the white and orange parts relative to each other only, and then do a kerf adjustment for the black trap relative to the combination of the two other colors.
If you do a stroke related ka on the white and the orange parts, it’s going to adjust the areas that contact the black as well…the outside edges. You might need to add the outline stroke using an offset after you get the interiors adjusted. That should be easy enough to do…just work from the inside out.
(And acrylic has absolutely no give at all, you really have to nail it with the kerf adjustment being dead-on, or even a little bit loose. It’s a hard material to do insets with.)
If I follow you correctly… Let’s look at the tail of the Fox;
If I have done KA for the black on the centerline of the black, then orange and white’s exterior need no expansion… But the intersection of the orange and white do. And I should expand just those intersecting lines at 50% of the kerf.
Does that sound correct?
Yep. At least that’s what I’m seeing. Someone else might have some other method of doing it that’s easier.
1 Like