How to create a pattern in Illustrator inside a shape
Patterns in Illustrator are shapes that are repeated in a specified manner in X and Y directions. These are incredibly useful you draw 1 or more shapes and Illustrator will do all the math to keep your pattern inside any arbitrary shape.
1. Creating the pattern
In a document (separate or your final document) select the shapes you wish to be in your pattern. Arrange them the way you want them arranged. There are ways to make varying patterns, but let’s keep to the basics of a simple repeating pattern.
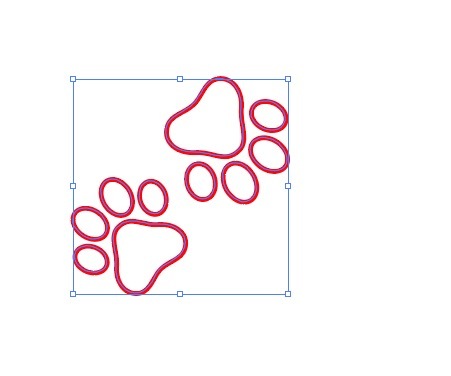
In this case we will use these 2 cat paw prints, arranged this way.
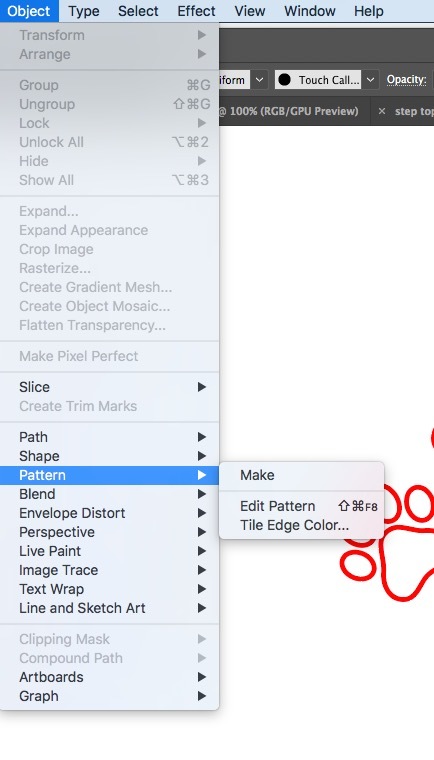
Select the shapes, and under Object, select Pattern->Make
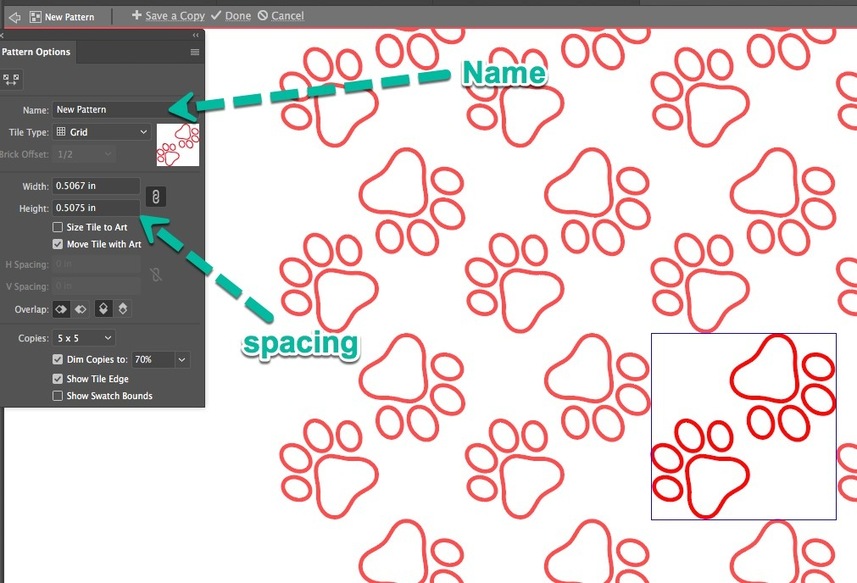
You can adjust spacing, along with other parameters of the pattern. There is a preview to the right. It is important to give your pattern a name, as later in the swatch library it will be confusing as if you have many patterns they will all be called “New Pattern”
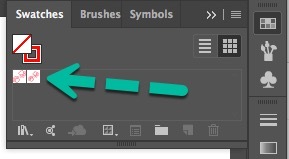
Your pattern(s) will appear in the swatches screen
2. Saving your pattern such that it’s available in other documents
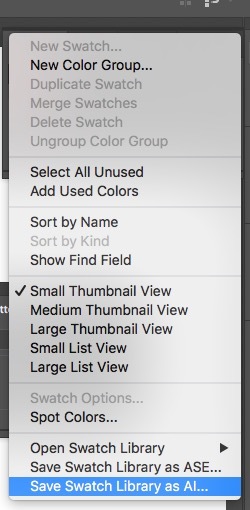
Remove any swatches from your set you don’t want to save to your library, then in the little action menu in the top right of the panel, select Save Swatch Library As AI… and let it go to the default directory.
3. Opening the library into another document
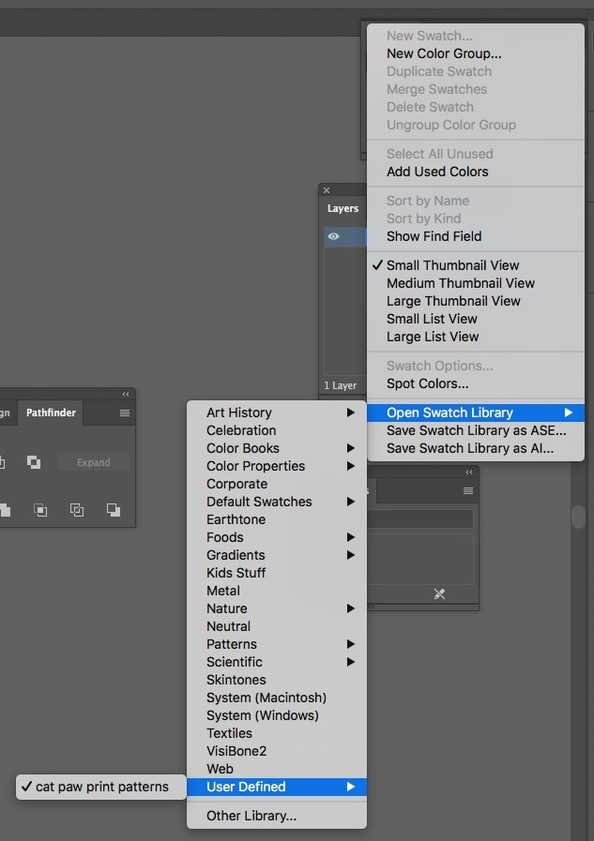
In the document you want to use the pattern in, in the swatches panel with the little action menu at the top right, and select Open Swatch Library->User Defined and select the library file you just saved
You will now have the swatches pallet with your pattern(s) on it.
4. Filling your shape with your pattern
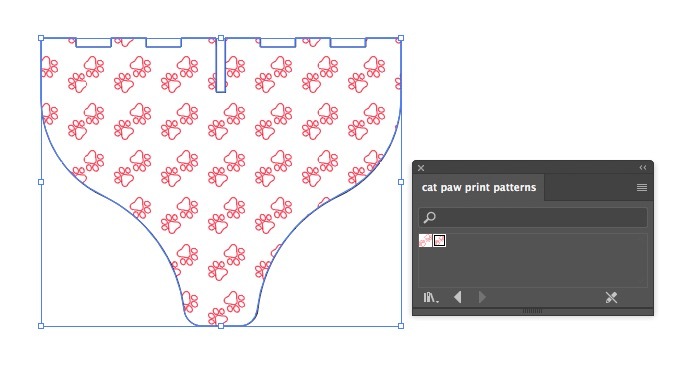
Select your shape you wish to fill with the pattern.
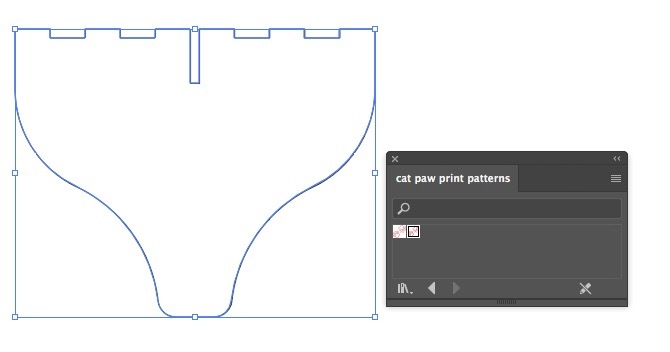
Click on the swatch of the pattern you wish to apply
5. How to deal with complex shapes
If your shape has integral holes in the part in which you wish to mask out the pattern. In the image below you note the pattern goes across the holes in the pattern.
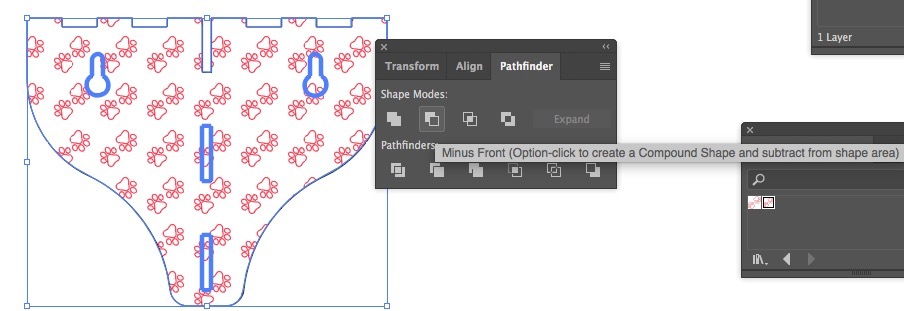
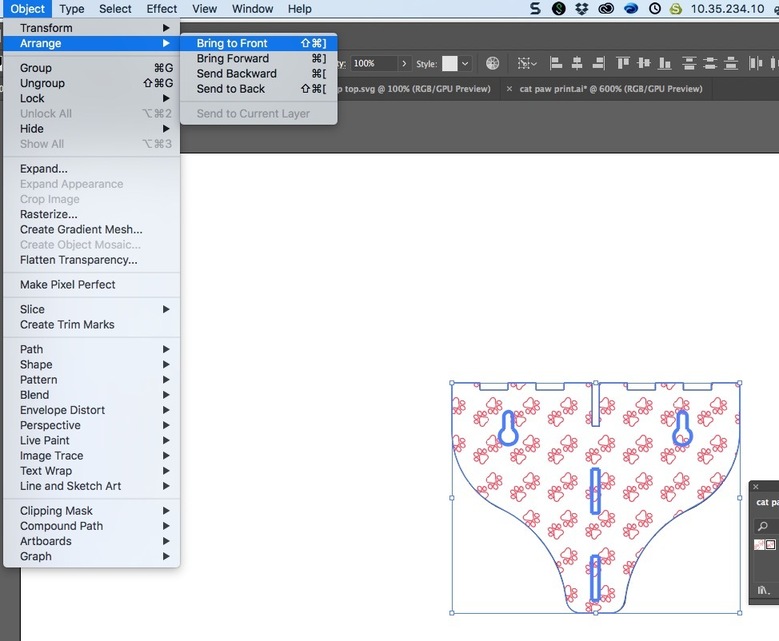
The first item you need to do is select all the parts you wish to have in the front, and select arrange Bring to front (any part you wish to mask out)
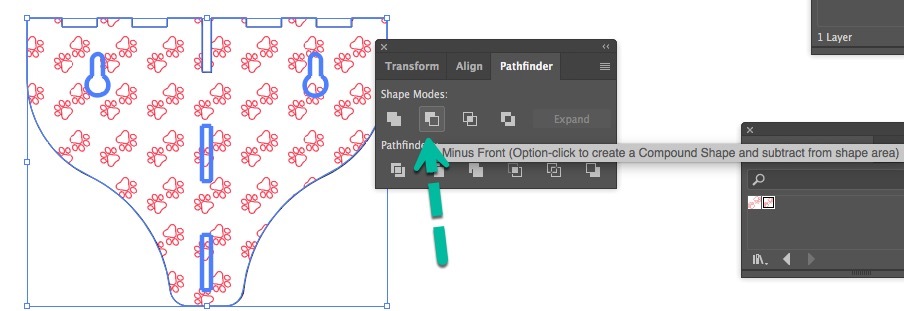
Now that the mask parts are out the front, select all the parts, and in the pathfinder pallet (window->Pathfinder) you can subtract the front:
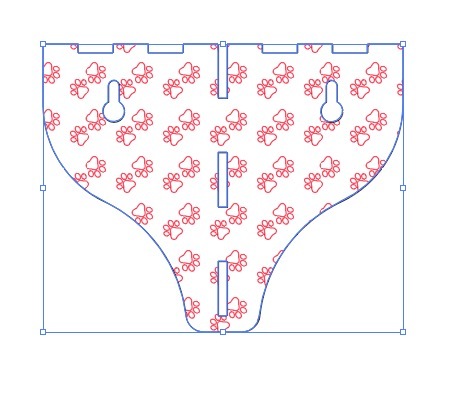
Voila
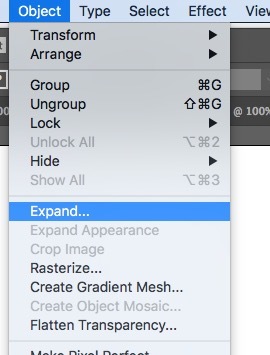
- Expanding the pattern
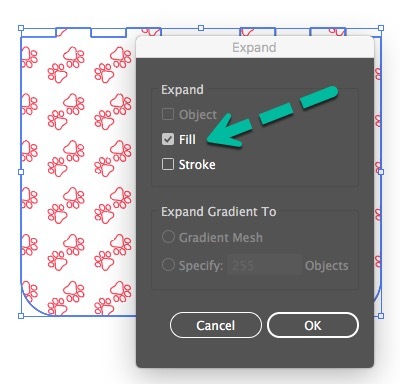
Once you are ready to actually engrave the pattern on the part, it is super important to expand the pattern. So you need to have the fill button clicked on the toolbar and under Object->Expand
Only check fill. This will turn it into regular paths as the GFUI does not support compound patterns at the time of this tutorial.
There are lot of subtle features of patterns, but this will at least get you started.