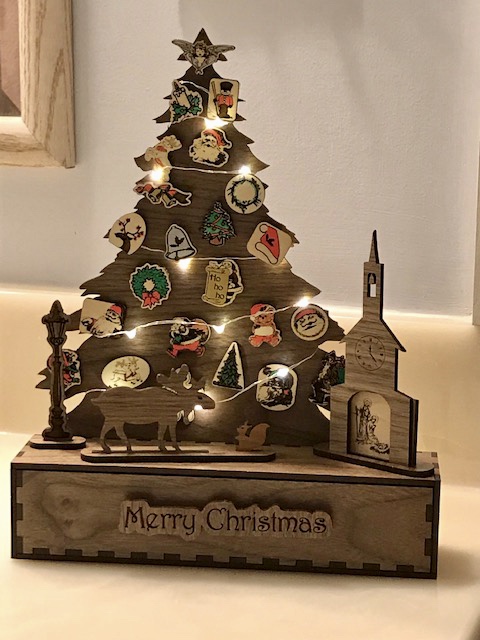
A few weeks ago my husband challenged me - why hadn’t I made an Advent Calendar yet… I’ve loved these since childhood and always have 1, 2, 3 or more going. This year, we’ll have at least two with things in it; an electronic one from Jacquie Lawson, and now this one. My husband insisted on not seeing the end result as he wanted it to be a surprise. Guess who gets to put the ornaments on!
This project has been quite the advent-ure. Had the notion to provide the files for free, but most of the ornament illustrations are svgs from https://svgsilh.com, who appear to have issues at the moment. They do allow for sharing in this manner, but I don’t feel right about it seeing as how I don’t know what their current issues are.
I spent a great deal cleaning up ornament designs and then using “linked offset” in Inkscape - thanks @mp4doggie for your tutorial. Next step was to use layers to see where to place the ornaments on the tree. Then add holes and numbers to the tree itself. The next step was more tricky. Copy the holes to become scores on the back of the ornaments and with the corresponding numbers. I wanted to cut the ornaments together in a group, and be able to turn over the group as a large rectangle, and then engrave the scores and numbers on the back with them still be in the right place. Yeah! I got it to work, but it took all the brain power I had to figure it out, using layers, grouping, ungrouping, flip objects, etc.
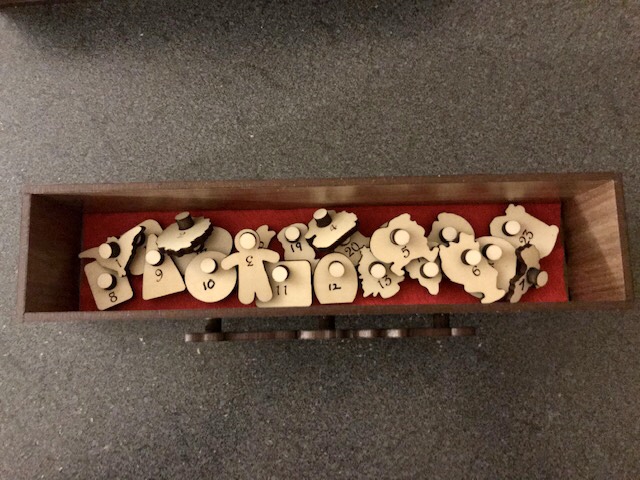
The posts on the back of the ornaments are cut from PG thick basswood ply and I tested so that they fit snugly in the holes in the tree, so they don’t fall out when you walk by. The church has 2 doors that fit in front and can be taken out on the 24th. I fiddled for a long time with tiny hinges, but they were still too large, and wouldn’t behave, so I went simpler still.
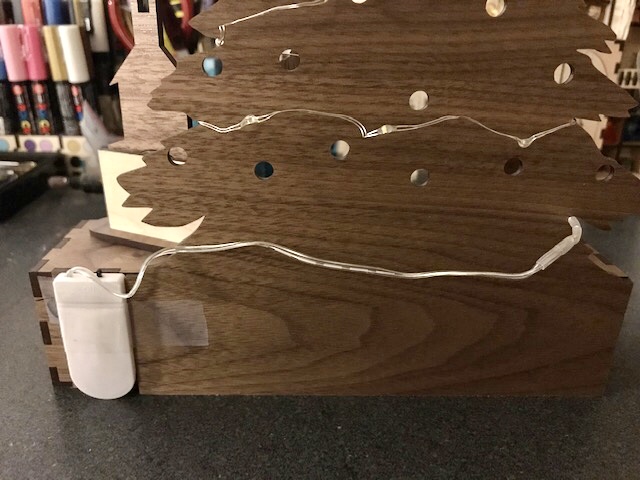
The battery for the lights is just taped to the back. Initially, the church was going to be a box open at the back where the battery would fit, but that didn’t work out well either.
So there you have it! I know it is before Thanksgiving, and too early to think about Christmas, but Advent is just 2 weeks away so I thought I’d share.
