Alternatively titled, “My Ridiculously Delayed I’ve Got a Glowforge! Post”
Thanks to Instagram, a small handful of people already know I received my Glowforge back in late June. Sadly the real world intervened as soon as it came, so I never had the time to do much more than quick little projects …until now!
(shameless plug- you can see those projects on my instagram if you’re interested )
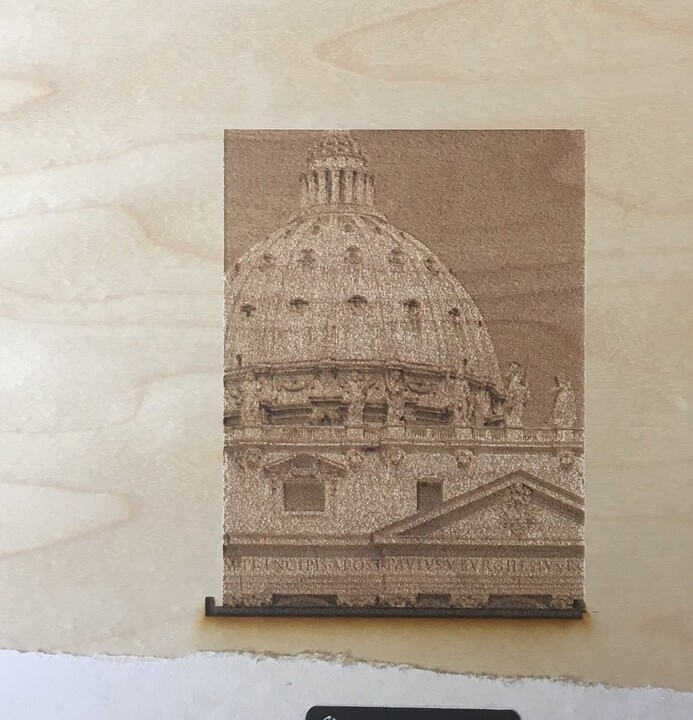
I decided to finally take the leap into photo engraving. The photo is a shot of the Vatican from my first trip to Italy, and despite the numerous (and sometimes frustrating) test engraves, the final result came out way better than I was expecting. For starters, I ran a basic automagic dark engrave (roughly 3"x4") on proofgrade maple plywood with very little editing done to the photo:
Not even that terrible! Overall too grainy for me, though, so back to Photoshop for a little contrast boost and then back, and back, and back again to the laser…
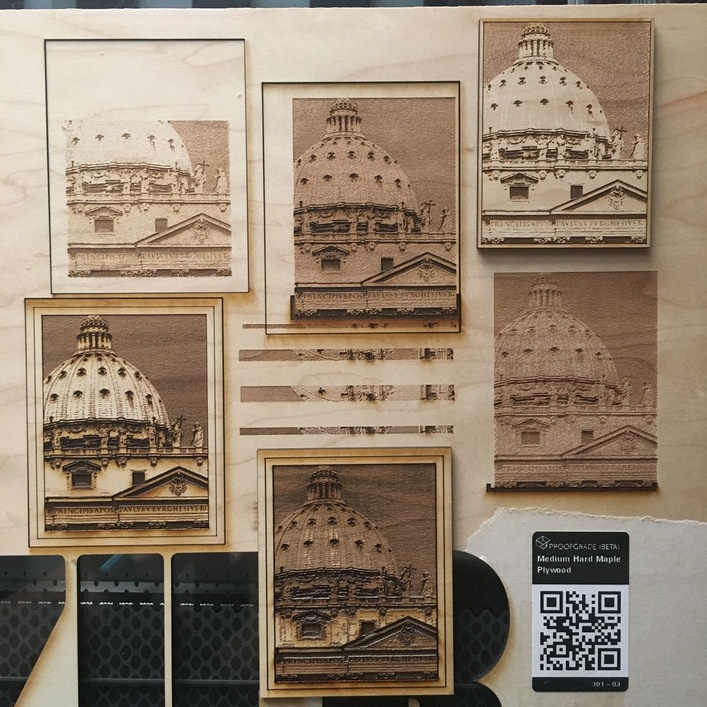
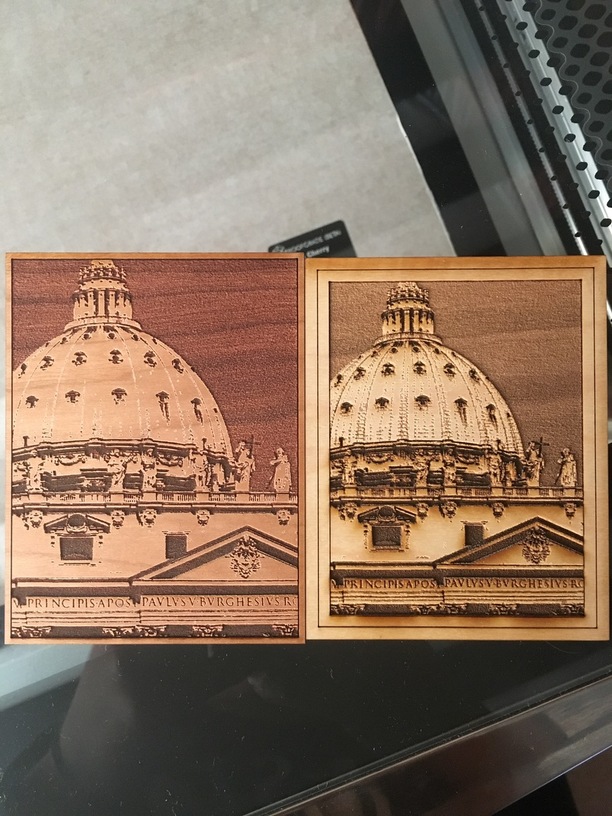
What I began to realize was that rather than messing with the laser engrave settings, I needed to mess more with the photo. To be honest, I’m not a huge fan of trying to perfectly replicate a photo with a laser…I didn’t like how my early tests engraved the entire surface. Going between Photoshop and Illustrator led me to create a new version of my photo that was a little more pop-arty. It only has 2-3 shades of grey for all the shadows, no gradients, and pure white for everything else- meaning those areas wouldn’t be engraved. After that, it became a matter of how dark I wanted my greys to be and how much of the smaller details I wanted to preserve. Going back to using the automagic proofgrade dark engrave, I came up with my top two (the left in cherry ply, the right in maple)
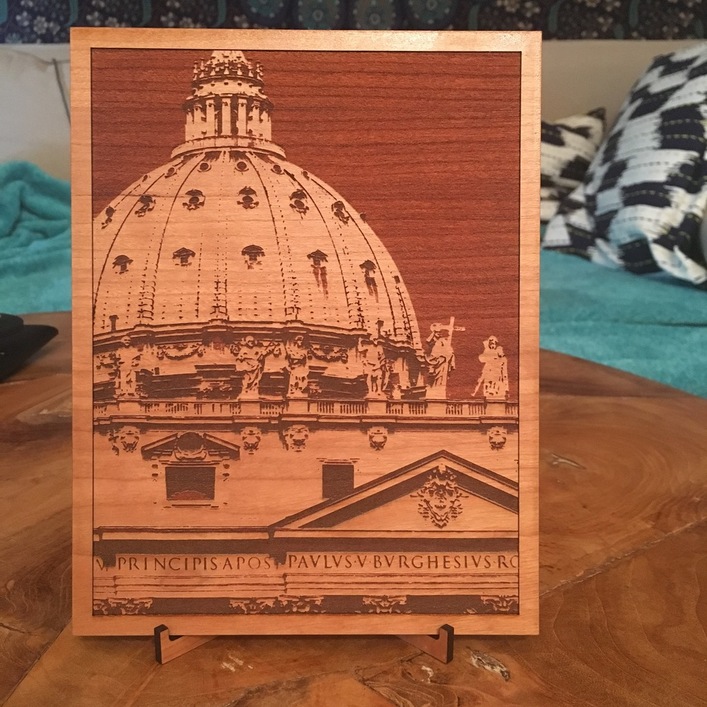
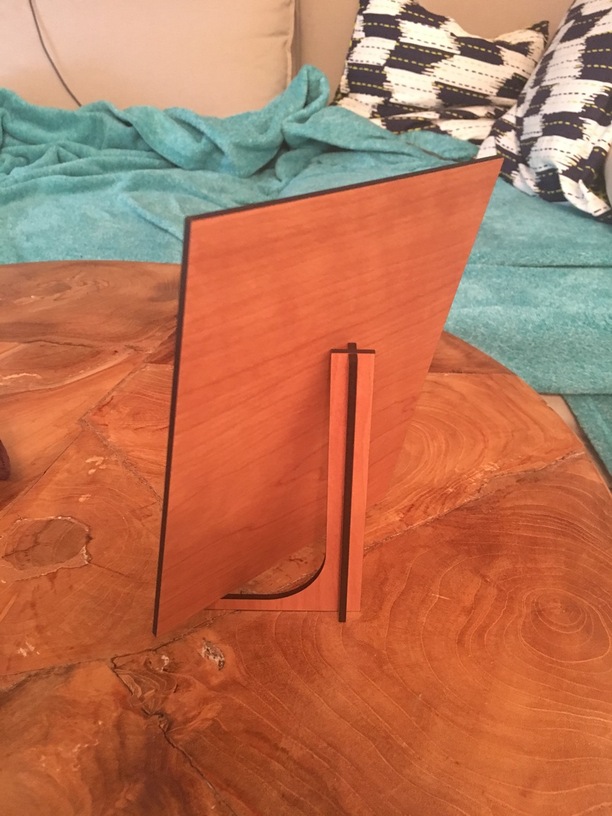
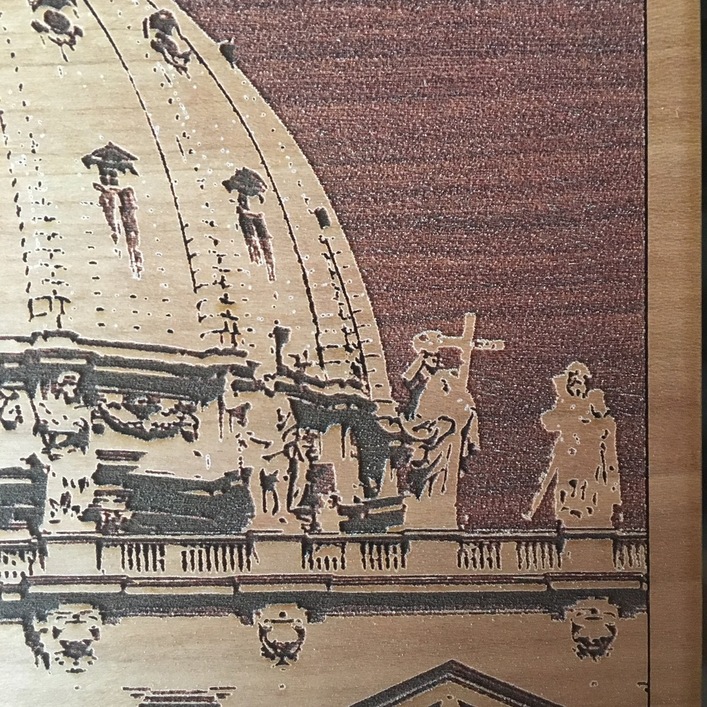
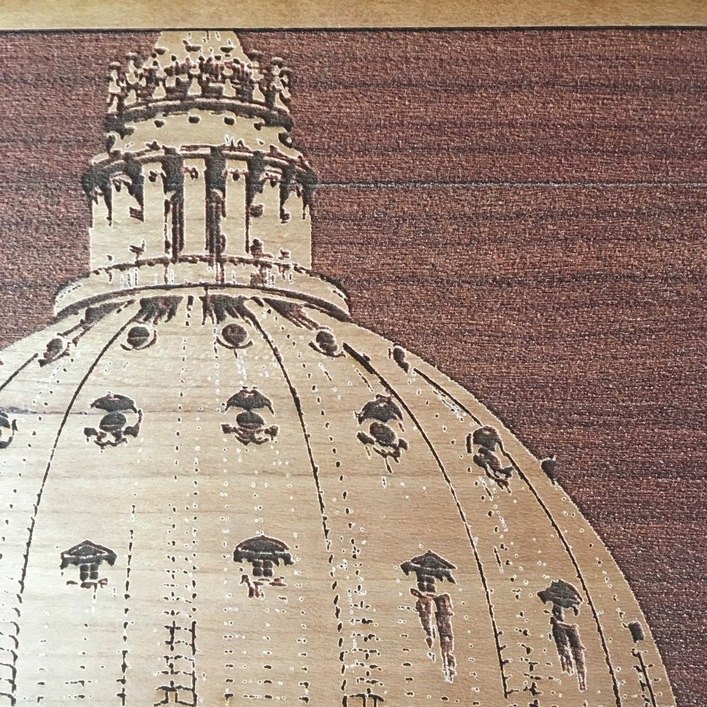
Finally, using the two tests above, I was able to edit the photo to preserve more of the detail in the dome but still keep the engrave levels to a minimum. The end engraving is 5"x7" and I even made a quick little stand for it. Overall, my favorite effect is how the sky came out! This definitely won’t be the last time I use this photo…I already have a new project planned to try and give the engraving a little more pop
The final product is just fantastic! Congrats on getting your Glowforge, by the way. That’s fun. In the photo with all of the samples, I really like the lower left one.
Thank you!! I agree on the lower left- it hasn’t been cleaned at all, so I’m thinking of giving that a shot and revisiting the settings used for it. Also, I took off the masking on the proofgrade for all these engravings…it makes a HUGE difference in the final engrave quality!
Hard to pick a favorite with those…I like the contrast of the different effects and woods. Very artistic in execution. Congrats on receiving your Glowforge and gettin’ busy!
well done. pop arty is definitely the way to go. i’ve also never been a fan of precise photo etching on a laser as even the best ones end up looking like newsprint. as you suggest, the key is to reduce the number of colors as low as you’re comfortable with.
anyway well done. did you climb up on top of the dome? we got to st. peter’s at like 730 on a friday morning and the only people inside were a priest and some bnuns doing morning devotions, and like three other tourists. glorious.
Thank you! I’m totally using this approach as my default for any other photo engraves I do. I love using the natural grain of the wood as the base tone- then just a simple score line around the photo to help separate the image from the border. I’m excited to see how this might look on walnut!
We did climb to the top! I can’t remember the time of day we went, but it didn’t seem too crowded- though the heatwave that came through the city may have had something to do with it haha.
@cynd11 I love your Instagram comments!! lol my ease with Photoshop balances out my horrendous non-ability with Illustrator
Thank you!! The sky was really serendipitous- it was a clear day in the original photo, so when I converted it to black and white the sky turned a solid mid-grey shade. In the file for the final engraving I made sure that the sky was its own shade and that all the shadows on the building were darker, almost black shades…but the resulting red tone in the cherry took me by complete surprise!
I feel like no matter how good I get at using my glowforge I’ll always end up with this sort of process for photo engravings…though hopefully with less steps involved! I spent about 5-6 hours total on the mini test engraves and any editing of the photo, then the next day I made the small cherry test, tweaked the photo a bit, and ran the final engrave (which took about 50 minutes or so). It helped that I started with a photo that lent itself well to engraving!
Wow…Steph! Great job! And I’m so happy you finally have your Glowforge! I’ve been wrestling with trying to get a good photo engrave, too…and came to the same realization as you…it’s not all in the settings as much as having a good photo to work with in the beginning. I have one particular photo that if I can get that one right, I figure I can get almost any one right.

 I can’t wait to get into bigger, more elaborate projects!
 lol my ease with Photoshop balances out my horrendous non-ability with Illustrator
  I spent about 5-6 hours total on the mini test engraves and any editing of the photo, then the next day I made the small cherry test, tweaked the photo a bit, and ran the final engrave (which took about 50 minutes or so). It helped that I started with a photo that lent itself well to engraving!
 materials are gorgeous!