To reaffirm @Xabbess 's post, I’ve been using the same Affinity Designer process since day 1 unpacking my Glowforge Pro.
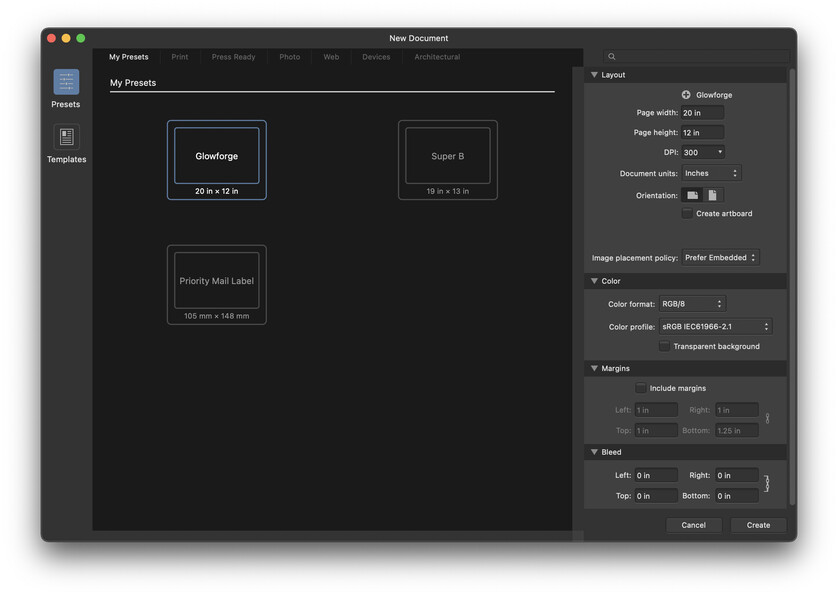
File > New , then look for a (+) icon at the top of the right palette. Hovering over it indicates it’s for adding a new preset. Be sure the 20 x 12 inch parameters are entered. DPI is entirely irrelevant to how Glowforge reads it.
Make sure to install the Glowforge Designer Color Palette file in post #16 of @marmak3261 's thread:
Create vector artwork. I like placing elements into logical named layers “Perimeter cut” “Content” “Trim” “Engrave Name 1” etc
Might even be handy to create a hide-able layer for setting notes… power/speed settings used & resulting observations.
After doing this, I’ll SAVE this as a native .afdesign file: ie, iPadStandWorkshop.afdesign
Intent here is if a part needs a change or name/logo engraving, it’s done on a new layer. Glowforge doesn’t read native .afdesign files.
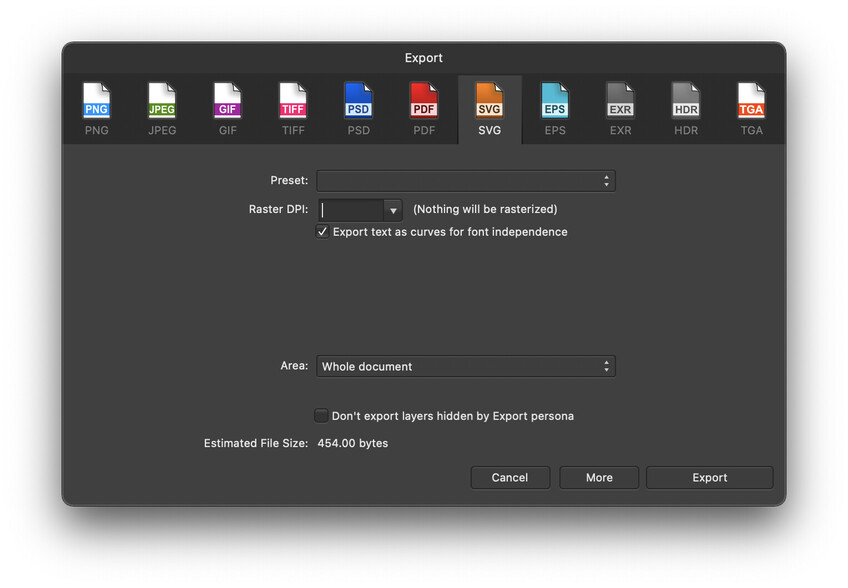
When ready to export an SVG for the Glowforge, toggle all the layers needed and hide those not involved (setting notes, guide layers, previous names). In the final exported SVG, Affinity Designer will exclude layers that are hidden. The only thing that needs attention in the export dialog is to Export text as curves.
It should be noted the Glowforge’s working bed/parameters may not coincide with the SVG document’s 20x12 and this is where it might be good to use some clever-monkey techniques to add a native-file layer named “safe zone”. This reference layer can have a thick orange rectangle at a 19x11 size to remind the owner not to create an object so large that the laser module may not be able to reach. Toggle OFF this layer before exporting to SVG.