Alright, got the file loaded… you have a lot going on - that, sorry, will be reallllly confusing to a beginner in Illustrator.
Your easiest/fastest bet is going to be to rasterize it, as Jules said.
But, we can do it the other way, if you have patience.
First - let’s address the rounded rectangles since a lot of this thread was about that. I hope that this doesn’t confuse you more… you added it to a library, which makes it something called a linked asset. You got the intent right but the usage just a little bit wrong. When you drag it back into your document from a library, it’s basically treating it as a raster image (I think the most comparable thing might be a “smart object” from Photoshop, if you’re familiar with that - if not, ignore that statement lol).
You CAN do what you want to do this way, but to insert it back into your document for this type of usage, you need to hold alt (or option on a mac) while you’re dragging it into your document. This will create a copy of the library asset that is placed directly in your document and you can edit as you want, etc. - but primarily, it is seen as just a vector shape and you can manipulate it (and other things with it). The linked asset is basically just that - it’s a linked asset that lives in a library - whenever you make a change to that asset, it updates all of the instances of it.
The easiest way to just replicate your shape is to copy and paste it. It will make an identical copy.
You discovered early on one of the toughest things about designing for the laser… these shortcuts can work for print work but they don’t work for lasers because of the differences in what they are looking for and how they interpret the file. As we have the file designed right now, we have white objects that are overlaying your black background object. This will work if you send it to your printer because it’s either A. rasterized in the printing process, or B. white is set up by default to knockout the underlying color.
This won’t work on a laser because it’s only following the pathing instructions inside of the SVG that define the vector shape(s). It’s not knocking anything out below it - just stacking things on top of one another. Does that make sense?
So you’ve drawn out your general design and know what you want to knock out. This is where things will get a little tricky.
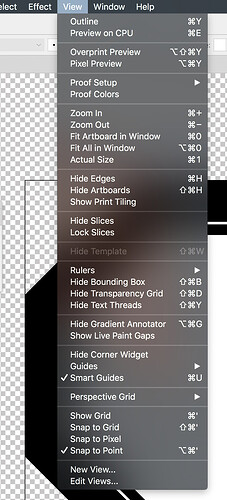
The first thing I would do is turn on your transparency grid… this will make it easier to see what is actually going on in the document.
Second, we need to start knocking things out. We can’t do it all at once - or at least, not in a way that I know of (except rasterizing, like @jules said).
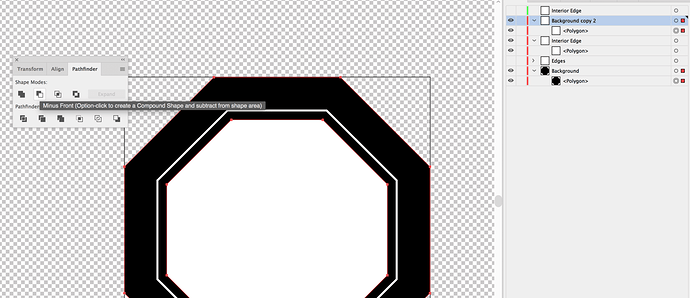
Let’s start with the big piece in the middle and go from there. Let’s open our pathfinder palette by going to the top menu item Window > Pathfinder.
I want to select both of the items, the big middle piece and the black background shape. You can see what’s selected in this screenshot. And then, I want to hit the “Minus Front” button on pathfinder palette. We want minus front because the white shape you created, that you want to knockout, is located in front of the black shape. We want to minus the white shape in front out of the black shape.
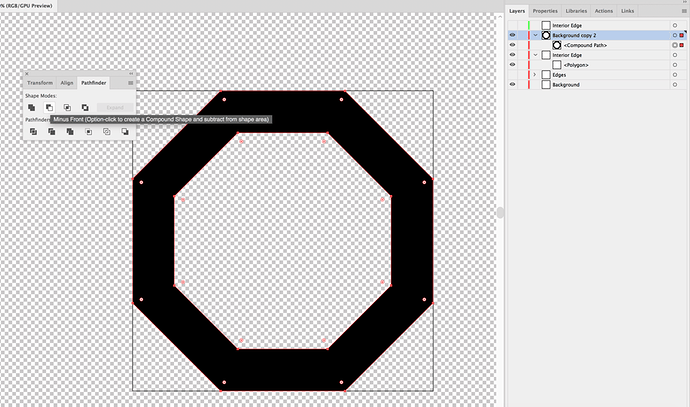
Once we Minus Front, we get this. Notice how you can see the transparent grid right through the middle of shape?
You just knocked the center out!
You might notice that the white bordered object that you had created earlier now can not be seen. That’s because we created a new shape when we ran the pathfinder operation and it put the new shape on top.
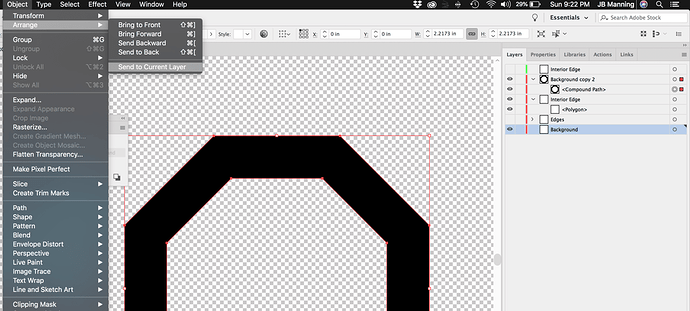
To continue using the “minus front” operation, we will just either drag and drop the layer in the layers palette to the bottom (effectively placing it at the back of the stack), or we can select the new object (indicated by the red dot on this screenshot, and then click on the layer name (Background), and go to Object > Arrange > Send to Current Layer
Now, we need to minus out the object that you created that has the white stroke. This one is a little bit different because the stroke is just an appearance that borders the vector path. What we actually want here is for your stroke to be an object that we can subtract, right?
So, let’s remove the black fill that you added. We will do that by selecting the object (as indicated by the red dot on the layers palette in this screenshot), we will go to the fill/stroke squares on the left hand side and make sure that we have the fill box selected (when selected, it’s on top of the stroked square) and then we will click the little None box that you can see in the screenshot (it’s an empty box with a red diagonal line). That will remove the fill. You can also hit the forward slash key to remove the fill (/).
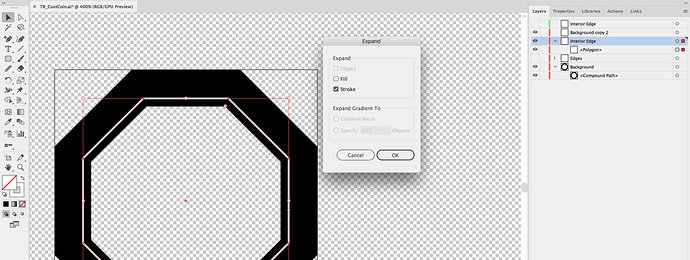
This leaves us just a stroked object. To turn the stroke into an object, we need to go to Object > Expand > Stroke
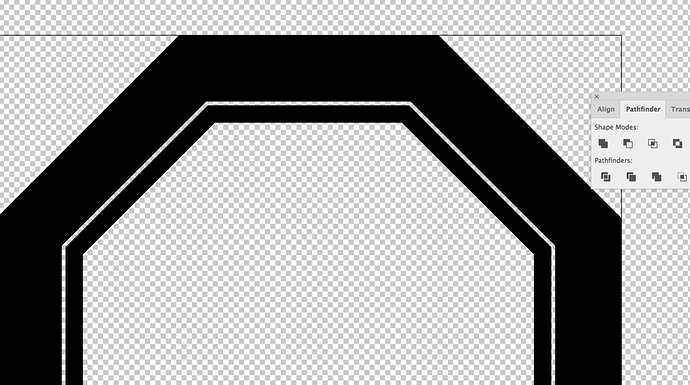
Now this left us a shape that is exactly like the stroke that you set up. With it being an actual shape, we can subtract it from the black background shape. All we need to do is select the two objects and then hit “Minus Front.” See how we have transparency now?
We can move that shape back to the back by using the Object > Arrange method that we used earlier.
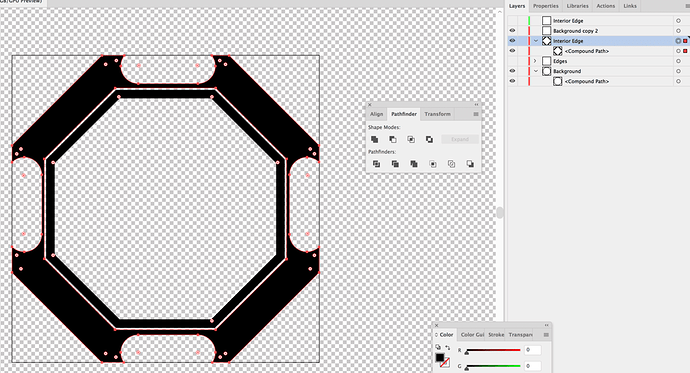
For the rounded rectangles, just make one the size that you need and then copy and paste 3 more copies. Move those to where they need to be.
We have to be careful subtracting these because we now have two compound shapes… we can deal with this two different ways. We can either A. select the rounded rectangles and the outside most compound shape and do our Minus Front command. or B. We can select both compound shapes, go to Object > Compound Path > Make (which will combine the two compound paths into one) and then we can finally select our rounded rectangles and the black background shape and do the Minus Front operation.
So here’s the thing - I’m not an Illustrator genius and there may be an easier way using some of the newer tools (like Shapebuilder, etc.)… and there are different ways the file can be arranged to go about things differently… but, I wanted to use your file, the way that you have it set up. This oughta give you the gist of how to use the Minus Front tool and what it’s actually doing.
