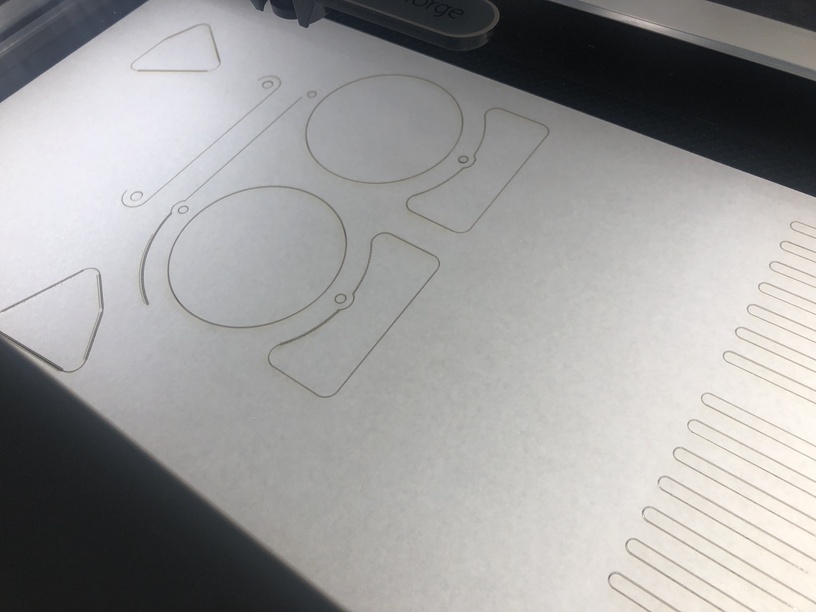
Hi, I created a file in 2D CAD, exported as a PDF and successfully uploaded it for ‘printing’ to my new GF. Also, I’m using Proofgrade Medium Clear Acrylic. All the lines I created appear in the ‘preview’ and in the left column as ‘CUT.’ However only some of the lines cut. To be clear, the lines that cut, cut perfectly…but it seems like many lines are just ignored (it is NOT a case of not cutting through all the way). I’ve searched for answers, but no luck. Any advice?
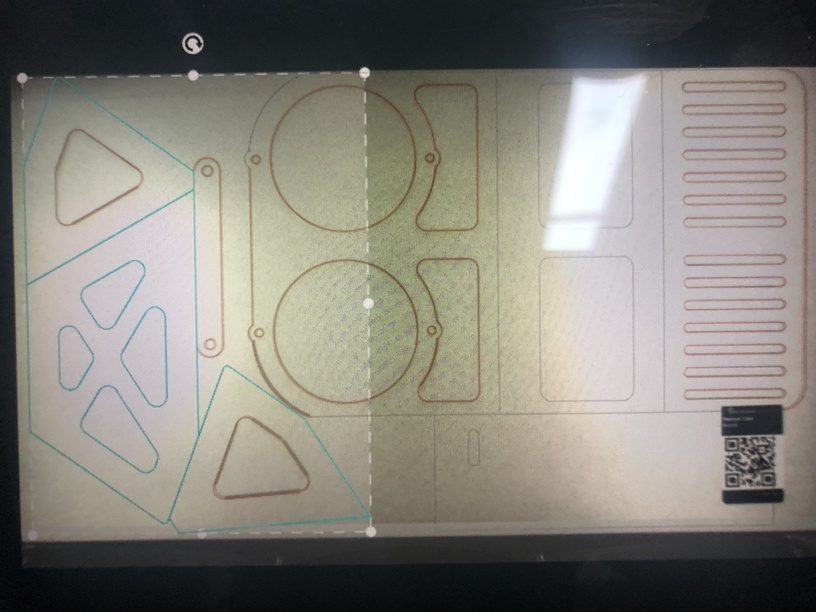
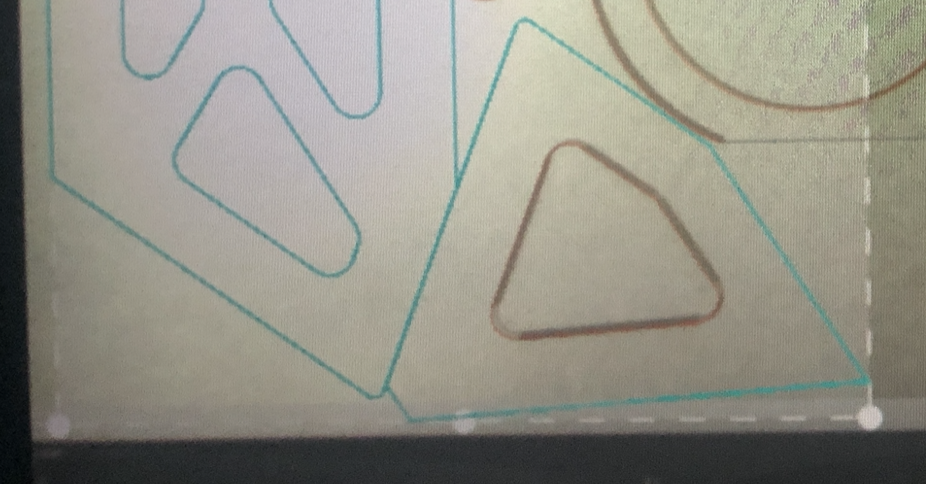
It looks like you have ventured into the DLZ… Don’t Laser Zone. Due to limitations from several factors, not all of the crumb tray area is accessible by the cutting head. You should notice a grayed out box around your image on the screen. Anything in your design that crosses into this area will not engrave, cut or score. Sometimes it will affect just a small portion other times it may prevent the whole image from printing, depending on the file type and function you are attempting.
5 Likes
Thanks. Strange…in reality there is actually a bit of a border (at least .5in or so) between the lines the the edge of the material. On at least two sides (back and right) cuts were made to the outermost edge. Is there a guide for this issue…I’m struggling with finding directions that align with what I’m seeing on the screen?
You may need to do your cuts in more that one setting… cut what you can, adjust material then complete your cut. You have your file nested nicely. You may also want to ensure that where two pieces share a cut line that you are not going over the same spot twice. Depending on how critical the fit and the material you are cutting, it have an impact on the final product… Acrylic for instance can warp and shrink away from the kerf with too much heat.
2 Likes
That is good to know. I actually made a mistake in my 1st pass - I didn’t notice that the software made some lines ‘engrave’ and others ‘cut’ (I caught it, stopped it and restarted). That is why some appear thicker. How does it determine what is what? In my file, when parts ‘touch’ there is actually only one line (I deleted the redundant line).
The actual available cuttable space is about 11"x19.5", it varies a few mm from machine to machine but if you keep your sheet of artwork within those dimensions you’ll be good. If when the artwork loads it looks like something landed outside the available area then select all and keyboard arrow nudge until you’re back in the zone. You’ll know when the lines of the artwork change color. Note that available space will shrink under certain engrave settings.
I what context?
It is not the parts touching but there is a gray shaded area on each side and the bottom. If you have set the line to cut it should be red when nothing is touching it but if the gray zone is just barely touching all of that part will not cut, and a couple hits with the arrow keys will light it up red as soon as it is able to cut.
1 Like
Sorry, how does it decided what it should cut and what it should engrave?
Well, it was a very frustrating first experience. I do think my issue is that I exceeded the 11x19.5 area. It is very confusing that it doesn’t cut lines that are completely within that envelop. I have managed to get all of my parts somewhat cut. Fortunately I have other tools to adjust the parts that are incomplete or off slightly. Knowledge to apply to the next attempt! Thank you for your help!
When you first create your file, assign a different color to each object and after you import it into the GFUI you can tell it which you want to engrave, cut or score. Otherwise your rasters will engrave and your vectors cut (with some overlap when using closed vectors)
@ekla (did I get that right ? Sometime I confuse myself)
OK, thank you!
Yup! Vector lines with no fill default to cut, vector shapes with fill and no line color default to engrave and rasters always engrave. You can change what the vector lines will do (cut, score, engrave) Different colors will translate to different steps that you can then choose different settings for.
4 Likes
Thank you, I wanted to be sure I was giving good info.
2 Likes
Excellent advice, @ovm.steve - thanks for your help with this. @dcuffaro, I extracted the logs from this print to investigate, and I can confirm that the only sections of the print that successfully completed were within the printable area. The other cut lines fell either wholly or partially out of the printable area, and were not printed.
I’m sorry for the disappointing first experience, but I’m glad you were able to get help here. I’m going to close this thread, but f you run into any other trouble please start a new topic.
1 Like