I got my first glowforge with allignment issues, i did a calibration test and then it was still printing about 2inches lower on top and left side, the team acknowledge that there might be an issue with the lid camera so they sent me a replacement . of course im expecting that the problem should be resolved but i still notice that it still has the same issue, still prints low, i run out of draft board and you know GF store takes a long time to actually process your order and send to you so im unable to run calibration on this second machine that they sent me.
But the thing is, if i print another project on the same board and adjust it manually, it prints exactly at the spot where i place the artwork, but if i try to print all the way up to the top of the material, it prints it 2 inches low. why?
A screenshot here would help.
But, I suspect what you are seeing is that the bed image is cropped. You can’t see the top edge of the material generally, or about 1” on the left hand side.
Does the overlay match up with where it prints? It sounds like it from your description.
If I’m understanding correctly what you’re describing, your system is completely normal and operating correctly.
Ill try to send pictures, once my draft board gets delivered, which is about 10days… 
You can put masking tape on an older board and rerun the calibration sequence. All it needs is a clean surface.
I’m sorry to hear you’ve been having trouble with print alignment. I see that you have mentioned you are waiting for your next delivery of Proofgrade Material. Once your materials arrive, could you please run the following alignment test?
- Turn off your Glowforge.
- Check for small pieces of debris or dust.
- Check the lower door to make sure it closes all the way. It may require some force to open, but open it, wipe any dust off the edges, and close it all the way.
- Remove the tray and clean any dust or debris from the surface underneath. Pay careful attention to remove all debris from the four dimples where the tray rests.
- Check the lid to make sure it closes all the way. Small particles of material, such as dust or debris, can prevent it from closing completely.
- Check the surface your Glowforge is on to make sure it’s flat. Ensure it is not twisted slightly and that there is no debris propping up one side of the machine.
- Turn your Glowforge back on.
- When the print finishes, leave the lid closed and wait until the fans stop and the picture updates. Without moving your artwork or your material, take a screenshot of the Workspace to show us the difference between the artwork placement and the actual print placement. Make sure to include the rulers in your screenshot and show as much of the bed as possible.
- Mac: Press Shift-Command-4 and click and drag a box around your image. You’ll find the screenshot file saved on your desktop.
- Windows: Click on the Start Menu and type “snipping tool”. Open the Snipping Tool > New then click and drag a box around your image. Click the Save icon and name and save your file.
- Send us the screenshot along with the date and time of the print, and we’ll investigate.
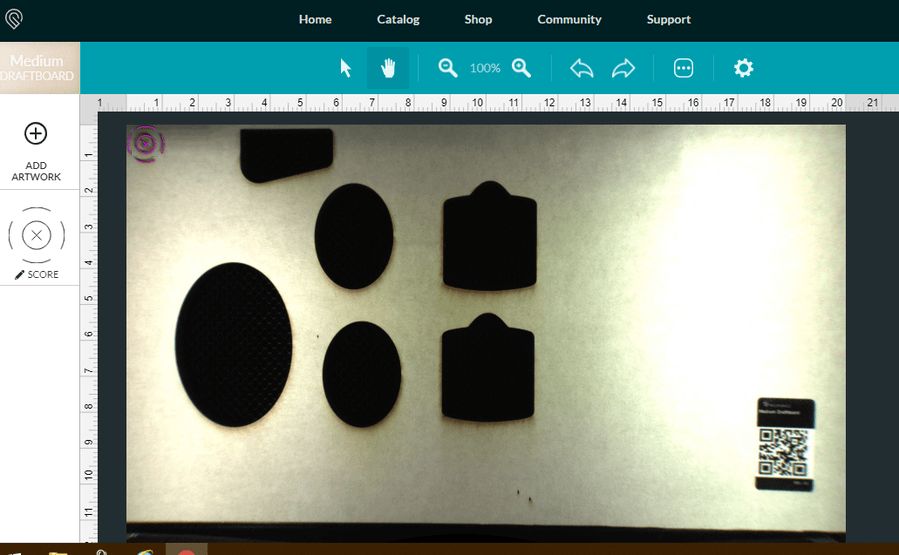

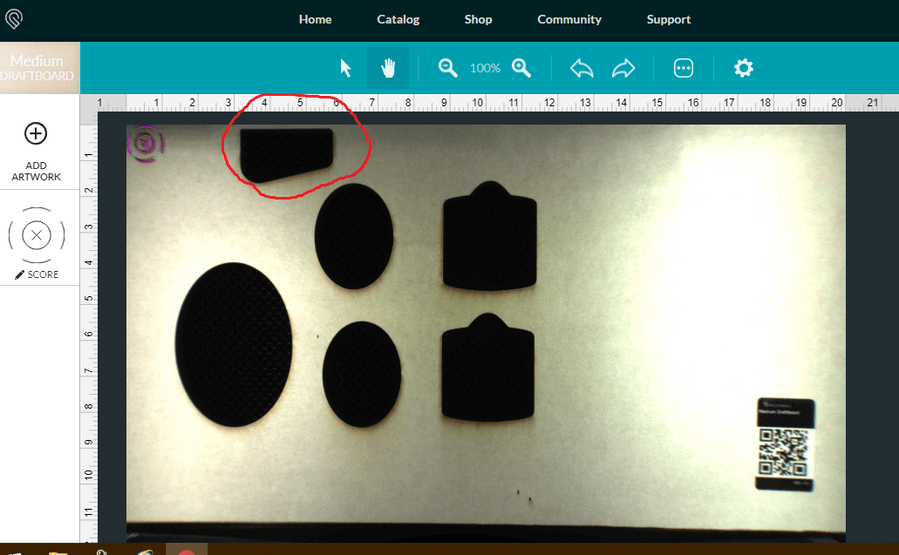
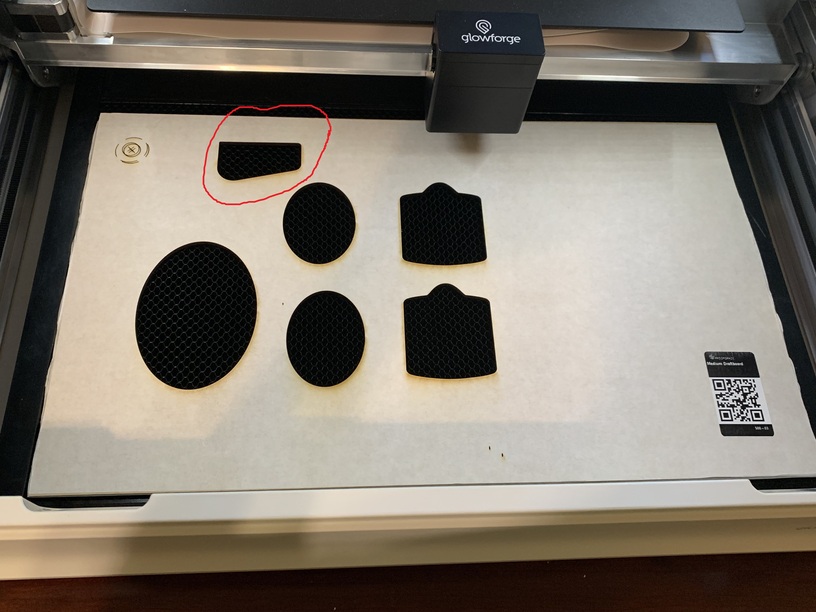
i used one of my used draftboard , the screenshot indicates it pritned at the top left hand side. but the second picture which i took shows that the print shows, it is one inch low on top and less than an inch off from the left side of the board.
This is the second unit delivered to me with the same issue, it also seems the camera is not able to take a picture of the whole draft board .
If you compare where you placed it relative to the Gift of Good Measure in the top picture to where it cut relative to it in the bottom picture, you can see that it’s cutting exactly where it was placed. You can’t see the whole bed on the camera, which is why you think you’re in the top left when you’re actually not.
thanks for your input, are you saying that this is normal, that i cant maximize the draft board? it means there will always be an inch that the camera cant see, and even if i put the artwork on the top of the board, since the camera doesnt see 1inch of the board, i always loose that part?
where do you put your material btw? do you put it on the lowest part of the crumb tray?
Michael
i did the calibration and took pictures at 08/30/19 1800
raymond
This is what @jbmanning5 was talking about above.
In terms of draftboard, no, you cannot maximize because the drafboard is 12X20 and the max cutting area is 11X19.5. Engrave area is typically even smaller.
What I do not know, but someone else will likely know off the top of their head, is whether your spacing looks right… Looks ballpark to me, but I’m awful at estimating distance. Either way, the issue isn’t that your machine is cutting too low.
Looks completely normal/like everyone else’s to me.
One thing I don’t understand - look at the horizontal ruler, it shows that he is seeing the entire 20" of material width, and the design was placed at the very left edge. Yet it prints about an inch away from that edge.
Vertically he is only seeing 11", which explains the 1" spacing above the printed design.
If you look at the printhead of your laser when it is in the home position, you will see that it cannot move any further back. The material behind it cannot be printed on until the board is rotated and that part of the board is put down at the bottom.
Yes, I do.
okay, so it seems like you guys are saying that this is normal, that even if i put the artwork at the top line, it will still be an inch lower . from what ive noticed , the camera is focused lower than bec it actually takes picture below the material, if this is normal then i guess there is nothing for me to complain and just accept the fact, though i dont get why, this last picture will prove my point, the camera is focused on the lower part.
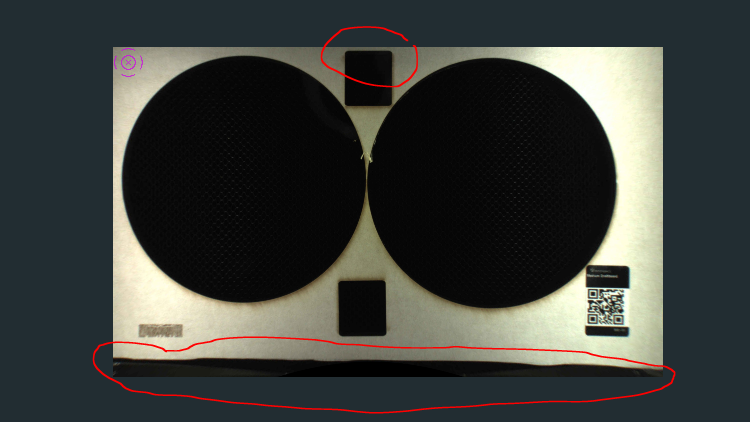
Look closely at that picture you just posted. Do you see the sides of the tray in it?
That is an overlay to make sure that when you place your design on the material, you place it into the area that the laser head can reach. It cannot reach about 3/4" to the left of the overlay, or 1/4" to the right, because the head needs space to decelerate at the sides. There is also about an inch or so along the top side that you can’t see.
This is what the folks at Glowforge see when they take a picture of the inside of the bed.
That wide angle view is corrected using an algorithm with the thickness of the material to give you a more human looking image that they send back to your computer. But they crop part of it off so you don’t place the design where it won’t work.
Or to put it another way, what looks like the upper left corner at the very edge on screen, is actually about 3/4 inches in on the material.
To maximize the use of your material with a Basic or Plus machine, treat the lower right front corner as the origin, and build out from there. The material needs to completely cover the gridded area of the tray, and there will be a band along the left and the top that you can’t see or cut from that postiton. But if you need to, you can turn the material over and use that band up for small cuts later by placing it on the bottom and right side.
That is because it is not an issue. It is how everyone’s Glowforge works. Zooming close up shows it went exactly where you put it. This line you can size or rotate and see exactly where the edge of your work area is and then you can use the part outside to locate any future work.

There is no way for it to be a camera or machine calibration issue. The camera shows what’s in the viewport. For the displacement of the hole to be different, it’d have to be two different prints, or there would have to be a significant amount of camera distortion to account for it and there is clearly no camera distortion. The hole has to be in the same place in the GFUI and the actual print, so the only explanation is that you’re not “seeing” it correctly in the GFUI.
What I think is happening is this… The GFUI “clips” what it sees in the camera so it just shows where you can cut. The top edge you think is the draftboard is actually the clipped edge of the viewport. The draft board extends above that point but you’re not “seeing” it.
Put a piece of tape on the edge of the draftboard and slide it down until you can see the tape at the top, then try your print again and I bet it’s aligned.