He posted it under the free designs category. ![]()
I saw that after I posted lol! So, I’m not to observant I guess lol!
2 Likes
Love it. Great idea.
1 Like
humbled … very nice
1 Like
So cool!! thank you for sharing this, def gonna make it 
1 Like
This is such a cool design. I’m still very much a beginner, so I wanted to make this using the directions as a learning experience. Everything was perfect until I tried to cut the printed paper ring (ancillary_paper_ring.pdf). I cannot get my Glowforge to align and cut the circle accurately.
Using the red lines for alignment seems like a brilliant method. I place the printed paper in the center of the Glowforge, upload the PDF, and place the design fairly close to the markings on the paper. Then I lightly score the paper and, without moving the paper, I adjust the design so that the scored marks align with the markings on the paper. I’ve tried several times and the cut is off each time by at least 1/16" of an inch (i.e. not really very close).
Am I misunderstanding the directions? Is there something miscalibrated on my Glowforge?
Try performing the targeting step twice, zooming closer if possible and adjusting again if necessary.
This is a pretty reliable way to get alignment… Could your crumb tray be slightly off kilter? Make sure there are no debris beneath its feet and that it’s firmly resting in its depressions, as a slant would throw things off.
I’ll double check those things and try again. Thanks for the suggestions!
So if you make a cut, score, whatever with your glowforge and then look at everything in your browser when it is done, your design probably won’t line up with the cut, score, whatever you just made. This is known. What is also known, is that if you hit print again it will make the cut, score, whatever in the same EXACT spot regardless of what you see in the browser. Knowing this you can use the arrow keys to nudge your design up, down, right, left (this is glowforge’s version of pushing aside the targeting computer and using the force Luke.) There is a combination of some key and the arrow key to make micro nudges. It’s the standard Windows convention so you could Google it.
1 Like
The higher the UI zoom, the smaller the nudge with the arrow keys. I have found that useful.
1 Like
Can anyone point me to a discussion or documentation on how the Focus Height setting affects manual cuts? I have assumed that it should be set to the material height (i.e. the thickness of the paper when cutting card stock placed directly on the crumb tray). Is that correct?
Correct. Setting the focal point at the surface of the material is the default setting for all of the Proofgrade. (And works well for non-PG materials too.) 
There’s nothing wrong with multitasking. 
2 Likes
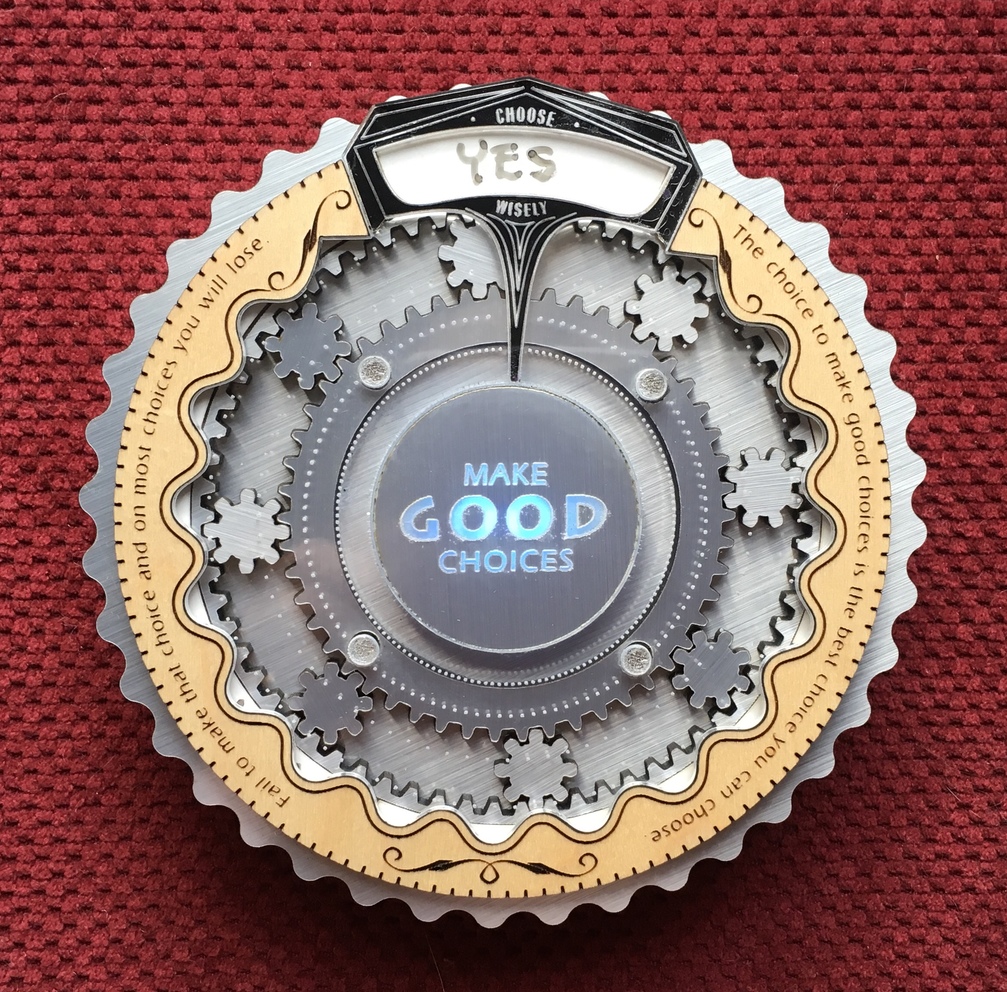
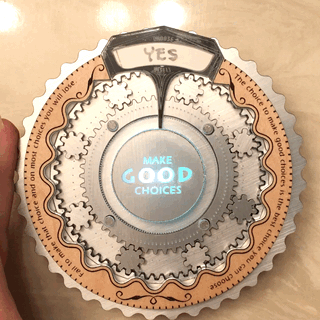
I finally finished my version. I call it “The Chooser.”
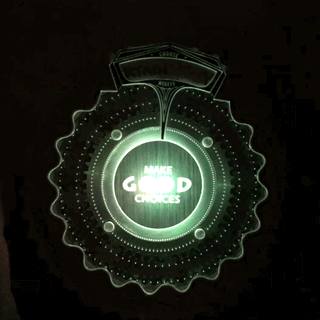
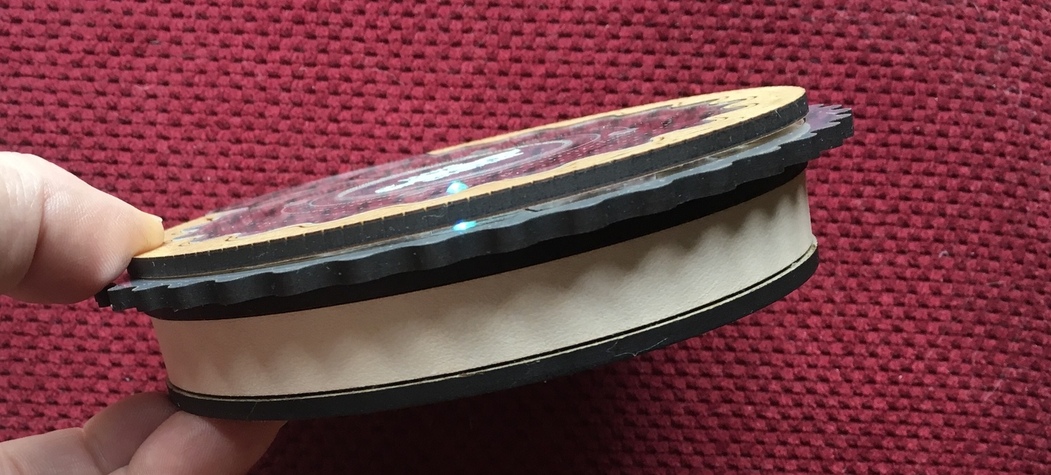
The thing is, modest though it is I still want to keep my own escutcheon. But I also wanted to make use of this outstanding design, so I repurposed it. The cardstock I used is dry erase cardstock, so I can write the choices temporarily then erase them. I made a round box with leather sides, that contains a color-changing votive LED light. The surface is Draftboard that has been covered with brushed chrome polyester film. The quote on the sides is from Ryan Lilly, done on PG maple ply.
22 Likes
It’s a thing of beauty, that’s a very cool way to make it a standalone thing! I like how you changed the fine print to match the new theme, and dry erase was an inspired choice as well. Okay, now I want to make one to take to the office…
3 Likes
This is amazing! This is my favorite escutcheon design so far, and there have been some pretty great ones. 
1 Like
It’s a stiffer turn with all of them in; I have to hold the center to keep it from twisting, when I turn it. I think I’m gonna go with the cherry, and take out the extras. ![]()
2 Likes
Thank you, thank you. Not only is very cool and generous of you, this helps me with some questions i’m formulating, as a new owner i’m facing a learning curve that is made much more tolerable by the kindness and sage wisdom of folks like you. thanks. I hope to share my projects soon in return.
2 Likes
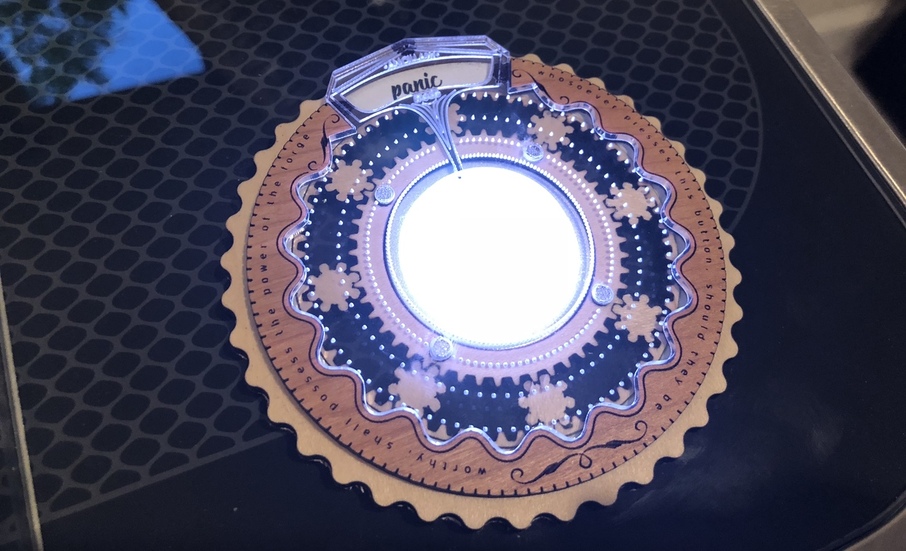
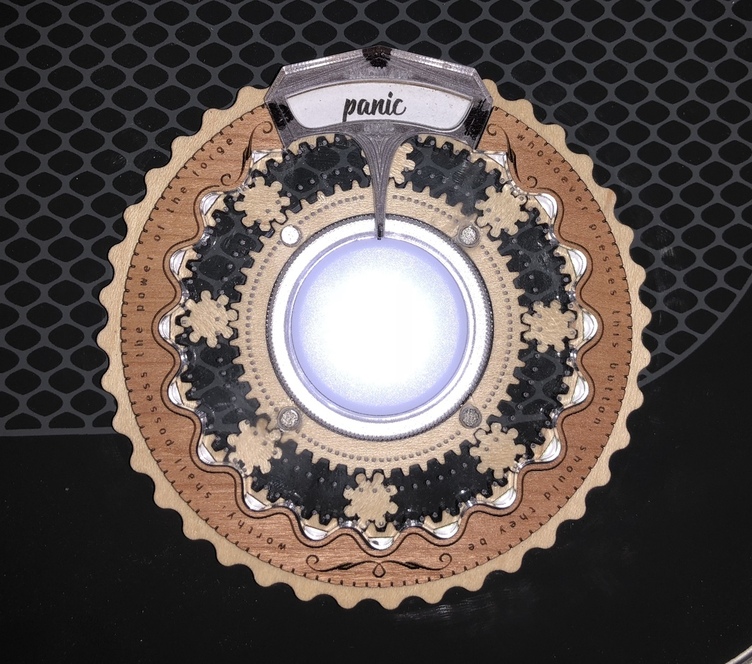
Done tonight! My proofgrade settings NEVER cut all the way through, so I always have to drop them by about 20 speed to get reliable cuts, but knowing this the escutcheon turned out great! I have a Pro unit and my magnets also sit kind of proud of the acrylic surface, but it still works fine as the instructions say.
I need to know how you guys made those Gifs now: I’d like to show off my escutcheon in a fancy gif like you guys did but I have no idea how lol
8 Likes
Looks great! You can eliminate the glue dabs if you use sticky tack spray on the black banking to adhere it to the acrylic.
I used Google’s Motion Stills app to capture my moving image, then optimized they gif online.