I mean sure, it would have taken me less time to do it manually than I just spent poking through the options on festi… but if it had worked the way I imagined, the first time, it would have saved me several minutes of measuring, copying and pasting. SEVERAL minutes.
1 Like
A whole several? The nerve.
3 Likes
the totally free app doesn’t automatically do absolutely everything I want without my having to do extra work.

1 Like
i understood what you want. what i’m saying is that if you look at the edges of that lid, the front angle will not match the front of the box. the back angle will not match the back angle of the box.
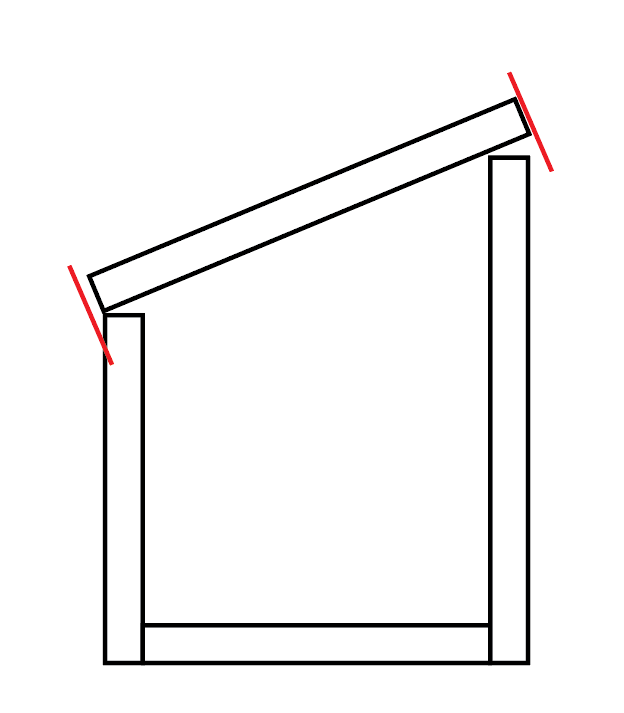
you’d need to be able to mitre those ends, which the laser won’t do unless you create some funky jigs.
In theory you could engrave your mitres…
oh, I see what you’re saying. The way I saw it was that the overlap points would only be the ends of the box-joint teeth, and they wouldn’t (in my mind) actually extend past the outer wall.
No matter, really, as I have realized that the uneven box with lid in it’s current state is pretty much perfect for a stone/gem/jewel holder, using opaque material for the base and transparent acylic up top. What I wanted it to do, as @evansd2 pointed out, is really quite straight forward (well… angled I guess…)
1 Like
![]()
Yes, I created a “slant” top box option just by flipping the front face so only the two ends were different that several other boxes I made, it would be easy enough to just use the design they would give you and just add a bit of extra length in a few places as long as you did not want the top to be any more than a single flat piece.
8 Likes
1 Like
Upping the game. I love it!! I also love all boxes folks make. For some weird reason, I haven’t made many. Okay, you’ve done it. You’ve pushed me over the edge. I will need to made boxes now, and some must be slanted!
1 Like
you could build it this way(it probably took longer in gimp than to actually do it)…
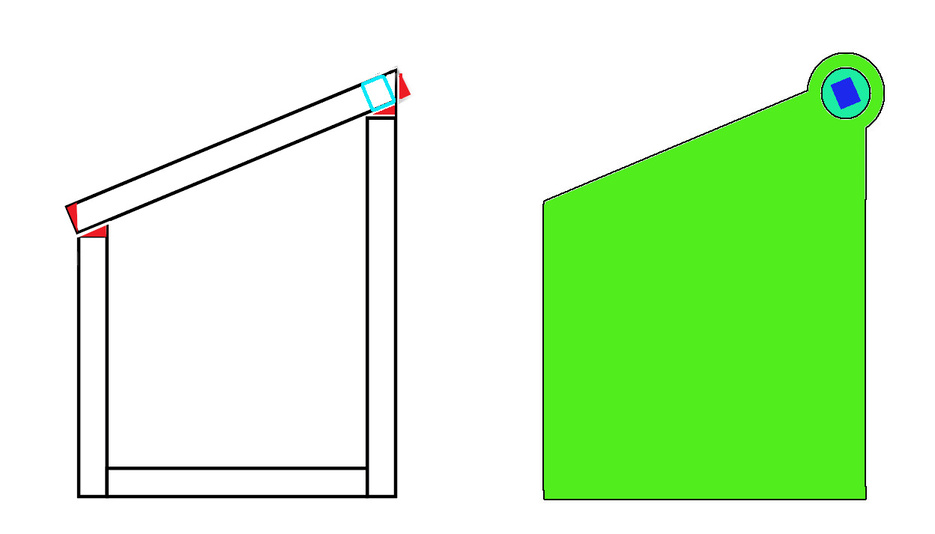
Trying again The Blue rectangle in the first bit is a part of the lid that extends to the final width of the box. The red is where it is longer but gets filed to the proper angle
3 Likes
The green design on the right is just about exactly how I had decided that I was going to finish this little doggy poop-bag holder that I started on yesterday, since the slanted lid needs to open.
For my initial thought of how I would use a slanted-lid box (ramps, roof sections) the “lid” would be fixed in place and wouldn’t need the hinge.
1 Like
they are both the same design one is a sort of a section but showing the hollow blue rectangle as the part of the lid sticking out each side (Shown as dark blue on the right) the light blue in the right is a separate circular piece that is glued on to the lid and the bright green is the cutout of the side with magic fingers not shown to enhance clarity, The lid is nestled. in so the top of the lid is flush with the sides
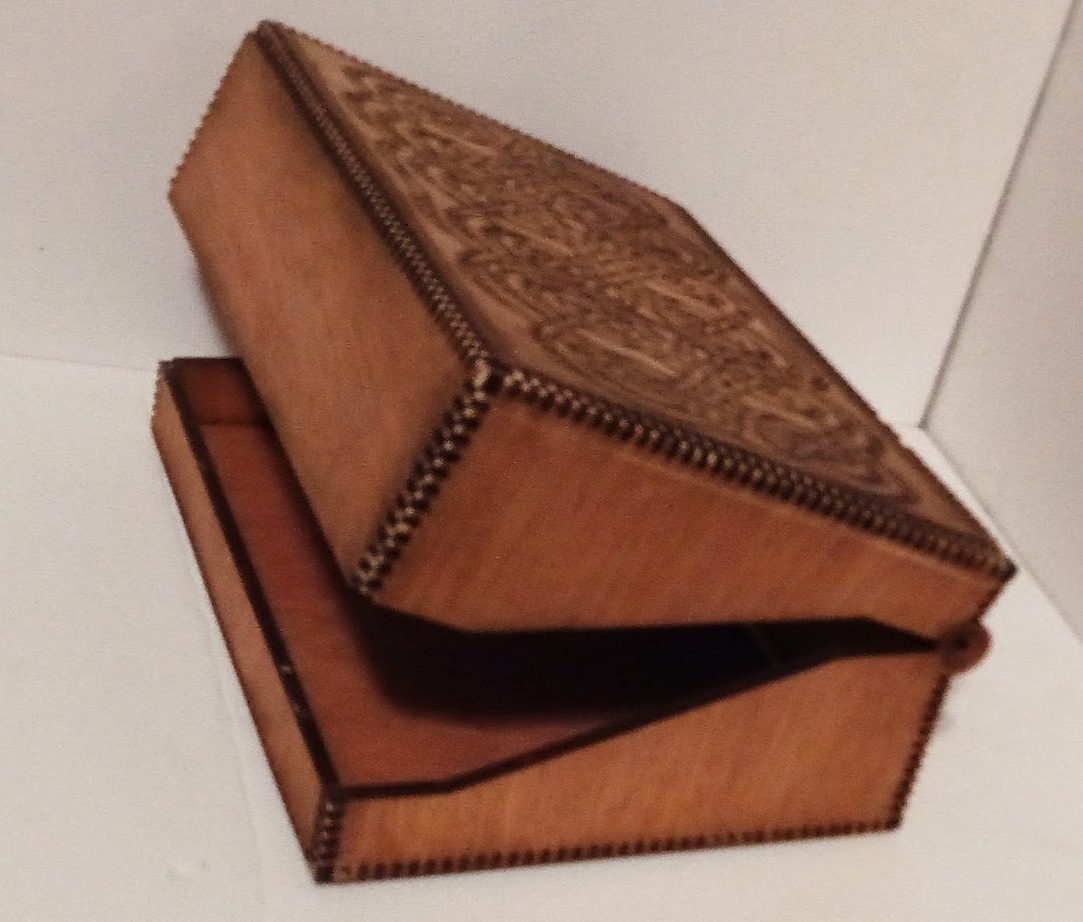
It is mainly a way to make @shop s design work, The hinge is the standard built-in hinge from Boxes.py as you can see in the photo of the one that I did above.
I do think you can fudge things, but in the end, you still have to either cut or sand those edges down or accept that they won’t sit flush.
Hello?
It 's wood. I probably have less extra tools than most folk here but I have not made anything yet that did not need some or a lot of work after the laser was finished. Another job that my scrap is put to is making sanding sticks with various grits of sand paper used, and using those to bevel an edge is hardly enough work to consider as work.
3 Likes
This topic was automatically closed after 32 days. New replies are no longer allowed.