The depthmap you show will cut something like this
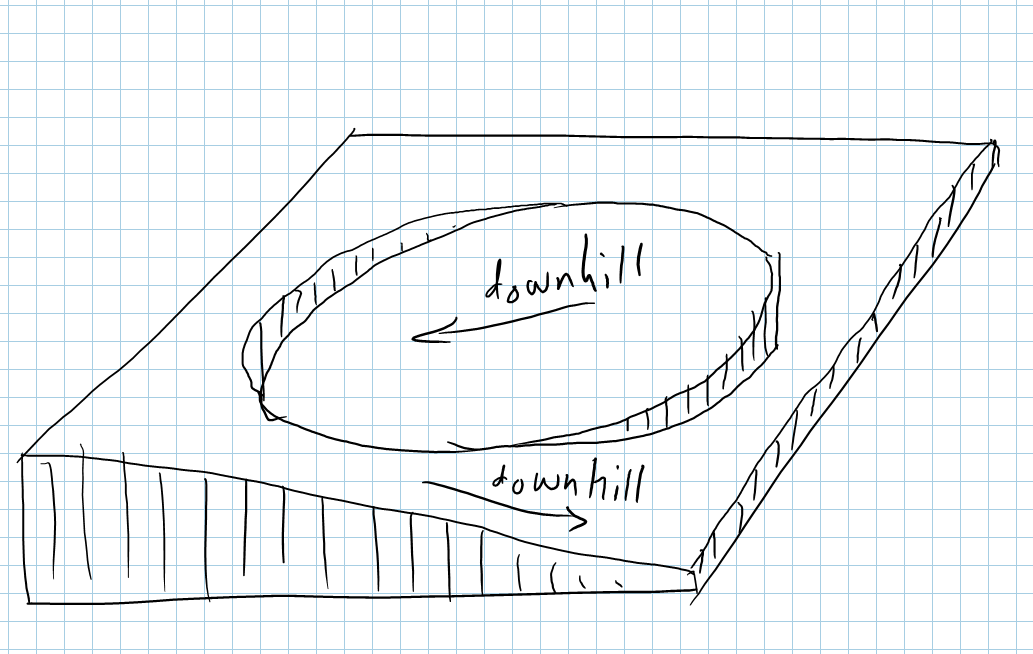
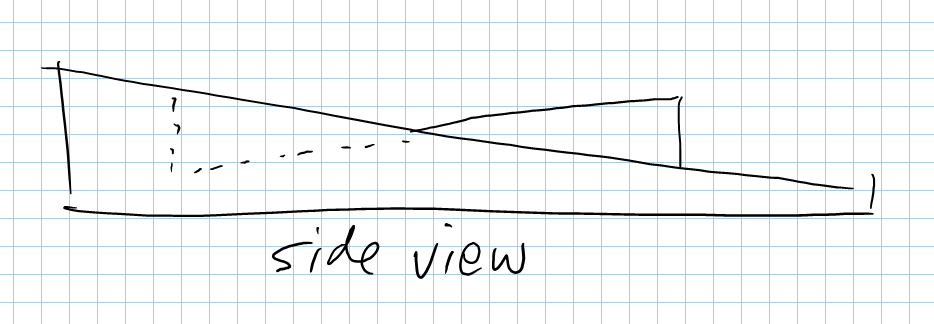
Pardon the very rough sketches!
So, perhaps the Glowforge will take a grayscale photo and create an engraving based on that.
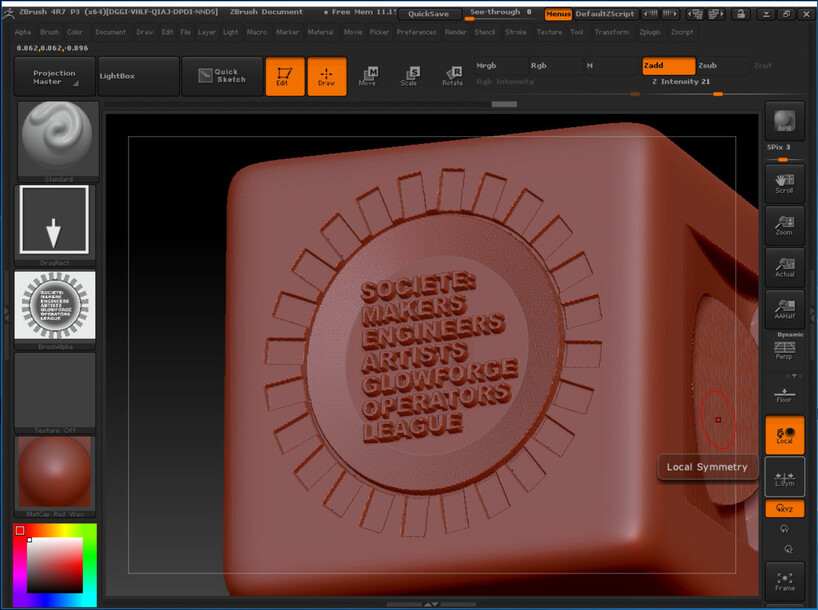
I will refer to the original title of this post “3d engraving files.” I think the confusion might lie with the latest Glowforge medallion that was showcased recently. This file was a digital creation using a gradient to achieve depth. These are two different processes that achieve the same or similar result. It is just a matter of understanding the process to create a design file accordingly to duplicate the engraving seen in the medallion.
So, how deep is black? How does the depth of off-white compare to light gray? I believe the answer will vary. I’m going to assume power, speed and material used will dictate the end result no matter how dark or light something is when viewed on your monitor.
Sounds like a lot of testing and collaboration 
You pick your depth. Black is that depth and the lighter the grey, the lighter the engraving. White is untouched. Works sort of as a percentage.
Exactly! When designing cad files I think in terms of measurement. For engraving, it simply using different gradients, from black to white, to achieve the desired effect.
Thank you for a masterful post. Understanding the concepts and using the tools for true 3D work is an advanced step higher in computer literacy. It does take on a level higher of sophistication that flatlander, Paintbrush accustomed folks may find daunting. Thanks for showing that this isn’t trivial while at the same time accessible in design. Now, produceable is another step.
Yup. My understanding is that, on Proofgrade™ material for instance, you could choose to 3D engrave a regular greyscale image file at a certain depth (not sure if it’s put in as .5" or “deep”) and if an area was 50% black then it would engrave at 1/4".
I could see just playing around in a photo editor with patterns and gradients and coming up with some interesting designs.
Edit: make it 1/4" and 1/8" to play it safe. I don’t really know the machine’s capabilities other than I can safely say it cuts 1/4"
I would dearly love to see something like that, if you get the time! Got a lot of STLs to work my way through. ![]()
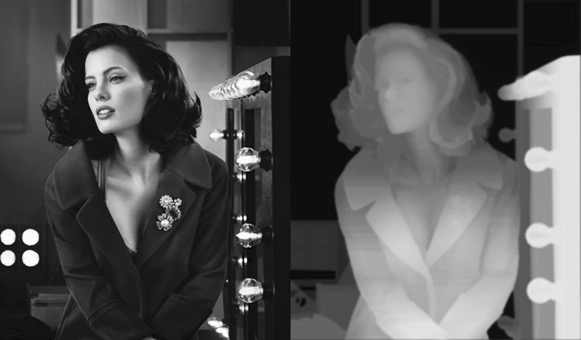
Palmercr is spot-on. A 2D grayscale photo fed into the human eye gets perceived by the brain as “3D”… or at least it interpolates depth in this manner. What a 2D depth map needs to look like is a different beast. The amount of manipulation it takes to work a grayscale photo into a proper depth map is on the order of you’ll-get-better-results-hand-sculpting-the-subject.
And F.O.G. beat me to it. Erin’s linear gradient will produce linear ramps…
As we start wrapping our heads around this and start learning to “read” what a depth map will do, the next step might be to accommodate the gradient requirements. Those who absolutely have zero inclination or desire to get into 3D CAD or sculpting can still use gradients generated from vector programs (Illustrator, Affinity Designer) or pixel editors (Photoshop, Affinity Photo) to create components that might even withstand assembling in layers to build up a design.
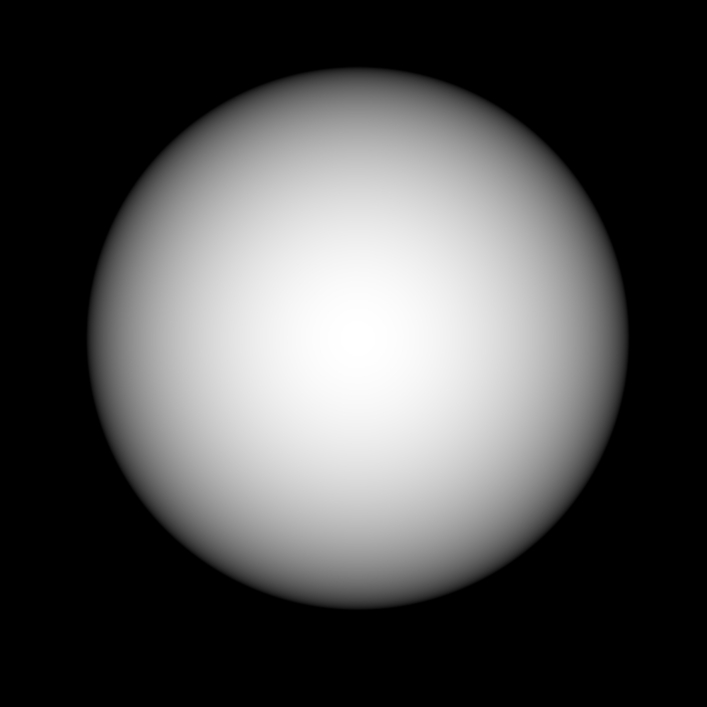
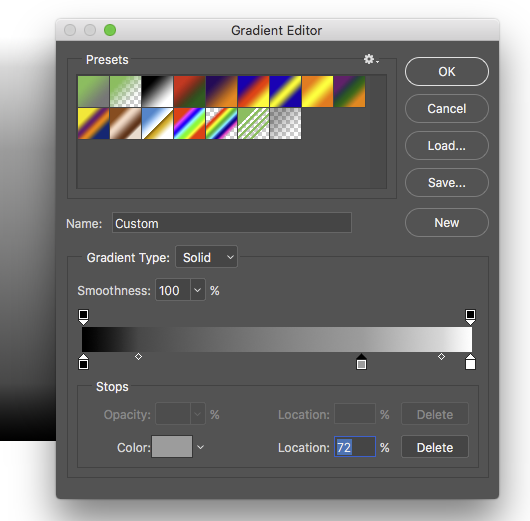
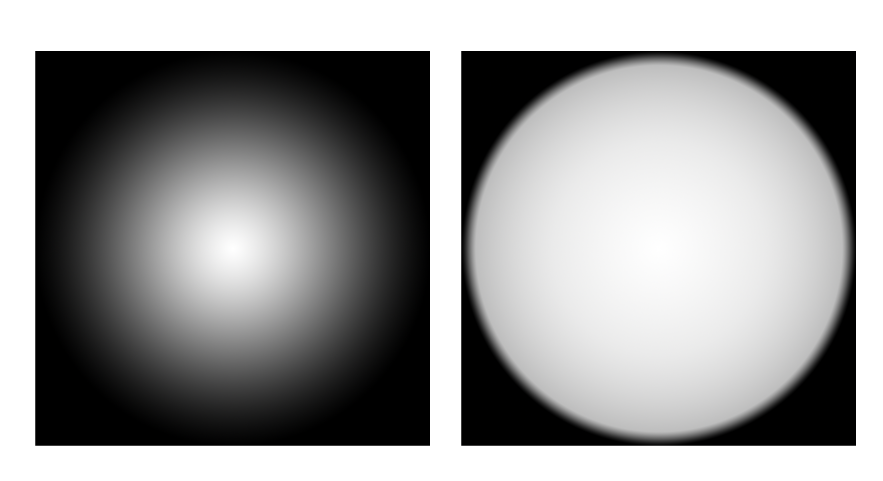
The roadblock here is that both vector and pixel apps don’t offer enough control in its gradient tools. As far as I can tell, they only offer straight linear jumps from swatch to swatch to swatch on the gradient controls. When specifying a radial gradient, the gradient fine-tune control itself where it goes from white-to-black is just linear. So this…
Gives this result…
…where the gradient needs to be more logarithmic in how it transitions…
Obstacles aside, there are still PLENTY of things that can be done in a vector program…
That’ll 3D engrave quite nicely, I predict
Thank you! Those sketches are perfect. That’s what I was hoping would happen, but I wasn’t sure if I was understanding it correctly.
Societe:
Makers
Engineers
Artists
Glowforge
Operators
League
SMEAGOL?
https://s-media-cache-ak0.pinimg.com/originals/b0/ea/64/b0ea64b10b24aa89b31a33b289039865.jpg
On topic: thanks for the explanation, @CarterTG . That really helps.
Wow! You’re clever. I wouldn’t have spotted that even if you told me there was something to spot.
I’m in IT, so I turn everything into an acronym. 
Ideally, that is the case, but not in practice with the current state of the machine, according to Dan. A linear gradient gives curved, not flat, surfaces.
I am hoping they will improve on that front.
10 3D high-res engraving
Engrave complex, three dimensional curves with 1,000 DPI resolution. To get perfect detail and sculpt with real depth, Glowforge can carve away material with multiple passes, each one focusing more deeply than the last.
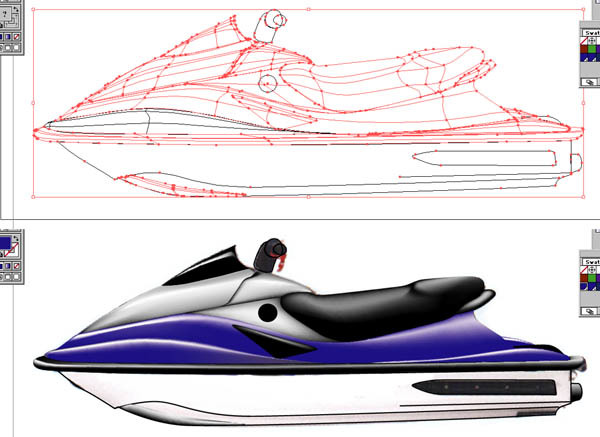
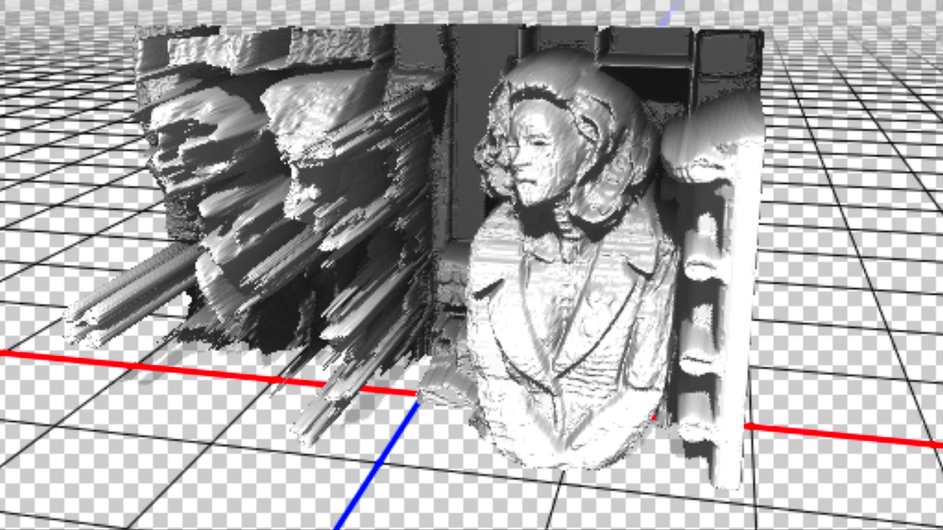
Ok I found a better example of the difference between a b/w photo and a depth map:
lol, what a horrible thought.
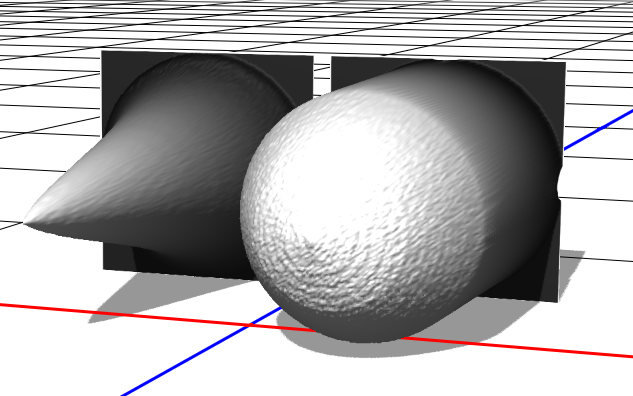
The two tutorials I posted were mainly to illustrate that you can use photoshop to get an idea of what your greyscale image might look like as a 3d depth map. I’m not saying it is a replacement for actually modeling something out, but looking at what can be done with the tools I know and have available.
So I put tried the samples posted above in photoshop, to see how they might look as a 3d depth-map, knowing that I would need to do a lot of experimentation to dial in how the depths translate to glowforge’s capabilities.
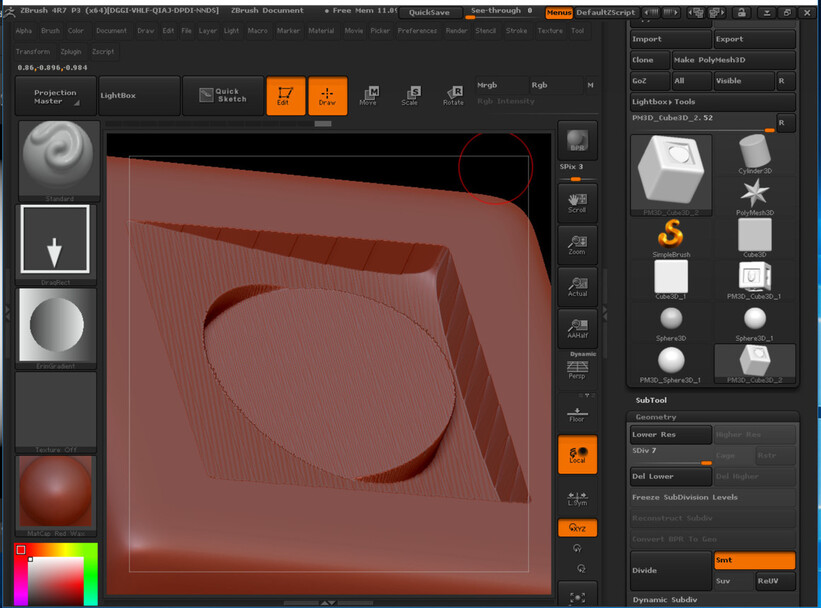
downloaded cone example:
rendered in PS
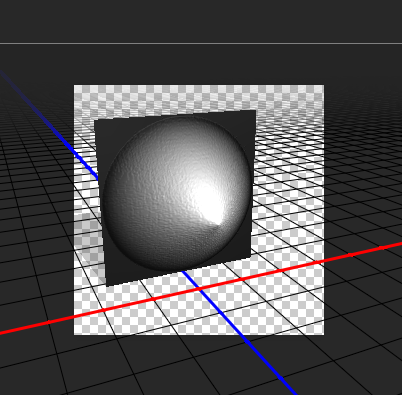
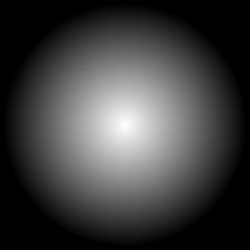
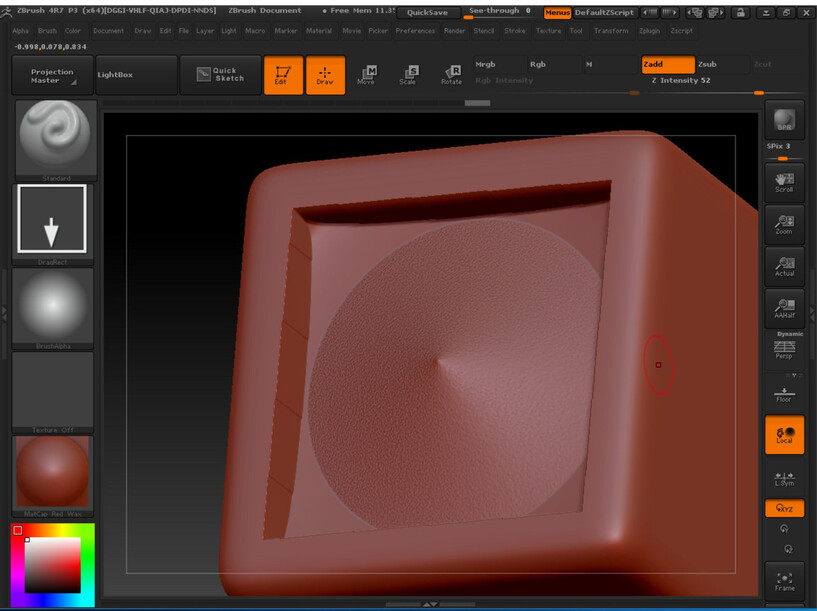
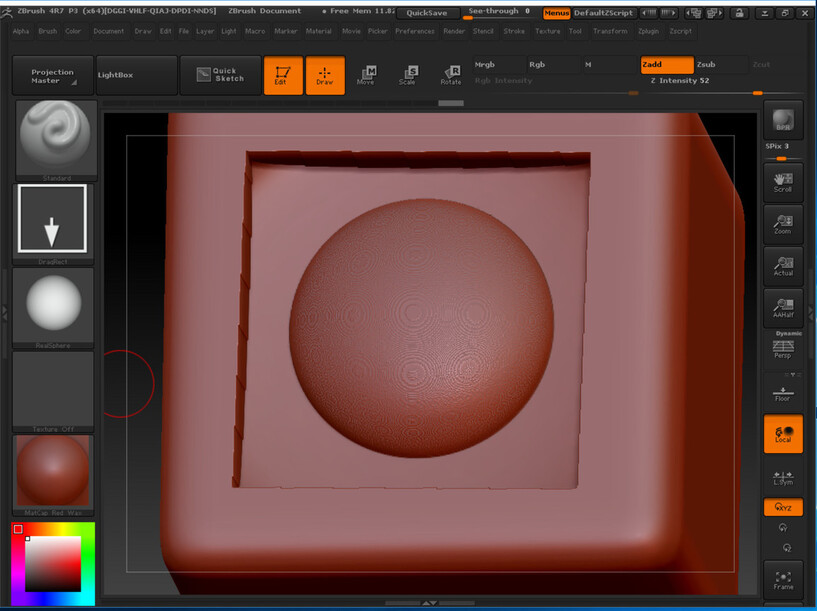
sphere example:

PS:
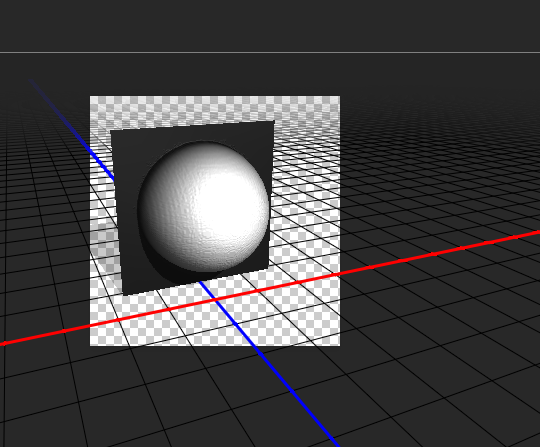
Gradients in photoshop do not have to be linear, they can be played with!
Oh! Thank you. The visual is really helpful - I wasn’t really understanding the photo part before. But that makes so much sense now.
Illustrator offers a Gradient Mesh tool, where you get precise control of gradient fills. You can make them linear, non-linear, or even stretch, pull, twist into shapes. Affinity Designer and Inkscape need this.
Perfect place.
People can definitely post files as examples. The only limit would be - please don’t say something like “can someone make me a height map of an acorn”. If someone wants to make one and post it as an example, that’s totally cool.
At the moment the software takes PNGs, JPGs, and GIFs. TIFFs are forthcoming. The higher the resolution the better, although gigantic files will be very slow to operate (e.g. a 20+ megapixel photo). The bigger you plan to engrave it, the higher resolution you need. You can use B&W or greyscale, although converting to greyscale gives you more control (otherwise the conversion happens automatically in the background).
The former.
The latter.
It’s harder than most people think in that you can’t just do a 3D engraving of a photo and have it work. Once you get the knack of it, though, many things are easy and powerful!

