Not trying to squirt lemonade in anyones’ Cheerios, but I’m fairly confident the three workflow examples provided so far aren’t worth pursuing if the intent is to achieve what we’ve all seen in 3D laser examples in the other threads.
A greyscale depth-map may be known by different names. In 3D sculpting, it may be referred to as an Alpha… which itself denotes something else to Photoshop jockeys. In the way the Glowforge and sculptors use a Depth-map/Alpha, black defines the bottommost end of the pool and white defines the untouched water surface. How far the Glowforge burns into the material when it encounters black might be a function of how much power the laser puts out and/or how long it lingers on that spot. Correlate this with your material HEIGHT and TYPE, and it should be the way you’d control the max limits of how far the laser drills down. If I had a pre-pro unit, it’d probably spend the next 6 months 3D burning various types of materials, cutting the cross section to observe the depth characteristics, and THEN testing various gradient curve levels to find the optimal curve for each specific kind of wood species, acrylic, etc.
I’m not at all convinced the MasterFX tutorial provided a true depth map and highly doubt that workflow translates in any way to something more fully 3D; face, sphere, vase, etc.
The Lynda.com tutorial generated something 3D-ish, but I’m still failing to see its applicability. Bottom line? A traditional 2D grayscale photo (from a camera) does not have the kind of information that will ever translate into a proper 3D object.
The Triaxes site took something that was 2D photo-based and attempted to fudge its way into becoming a 3D depth map. I too was curious to see exactly what the result would be like. (Well, I kinda already envisioned) I realized I could use ZBrush to bring this around full-circle. Borrowing their depth maps as an Alpha, I simply setup ZBrush to “carve” into a virtual block in vagely the same way the laser cutter would do it – that is, penetrate deepest with the black, for white pixels leave the surface alone, and with the grays in-between treat accordingly. If these results are acceptable to you, carry on.
Next up, testing the notion that any ol’ 2D photo can be fed into this process to get a full 3D object out of it…
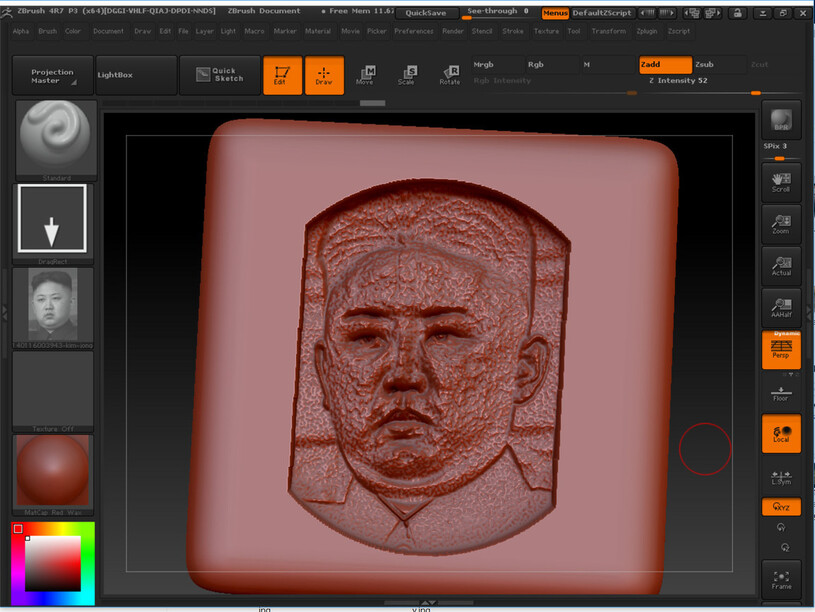
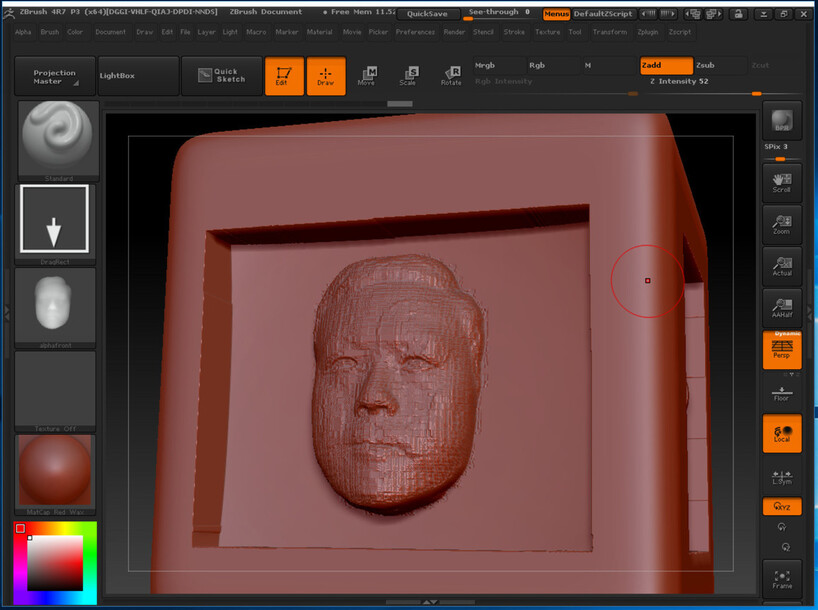
Facing head-on, the engrave has the tonal values that mimic the image used.
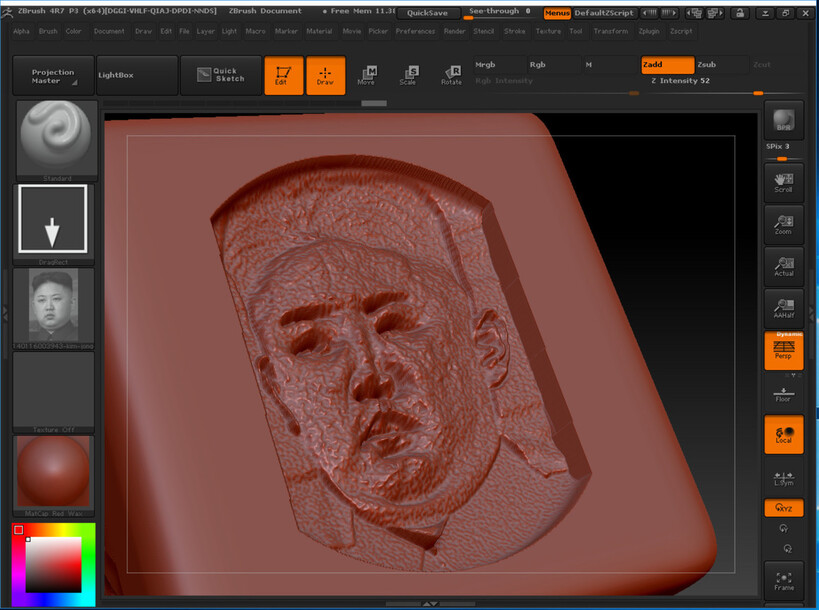
But just a slight tilt, and the 3D-ness that everyone expects is shown to be an epic fail. The eyebrows and nose undercut are sunk way in, The rest of the face isn’t extruding out in the proper bas-relief manner.
A depth map derived from a 3D file is the only way to carry the information through. 3D model it, 3D sculpt it, 3D scan it. Any of these three need to be in the equation.
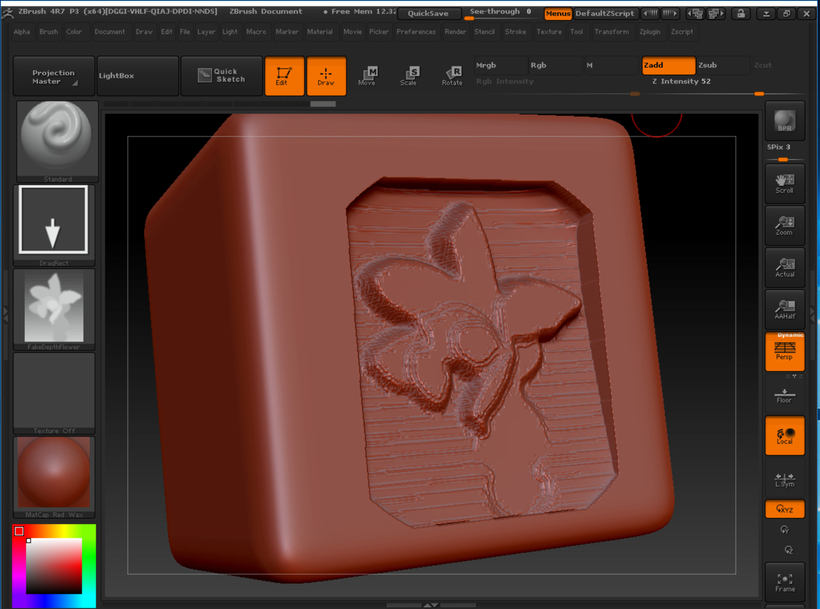
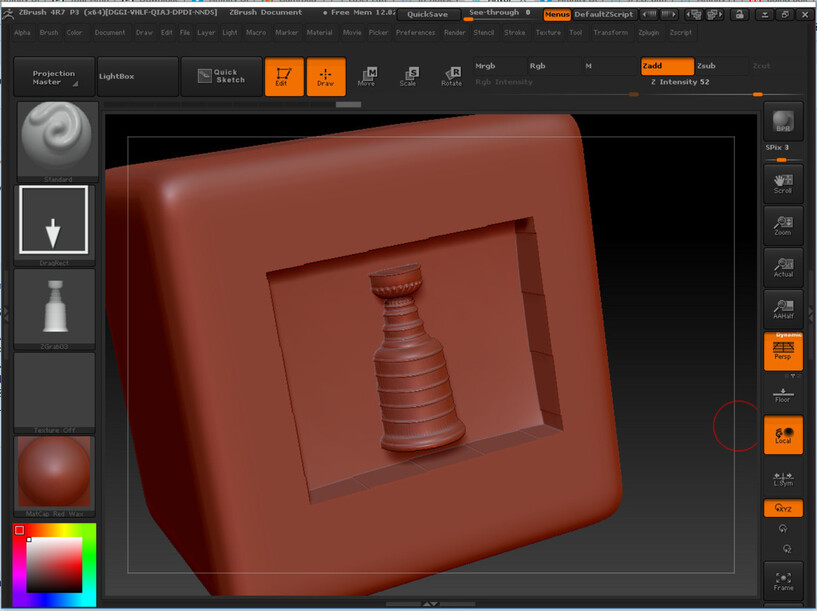
Going back to a previous thread, I took one of my depth maps derived from a 3D CAD model and mimicked a laser engrave…
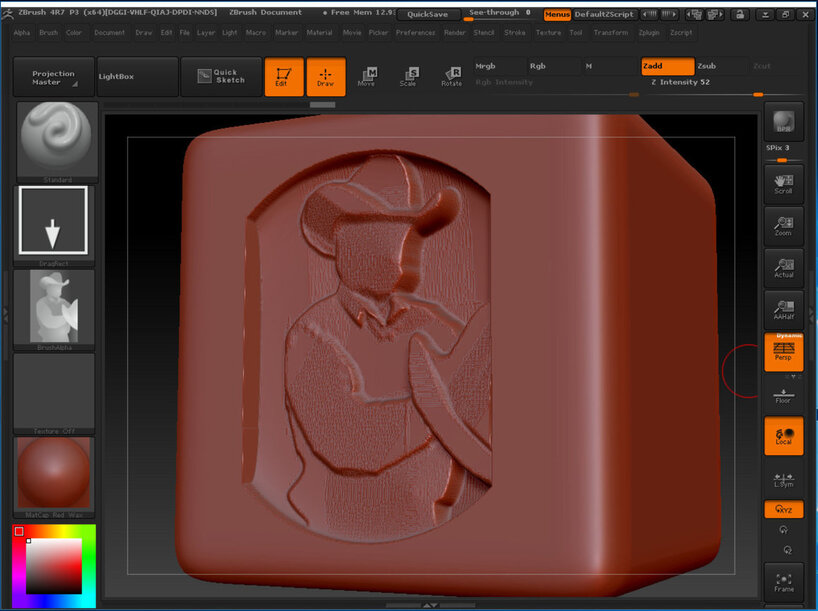
The low-resolution depth map originally derived from a 3D mesh scan…
Not terribly shabby for a garbage-resolution input depth-map Alpha measuring 475x384. A 1200 pixel higher-rez version along with a nudge on the Alpha blur slider would’ve done the trick.
As of now, the easiest way of generating a Depth Map from an existing 3D object is through ZBrush as described here. I could tap the GrabDoc button all day long to get exactly the type of images the Glowforge needs.
I know some may be asking, so I checked: Now that the cheaper ($150) ZBrushCore is out, can we make DepthMaps/Alphas in that? Short answer. Nope. After scouring a few threads and 3 ZBrushCore tutorial clips, they clearly stripped out the GrabDoc button found in the Alpha selection palette of ZBrush 4R7.
Those who have the time to push many more buttons to get a depth map can try Blender’s method:
Apologies to those who wished to finish out 2016 without having to gaze at Blender. 
 If there’s a site or tutorial that answers all my dumb questions, feel free to just tell me to shut up and point the way! I’ve tried googling but I am clearly not using the right words