The clarity of answering multiple questions from a user helps a lot with learning the steps of pre-lasering design and conceptualizing final products.
Thanks.
The clarity of answering multiple questions from a user helps a lot with learning the steps of pre-lasering design and conceptualizing final products.
Thanks.
A few years ago, I became fascinated with CNCs (because I read the Guerrilla guide to CNC).
Scratching-that-itch I spend 20+ hours working with an old Zenbot mill at my local makerspace.
The big lesson to me was that 3d tools (CAD, but also toolpathing) are really hard/effort-intensive to get your head around, so-much-so that I burned out on CNCs and all 3d CAD …until I saw the output from the glowforge 3d engrave…
Seeing how crazy good the glowforge examples have been (and imagining this might be the way I can finally make the gear molds from GGtCNC) I decided I would jump back into looking at 3d CAD and see if I could use it to generate grayscale files for the glowforge.
I suspect this is me stupidly trying to swat a fly with 100-ton hydraulic press, but the Rhino demo period and the fact there is a Mac version with good training got me going again.
From digging around in Rhino, I suspect that magic command is going to be “ShowZBuffer” (though I haven’t figure out quite the right way to save it to a file)
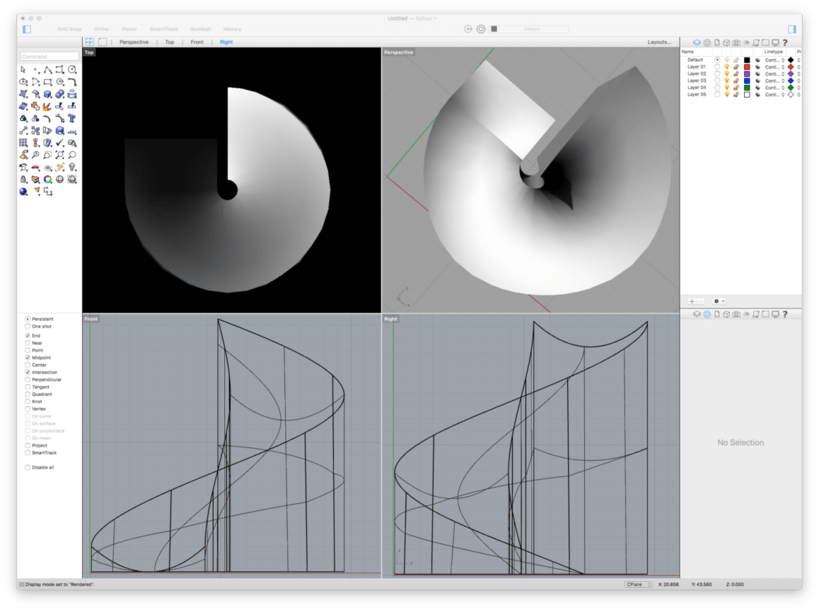
Here is a screen grab of a spiral marble path I’ve been struggling to render in Rhino:
The upper right view is a top-down, with “ShowZBuffer” turned on.
I don’t follow what the upper-right is, but the upper-left looks like it would do what you wanted - note though that the black would only be, max, 0.5" lower than the white.
So many likes and multiple bookmarks… thanks everyone! This is a great thread 
I might have a use for my Structure Sensor after all.
I got it to help measure existing spaces/buildings, but what it outputs is poor quality.
They will charge you $20+ dollars per room to convert what it outputs to a decent CAD file, which is more than I pay someone to hold the other end of tape measure when I measure a house.
It does a decent job of creating depth maps of spaces/things.
Can’t wait to try this with the  !
!
The Structure team are Glowforge owners themselves, so I’m excited to see what they do with it!
Can anyone point me to a video tutorial on the glowforge side of 3D engraving? Searching with no success.
I don’t know that anyone has made a video. What would you like to know about it?
Settings? A starting point maybe?
Did you know that you can select Proofgrade settings and then change to manual and the Proofgrade settings will carry over?
You’ll need to pick a material like a hardwood or acrylic for the 3D option to show up.
Awesome! That’s what I was missing. Thank you!
Even when I select the proper proofgrade material, I dont get the 3D or Deep 3D engrave options. Using an inkscape .SVG file. Am I missing something dumbly obvious?
Your file needs to contain a raster image of some kind, and preferably a depth map (grayscale) to get the most out of the 3D engraving. (And for it to auto-load as an option.) But you can code it manually for graphic and photo rasters…just change the Grayscale option from Convert to Dots to Vary Power in the Manual settings.
Oh! Ok, thanks! For what my students are currently doing, we need to be able to do deeper etchings on plexi that we then take a cast off of in plaster for ceramic sprig molds. In the future we will be doing lithophanes and we’ll need to figure out more of the nitty gritty with greyscales/depth maps. For now, we just need to be able to change the depth of the graphics on the plexi so when the final ceramic product comes out of the mold, writing and pattern graphics are visible and stick off the surface enough to be visible through the glaze
The way that Vary Power works is…black is engraved the deepest, white is not engraved at all, everything else between them scales based on the gray value.
Sounds like what you are wanting to do is just engrave deeper, right? For that, there are several ways to do it, but the easiest is to just increase the LPI. That causes the machine to laser over areas it has already engraved, cutting deeper with each subsequent line. (Although it all happens in one pass of the machine.)
Dumb follow up question: Will those options only pop up with raster files, or will they show up with svg as well? I seem to be getting inconsistent options, but I’m sure that’s because of user error…
This isn’t my or a students work, but is a good example of sprig molds used in ceramics, which is what we are using our GF mainly for this term. This is a wheel-thrown plate with sprig decoration by Washington artist Ryan W. Kelly: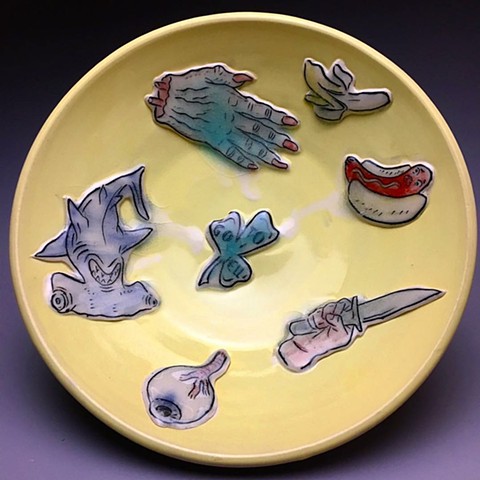
If you haven’t seen this, it is a really good explanation of how all the manual settings work.
The LPI option is available for all of the Engrave settings. If you used it, you wouldn’t have to use 3D or Vary Power.
You probably will want to run a few tests to see how deep you want to go. I usually just use the HD (High Def) Graphic setting and that cuts pretty deep. But I don’t know how deep you want to go with it.
You guys rock. Thank you!!!
-Nate
That’s kind of a trick question.
It will pop up with raster files.
And it may or may not show up with SVG files.
SVG files can contain both raster and vector elements. I can have a raster embedded right alongside a vector circle, in the same file.
In this scenario, the raster could be engraved using 3D, or convert to dots (dithered). The vector could only be engraved with a single power.
3D engrave varies the power of the engrave according to the grayscale value - that info is contained in the link Kittski posted above. It works with raster images only. If you had a gradient from white to black, it would engrave from shallow to deep (increasing the power as the image got darker). It’s an “always-on” process, where the laser fires continuously (except pure white). It doesn’t create a dithering pattern.
Convert to dots is dithering and will create a pattern of dots that vary from right next to one another to spread further apart. Our eyes see this as tonality.
The vector circle allows for one power level to be chosen. Color doesn’t matter. It’s an always-on process. The laser fires for wherever the engrave is. It doesn’t do 3D, but can engrave very deep.
In a nutshell, it depends on what is inside your SVG. It doesn’t sound like you necessarily need a 3D engrave (depth map, etc. where the engrave is contoured) but just need either vari-power if you have an image embedded in the SVG, or just engrave the vector element (if that’s what is in there) with either higher power, lower speed, or an increased lines per inch value.