ArtPrint Linoleum from McClain's Tests

One of the reasons I ordered a GF was to make my own stamps and/or stamps for other folks.

Over in this thread, no one could successfully determine if the Inventables lino was laser safe, but there was a comment regarding ArtPrint Linoleum from McClain’s in Oregon that has laser safe lino. And lino they have! A grab-bag of quadrilaterals for 9 bucks! The only problem is… no one has settings for this yet. And it’s weirdly curved…

I tried the settings mentioned here(10/175 - am I correct in reading that as Power:10, Speed 175), but they must have been for softer material, because they barely made a dent in this stuff. I mean, they dented it, but it wasn’t denty enough for a good stamp.

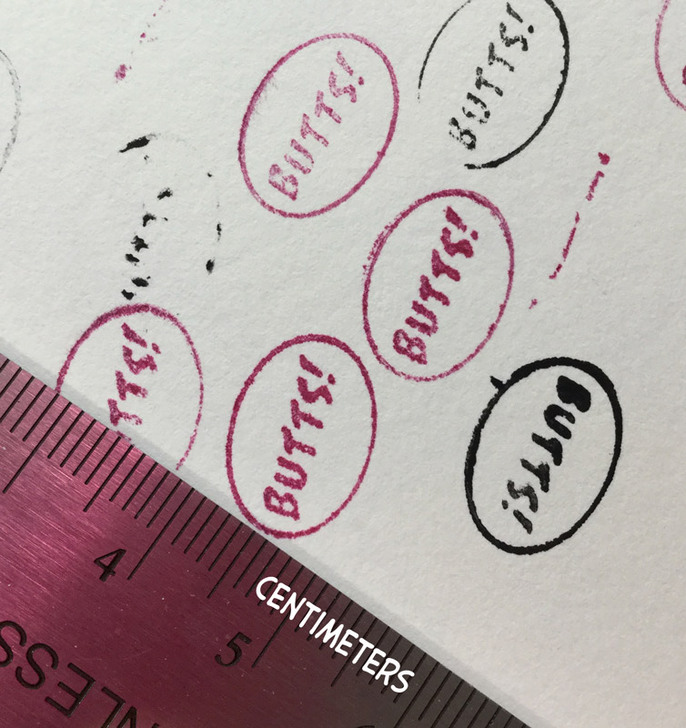
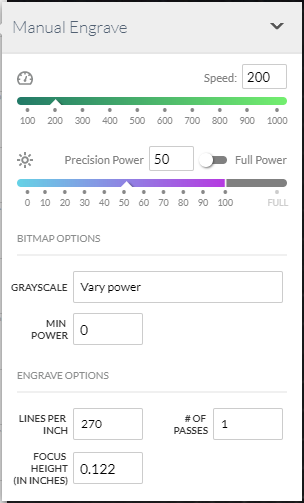
So i threw out random numbers and tested them. I cleaned them with Fast Orange and it worked pretty well. LPI for below was 225 and grayscale set to VARY POWER with Min Power 5(this=Mistake)

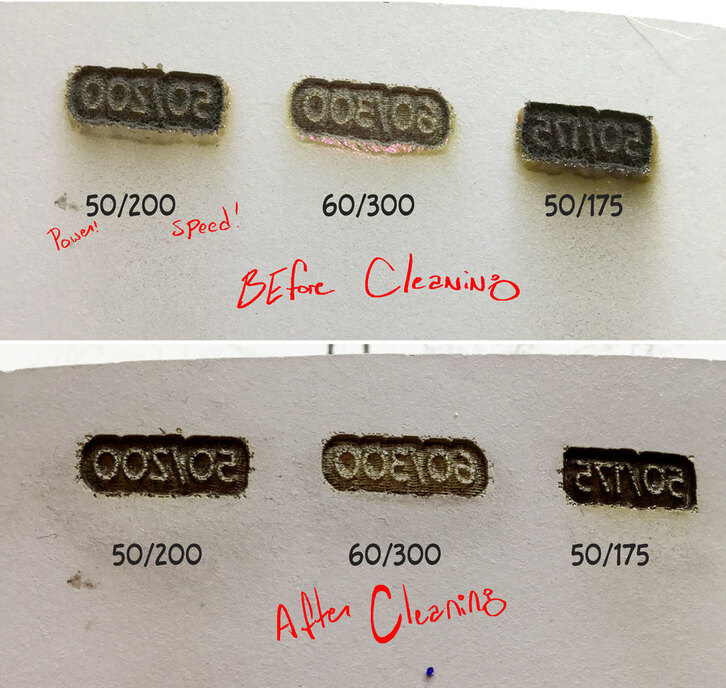
Eventually I fixed my mistake and turned the Min Power to 0(as I should have left it in the first place) and then set the LPI to 270, but I still could NOT cut through the stuff.


engrave03

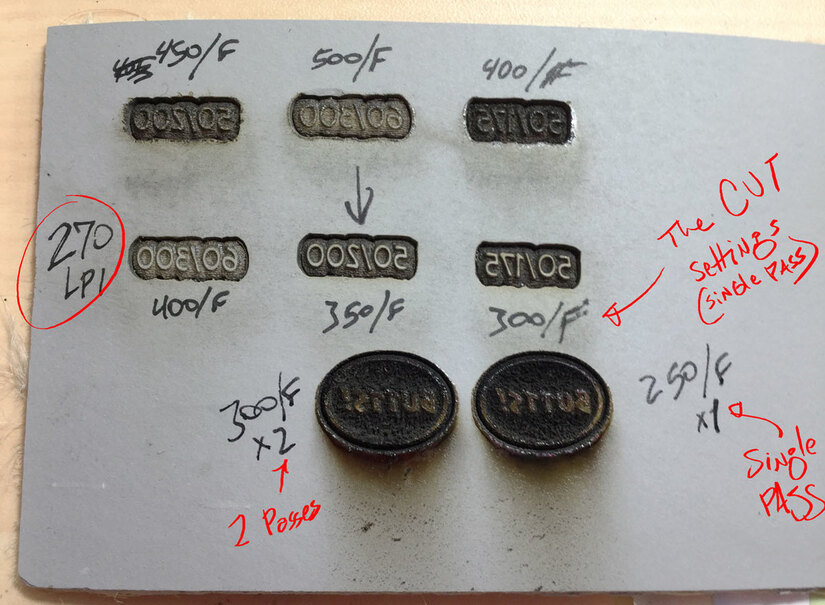
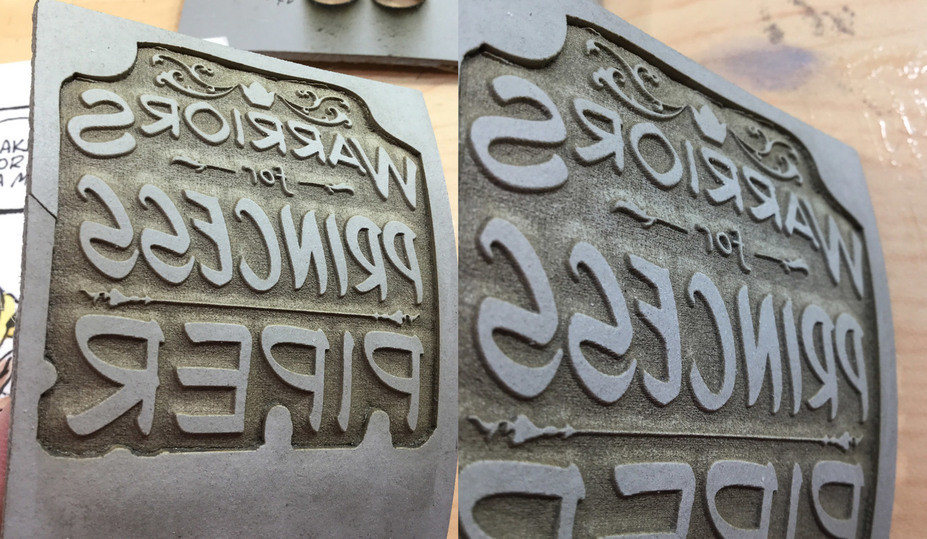
However, the 200/50 settings were looking promising, with a nice slope from the uncut lino on top(i followed this tutorial), so I started messing with cutting speeds and powers.

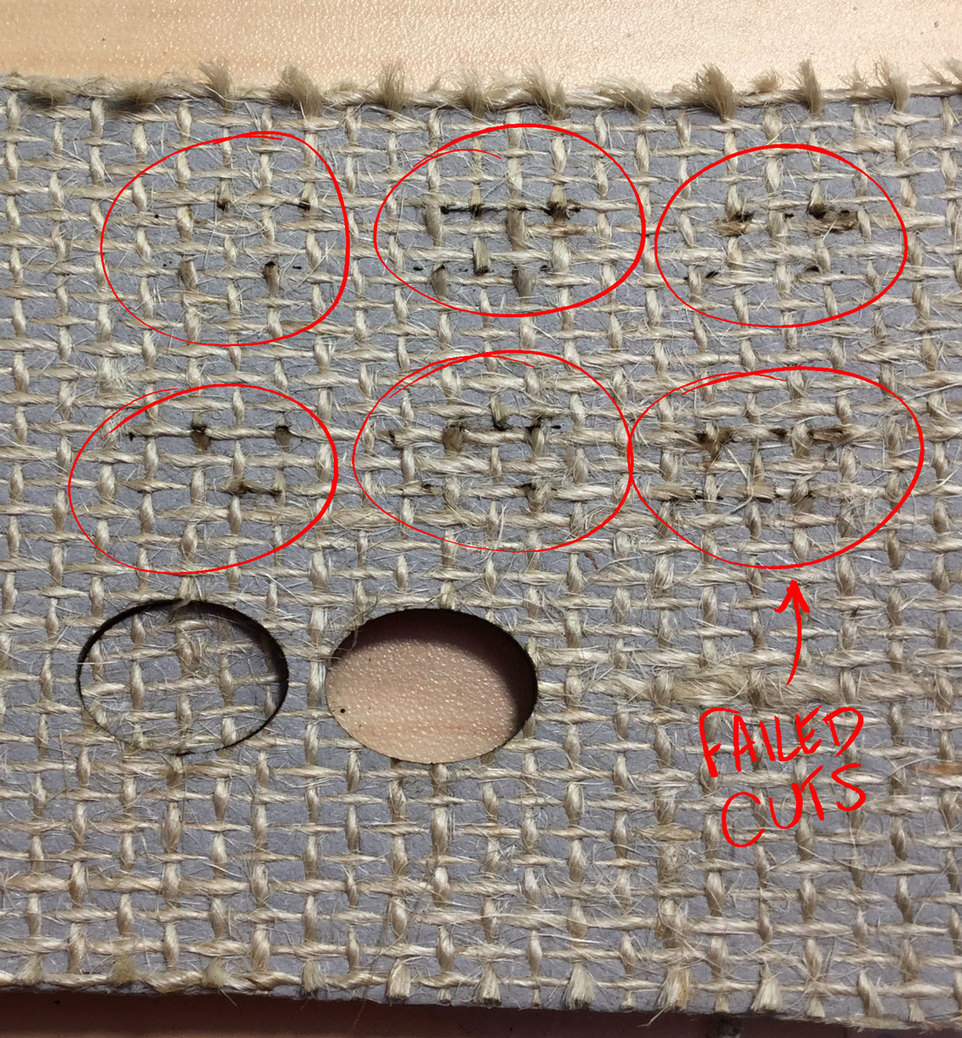
Finally, at 300/Full at 2 passes and 250/Full at 1 pass it cut through.

engrave04

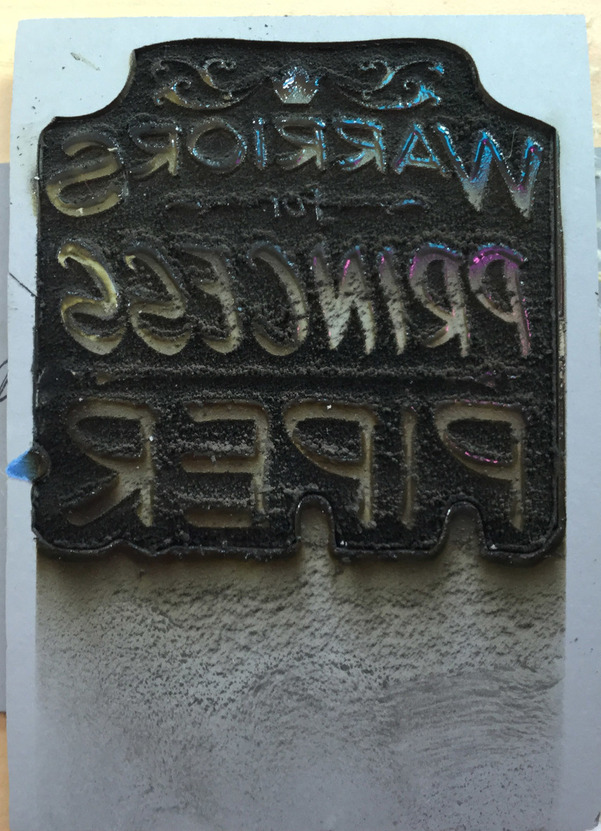
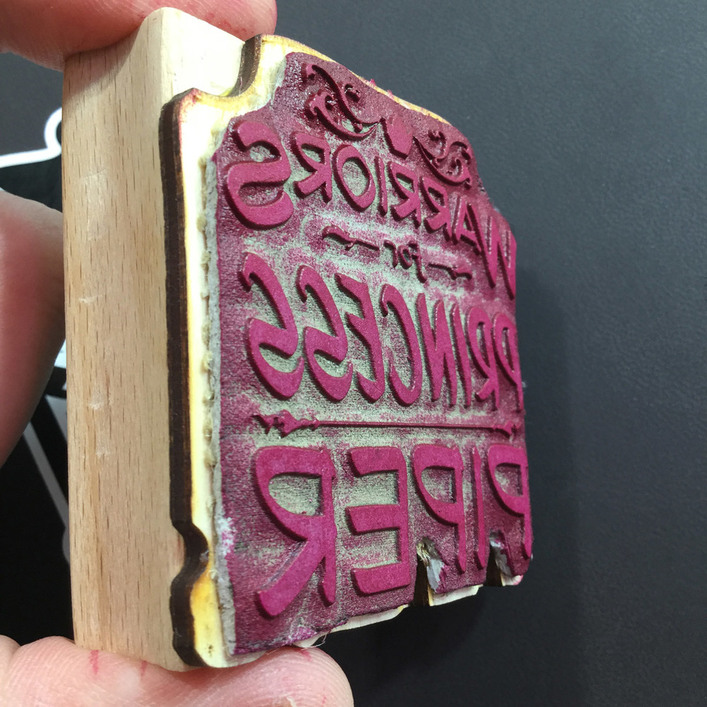
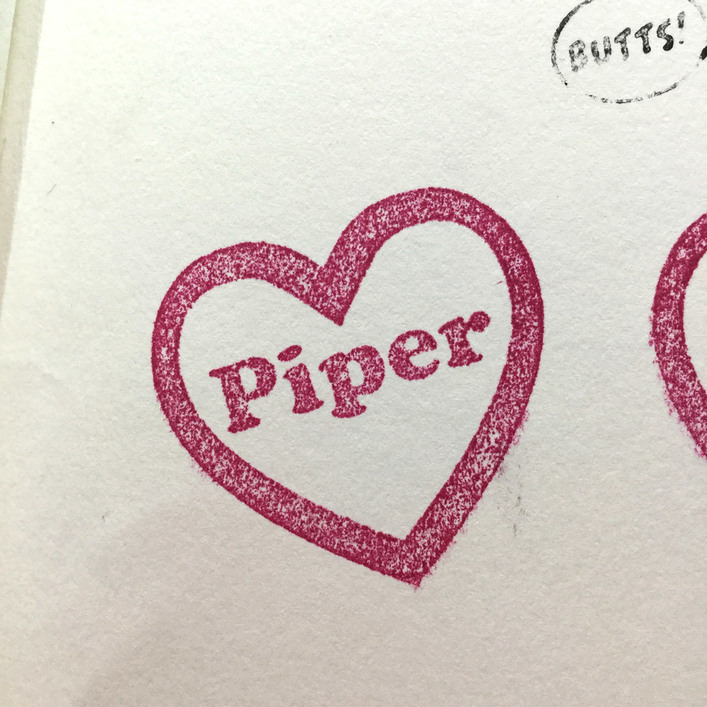
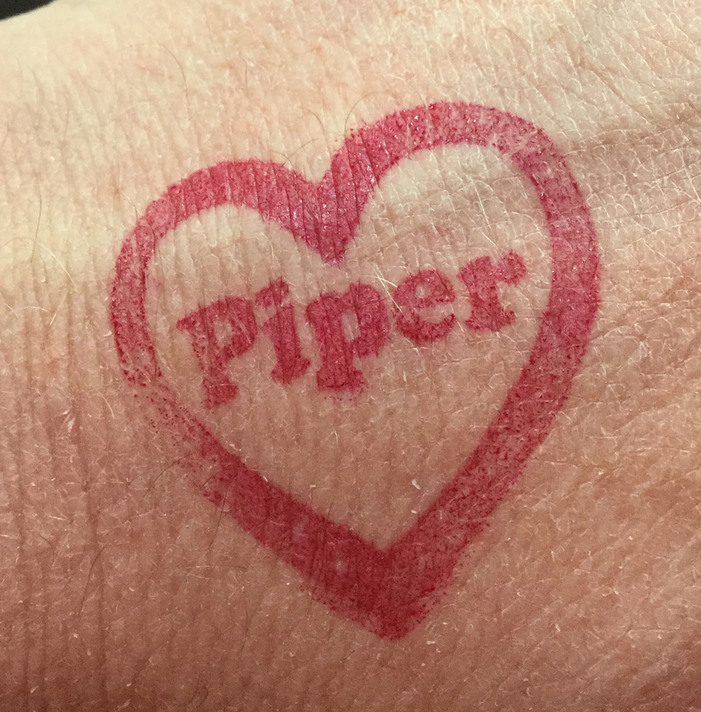
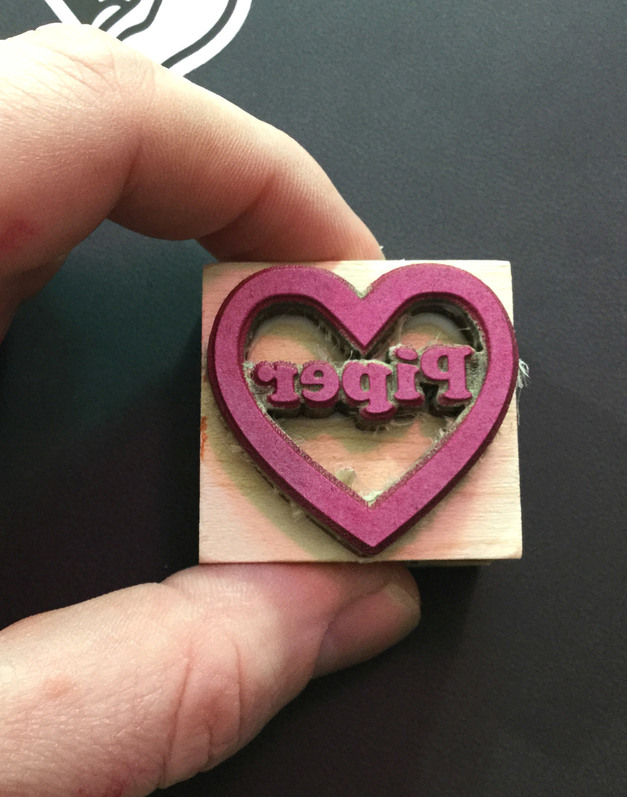
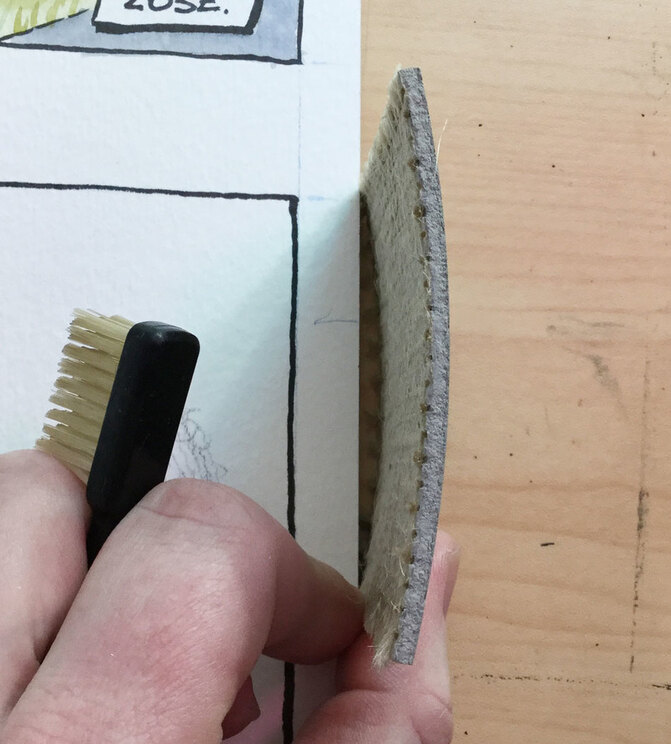
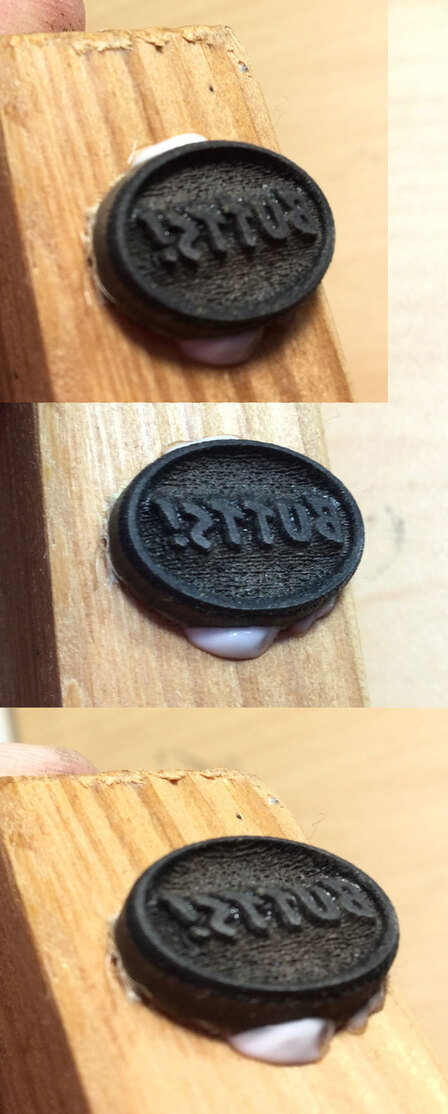
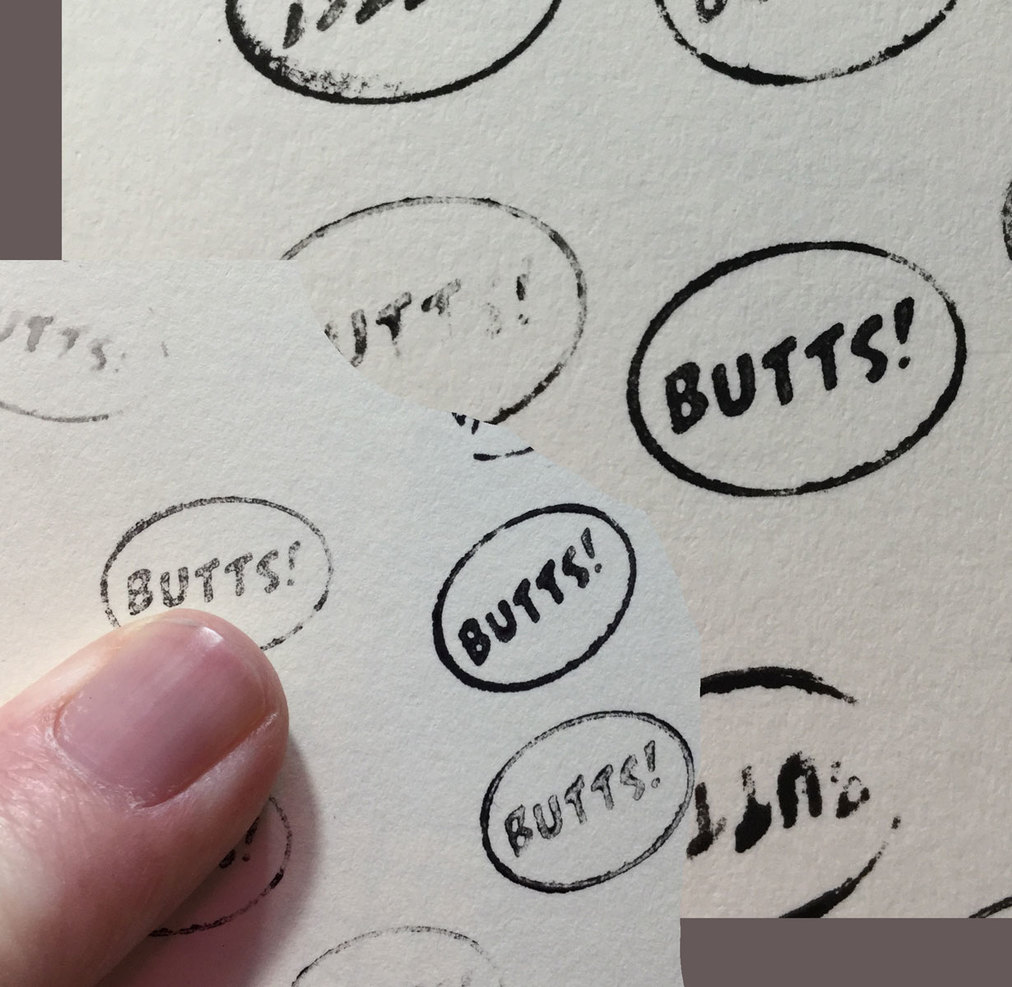
Time to make the test stamp happen. That’s my pinky finger in the photo. Despite the blurry photo, it removed quite a bit of material between the oval shape and the letters. And there’s ink all over 'em too.

engrave06

TL;DR: Engraving ArtPrint Linoleum, natural, no PVCs, blah blah from McClain’s in Oregon, settings that worked rather well: 200/50; Grayscale: Vary Power; Min Power: 0; 270 LPI

To cut it: I had most success with 300 Speed/Full Power, 2 passes.

Now about that wicked curve…
I ran it under hot water, then pressed it between some heavy objects and then ran it under cold water while holding it as straight as possible before putting it in the GF and starting the engrave as fast as it would let me.

When I tried cutting some of the strands on the back and then folding it the opposite direction…

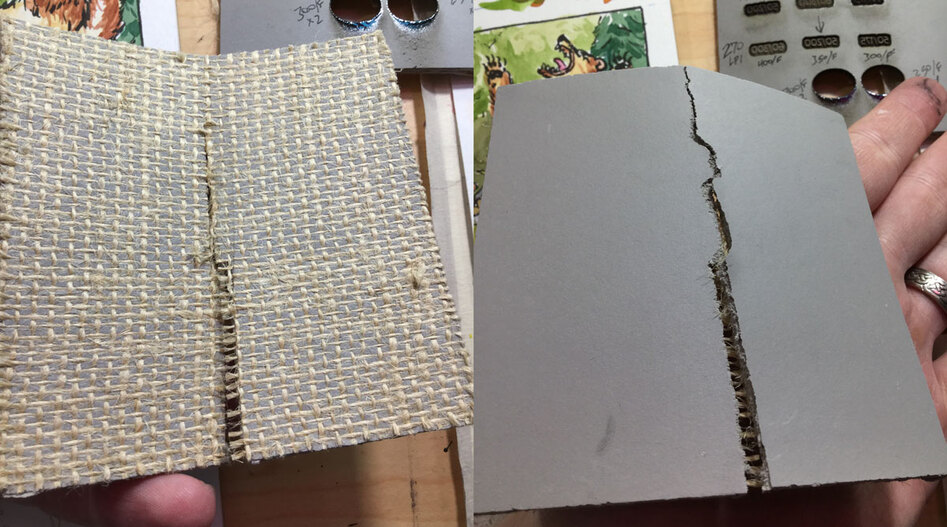
Maybe if it’s warmed up first it could work.

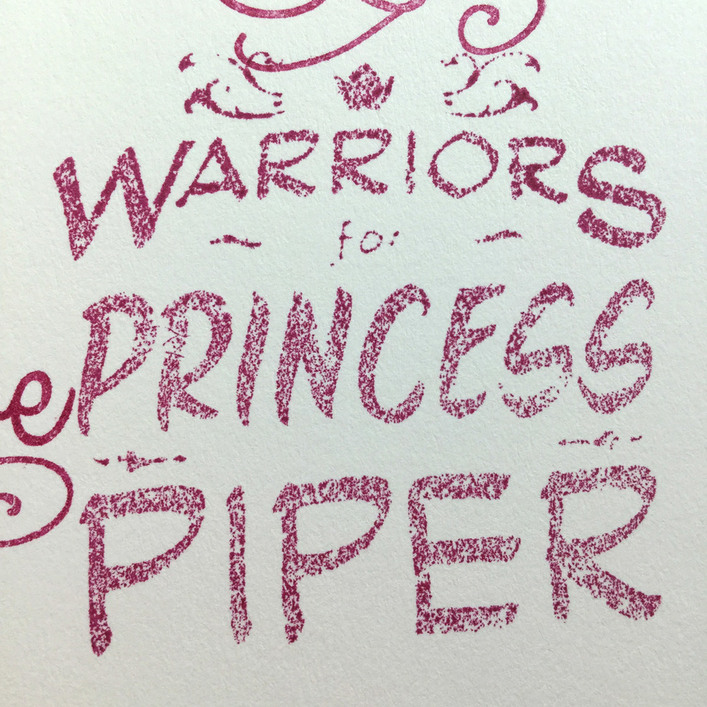
Anyway, good luck if you want to try this. You’ll also need to clean a bunch of stuff in your GF afterwards. I just ran the ACTUAL stamp i needed to make and that fold-down panel is filthy.
Will post pics as soon as I get it cleaned up.

21 Likes

GoodNESS that’s filthy. I scrubbed it with soap & water, and fast orange while it was submerged in hot water.

Either the GF didn’t perform the cut operation, or the cut operation failed miserably.
I experimented at 260/Full and it was definitely not cut at all. ALL of the raised area outside the stamp should have been cut right where the edge is…

Tomorrow I’ll get it mounted to some wood and test it out.

10 Likes

In the Questions at the bottom, someone specifically asks if its laser safe. The inventables employee confirms that it is.

Did you have two separate vectors for the background and the edge of the background? You can’t just have a colored stroke and colored fill on the same object. One object that is a colored stroke for cutting the outline. One object of the same shape but filled no stroke for engrave the background.

Thanks so much for demonstrating this and sharing settings. It looks great!

1 Like

Good point to bring up, but my previous file of the same set-up worked for the silly BUTTS! test. I use illustrator CONSTANTLY, so if there was a fill on the cut line, i wouldn’t have been able to see the engrave image as the engrave is a raster file and the cut is/was a vector stroke, all together inside one SVG file. I always put the CUTS above the ENGRAVES in the layers palette(screenshots of files below).

There wasn’t even char marks on the back of the linoleum like in the other cutting speed/power tests. There should have been a FEW dots of char on the back. Maybe it just gave up after 45 minutes of operation.

This wouldn’t be the first time a unit randomly quit or stopped during a step(it’s the 2nd time for mine). I know it’s still an early product /shrug, so i’m not upset; I’ll get it on the next go.


1 Like

Absolutely! There’s not a lot of info on linoleum on here yet, so I hope it helps anyone who might be interested. I’m pretty pleased with the BUTTS! stamp :wink:

1 Like

So way back in PRU-land @Joe and I engraved the inventables (specifically listed as laser safe on the web page). The “random numbers” you see were the old scheme before GF went to random units, one can convert using the spreadsheet.

3 Likes

Wow. What a lot of work you have put into this effort. I think maybe this is something I won’t attempt on my own.

What I really want to know is did it smell like poison, and did it make a horrible mess of your machine? https://community.glowforge.com/t/linoleum-a-comprehensive-test-and-why-you-might-not-want-to-try-it-yourself/15320 seemed like a strong cautionary tale.

Also, now I’m going to have this in my head all day.

Linseed oil. Solidified by. Oxidation.

1 Like

I wonder if a heat gun on a low setting would get you the right temp? Then put into a press or under some books.

Also I have seen laserable silicon that Johnson Plastic (laserbits) sells. Also a hot stamping company sells a similar laserable product. Wonder if that might actually work better for your Lino prints than Linoleum.

When engraving linoleum with hand tools, it’s recommended to warm it slightly. It’s really mostly a solid form of oil that at room temperature and reasonably high above room temperature is stable and firm. So some variables there in terms of prep.

Linoleum like this is sometimes worked by hand without being attached to a block, but you might consider whether you could get small blocks of it cut and engrave with the crumb tray out, and then use a hand tool to remove the additional material around the part you engraved.

4 Likes

The engrave took 40 minutes on the big “final” stamp, and it left some residue on the fold-down flap. But not a ton. I cleaned it off with isopropyl on a rag and it seems fine. I need to get some more zeiss wipes though and check out the lenses in there.

It smelled like… a super organic, vegan muffin that was very overcooked. Not great, but not terrible.

4 Likes

Maybe? I was misled in my expectations I guess, because this is decidedly NOT for making little stamps by hand-pressure alone.

What is the reason for using linoleum as opposed to other stamp-making materials? Various laser-safe rubbers for stamping have been discussed here before, but linoleum stamps seem like a thing.

Apologies for my ignorance. I am unfamiliar with the process and didn’t think about the fact that it goes through a press.

Maybe? I had my expectations in the wrong place I guess, because this is decidedly NOT GREAT for making little stamps by hand-pressure alone.

Rampant stupidity on my part. As you’ll see below, I wish I had ordered laserable rubber :unamused:

Today I’m grumpy because this stuff doesn’t behave anywhere near what I expected.
On a trip to michael’s I found some $2 stamps that I ripped the stamp off, sanded, and glued my “stamp” onto. Also a stamp pad to test it out.

So thumbs up for that, it looks like a real stamp!

With the minimal pressure, the stamp made from squishier rubber looks like this:

Nice coverage, exactly what I want.
What about that dumb stamp i made yesterday?

Hey, that looks fine too. Have to press harder than the orange rubber stamp, but it’s doable.

Now the big one (at ~7 cm square) with as much force as my arm/wrist/hand can muster:

It’s gotta be too much surface area to nicely apply pressure onto the paper :angry:

So here’s a test with me standing on the stamp with one foot:

laser-003

So I’m glad I didn’t waste my inventables gift cert $$ on some lino(not like the real $$ i wasted on this stuff) because what I really want is RUBBER. LASERABLE RUBBER. And all the places I’ve called today do NOT carry it #grumpface

I totally thought this could be used for hand-pressure style stamps. My stupid mistake. It does work for teeny tiny ones at hand pressure though.

8 Likes

Well, it’s helpful to everyone that you ran some tests though, so it was not done in vain. Thanks for testing and posting the results. :sunglasses:

(I don’t think they look bad at all, actually. I like the rough stamped look sometimes.) :smile:

2 Likes

Since i have SO MUCH of this(does anyone want some? ;D ) I thouht I’d run another test because it isn’t bad for small stamps. The size is really what seems to be the problem with lino.


Rather than burn through a bunch of the stuff & dirty up everything, I cut out all the places that would have been engraved flat. This stamp is 38 mm by 36 mm.

The cuts were Speed = 300, Power = Full, 2 passes

Here’s a shot of the SVG

(Our friend’s kid is dying of some kind of rare cancer and these were supposed to be custom gifts for them)

5 Likes

I am so sorry for your friend!

1 Like