I’ve sectioned this post so you can skip specific parts that you might not be interested in.
- INTRODUCTION -
I was really excited to do some precision Lino-cuts on the GF, in fact, one of the first things I got with my Inventables gift certificate was a bunch of Linoleum in preparation of some print-making! A good friend of mine does lino-printmaking cards each year for Christmas, so naturally, this was a great chance to test the capabilities of the machine with the material.
I searched the Forums before starting and found precious little information about cutting Linoleum, so I thought making a post to help others on the path would be a good idea.
What I learned: I’ll probably save the linoleum for analog lino-cutting in the future, and never put Linoleum in my GF ever again.
- ALIGNMENT PROBLEMS -
Like many printmaking projects, the project required us to make 3 separate, identically sized blocks, since the design has three colors, and all the blocks would need to register perfectly with one-another. To properly prepare to wage battle with the ever-present alignment problems with the GF, I made sure to prepare and size my files (SVG) carefully.
I created alignment rectangles for the blocks and put the artwork perfectly inside them, selected “ignore” on the artwork and used the resulting misaligned markings from the alignment rectangles to align the artwork in the proper spot. But here’s a problem that wasn’t my fault (I don’t think). I kept running into the “Aw, Snap” chrome browser error where the page crashes entirely. Since you can’t save a project, this meant that every time it happened (6 total times throughout this project, without a consistent, obvious cause), we would have to re-upload the artwork and start the whole alignment process over again. But it gets worse.
The alignment issue doesn’t seem to be consistent (have others noticed this?). Despite not moving the material inside the GF, the “off-ness” of the alignment changes from time to time, though I have yet to do comprehensive testing (or forum searching) to learn if it’s power-off or app-reboot or something else that resets the alignment problem. So that means each time the Browser crashes, we also have to do the alignment rectangle cuts again, too, and re-register the images within the resulting marks. Which is an annoying process anyway, compensating for a problem you can’t help but wish didn’t come with the equipment - but beyond wishing for things you can’t have, it also means there’s starting to be a lot of misaligned marks on the linoleum that will occasionally fall where the artwork is supposed to be, which means unwanted marks in the final prints.
Finally, because the GF can’t handle larger engraves at once (a well-voiced issue already, I know) you need to break up the different blocks into different engraves, which also increases the chance of running into one of these browser crashes. Most of ours happened between projects, which meant trying to do the alignment hustle with precious finished engraves on the cutting block, in potential danger of being hit by alignment marks.
TIP: I would use small corner marks instead of rectangles to lessen the chance of alignment marks falling into valuable real-estate.
- ENGRAVING LINOLEUM -
We knew you need to be careful not to use “modern linoleum” because it’s actually PVC and will ruin your machine and maybe you, too, with toxic / corrosive gasses. So we were careful to use actual Linoleum.
The nature of block printing requires you to cut the negative space and leave the actual artwork uncut, which means you are likely to be burning away a tremendous amount of material, and this was certainly true with ours.
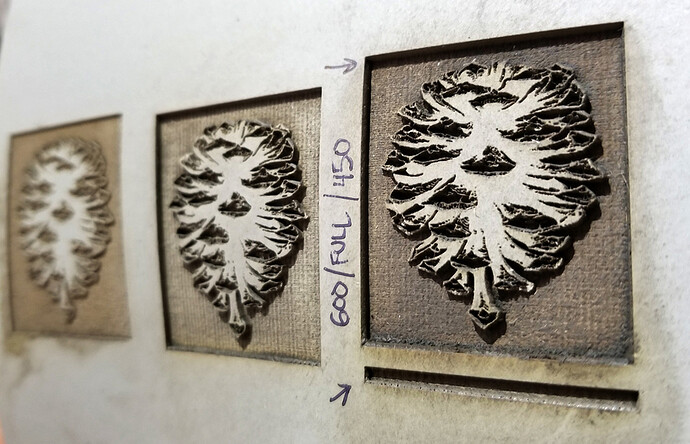
I started with a test engrave to get the power settings right. We found that 600 speed, Full Power, 450LPI produced the best results for print-making purposes. This produces a deep enough recess that you can be reasonably sure you won’t print the negative space, but still leaves a reasonable measure of the 1/8" linoleum intact beneath.
But right away, we started to notice some undesirable aspects to the process. First, it was very smoky and smelly (note: I’m a basic user without an air filter, just a standard hose to the outside), and second, there was a lot of build-up of dust and oil on the block after the test. This picture is post-cleaning.
BUT, OK, let’s make these blocks!
- HARDSHIPS -
It was a very arduous process with the alignment stuff, but second to that, the worst part was the smoke and the smell. It was so bad that I put tape over the seams of the door and front hatch of the glowforge, as well as a nearby door not far from the vent outside, just trying to stop some of the fumes from coming inside. Still, we had to turn on a fan, open another door, and practice a fair bit of tolerance during each hour-long engrave.
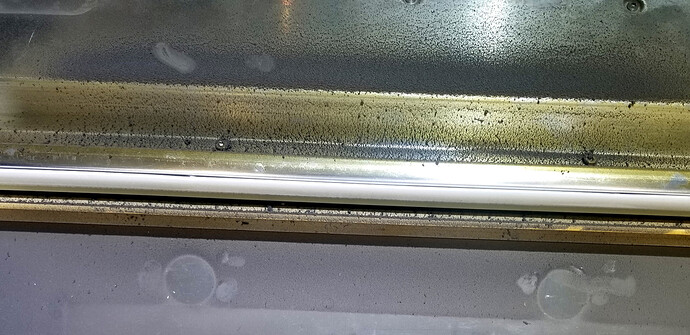
TIP: If you’re getting smells from smoky materials inside, it’s possible that it’s coming in from the bottom seam of the front hatch - I had a lot of burn build-up that got under the hatch, because the fans full all the smoke toward the front. Other users have mentioned you should check the exhaust fan cage and surrounding area for build-up that will restrict airflow out the vent.
This alone is almost enough for me to say fairly confidently that you may not want to engrave Linoleum. It’s seriously stinky, seriously smoky, and should be engraved in a more-than-well ventilated space.
But unfortunately, that is not the end of it: It also burns very dirty. Granting that I’ve basically only been burning wood in my unit so far, just one hour of linoleum made the inside of my glowforge dirtier than all 60+ hours of laser time previous, put together.
TIP: If you’re engraving several designs on the same block, make sure to do the windward side engraves first (front of machine), this way the laser isn’t cutting through a bunch of burn-build-up later on
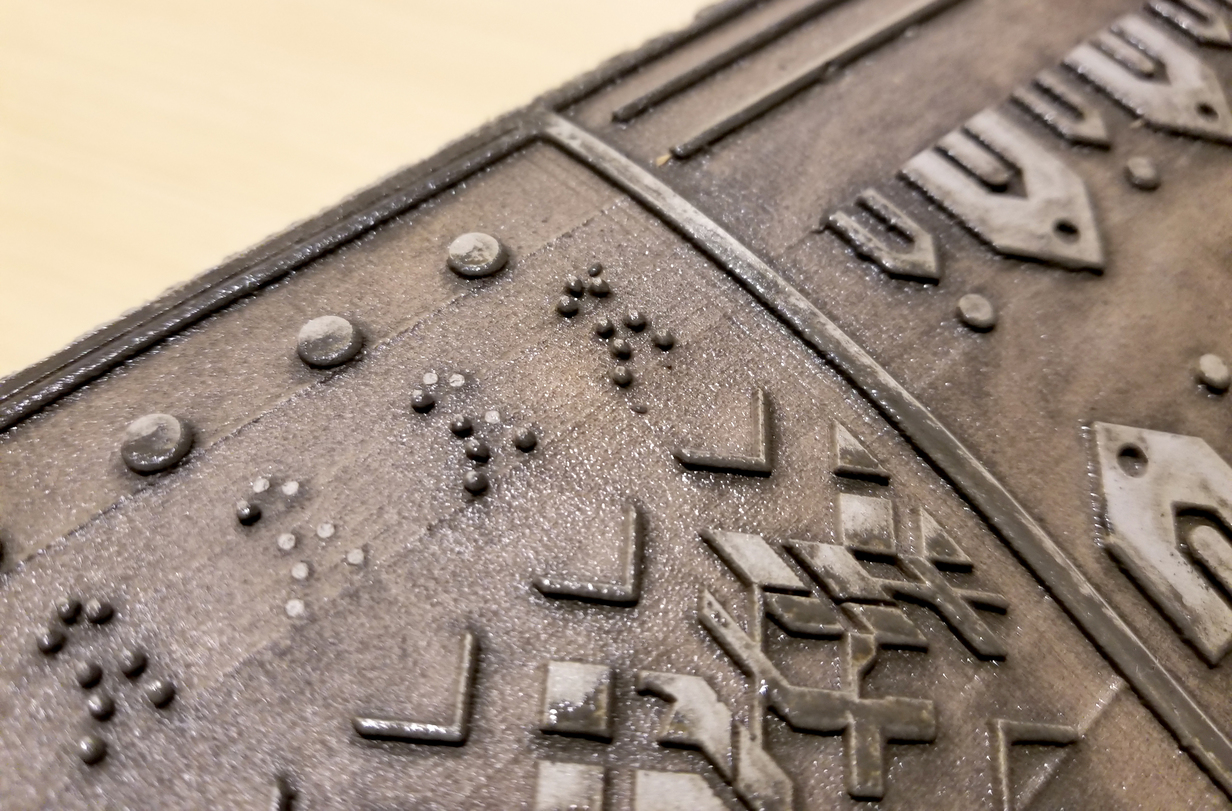
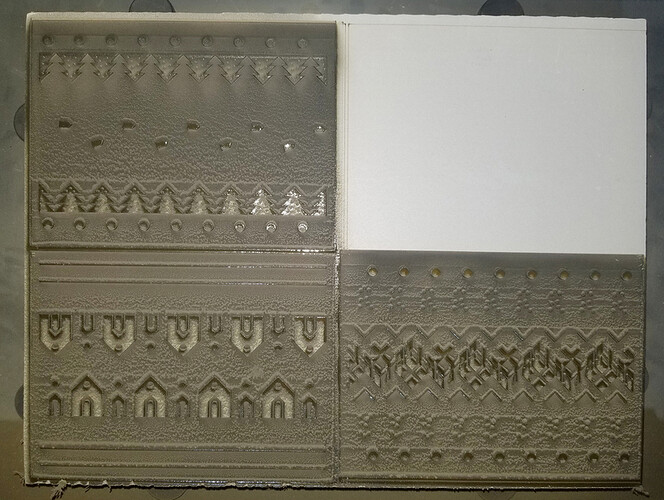
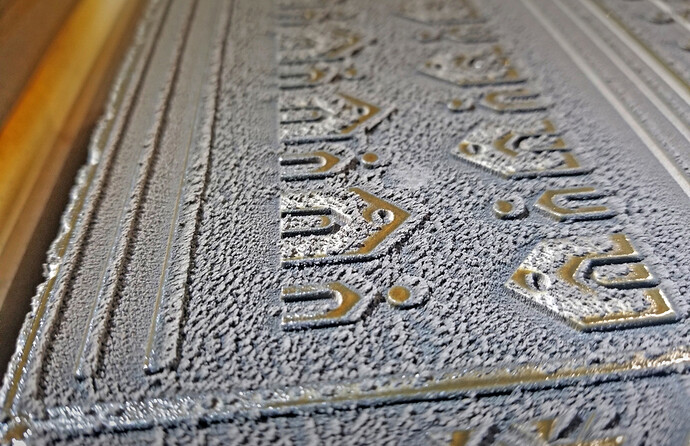
After the three blocks were done, I took a few pictures to document how dirty they get, and how much build-up you can expect on the material.
Seriously look at what is uncut, and what is build-up - it’s crazy!
Then, with the blocks finally done, it came time to clean them. But how? I do not know, you might have to google that yourself. Because we failed to clean ours. The thing is, some of the build up is dusty in nature, and can be rinsed/toothbrushed away with alcohol or soap / water, but then there’s a whole lot of oily thick tar-like build up that coats everything, ruins your cleaning toothbrushes, and does NOT wash away easily. We were being careful not to get water everywhere because our linoleum was pre-mounted to a block, but even with care and slow going, we still managed to ruin this lamination and the linoleum separated from the wood.
TIP: Don’t use linoleum mounted to a block because it makes cleaning a slower more careful process, and it’s usually mounted to particle board which shouldn’t stay wet as long as you’ll need this stuff to be wet to clean it fully.
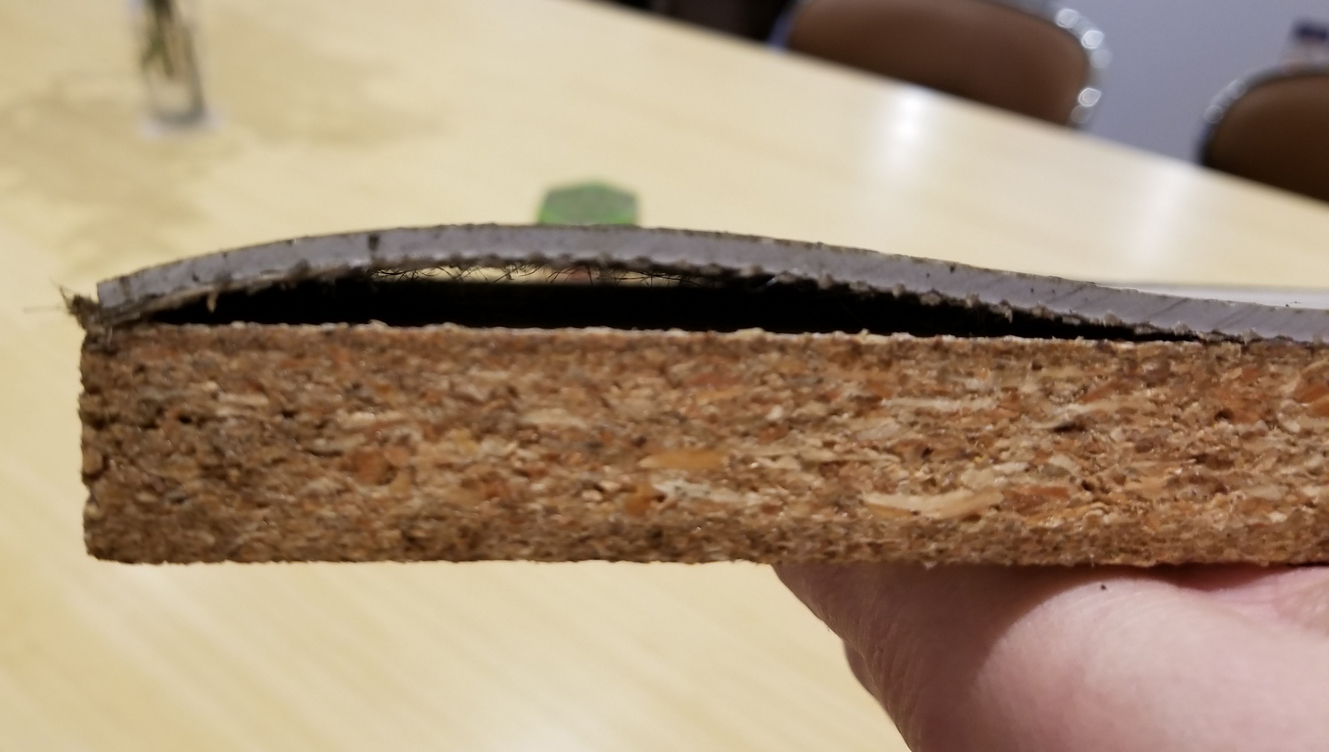
In trying to get off the thicker, tar-like build up, we took to a more vigorous scrubbing, which naturally adds a lot of risk to the smaller un-engraved pieces of artwork that remain. Again, with care, we still managed to ruin the lino-cuts just trying to clean them. Several smaller pieces broke or detached in the process, and we never did get them all the way clean.
- CONCLUSION -
I wish I had a better conclusion to arrive at here, and I sincerely look forward to other people’s attempts at the process, but if you ask me, I would tell you to pull out your carving scoops and cut the linoleum yourself. The process of engraving linoleum is very smelly, very messy, very dirty on your precious GF, and chalk full of places where the process can go wrong. We still may do prints with these blocks once we can get them cleaned, just for reference and catharsis, and if so, we’ll post pictures in the comments.


 I’ve eaten it and turned wine into it, but the only thing I ever cleaned with it is windows.
