Bathymetric Chart

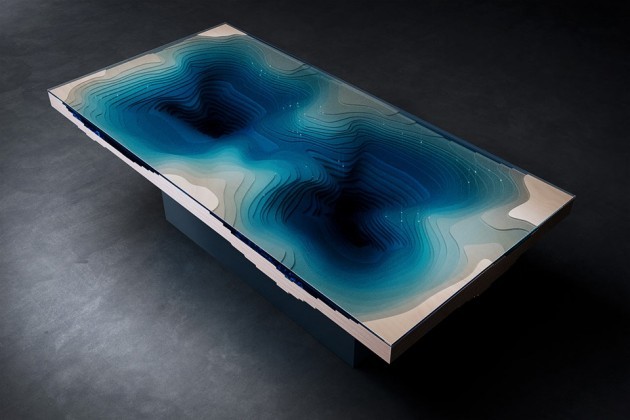
Here’s the first design I’ve actually sat down and created specifically for the Glowforge. It’s of Padre Island here on the Texas coast; a place very near and dear to me. I’ll give the first couple of them away as gifts to people I know down on the island. I may be in over my head on assembly! :slight_smile:

I’ve wanted to design one of these for a while. Bathymetric/topographic maps seem to be quite popular for laser cutters but I haven’t ran across any for this particular area. I was inspired to go ahead and do it by another thread - Laser Cut Map Question. Rather than using the methods mentioned in that thread (involving extracting data from GIS data, etc.), I decided to base my map off of actual NOAA nautical charts and design it entirely in Illustrator.

Before posting the files, a few thoughts on the design process.

It took me a few minutes to wrap my head around the design process - to keep in mind while designing that it’s not an illustration but that I am specifying cuts and engraves so I need to keep in mind what the active area of the design is and what is scrap.

I designed this to use (8) 1/16" sheets of material (plywood), which will leave it at ~1/2 in overall height.

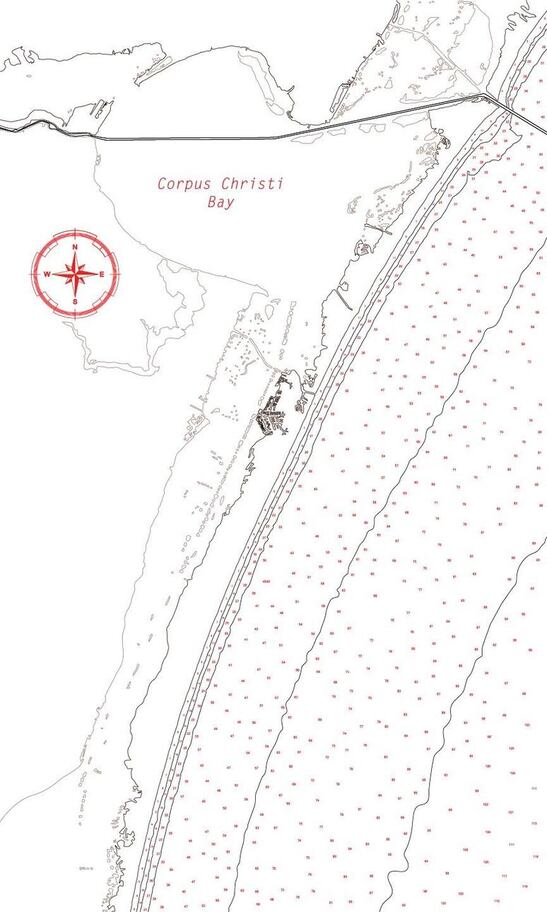
You’ll notice on the upper portion of the map a channel that runs from east to west. This is a deep ship channel running into Corpus Christi Bay. I thought it would be a nice touch to preserve the depth of the ship channel by cutting it out on each layer. This leaves more pieces to assemble in the end but adds an interesting touch, in my head, at least.

This is a unique barrier island area that has a ton of smaller islands. I’ve included the vast majority of them on this map but some are very little. My thoughts, and the way that I set the file up in the layers, is to cut all of the land area on one layer (or sheet) and then hopefully use a paper with adhesive to pick the sheet up, remove the scrap areas and have the land masses laid out where they will be attached to the actual design. To improve on that idea, I copied all of the land mass borders from the cut layer to the layer they will be adhered to and converted their paths to be a very light score/mark to serve as placeholders.

This is a fairly large scale area condensed down to a 12x20" map, so some areas will potentially be pushing the abilities of the Glowforge in regards to kerf (more specifically, the kerf overlapping a previously cut line). To try and mitigate this and see where potential issues were, I adjusted my AI preferences to show the stroke size in inches and assigned a stroke of 0.01" to simulate the kerf and identify potential cut overlaps.

From a software/design utilization perspective, I’ve never had much use for the pencil tool in Illustrator but I used it for the majority of the islands since it was much faster and more accurate than using the pen tool. It’s important to make sure that you look closely though that you’ve made a closed path as it can look like it’s closed but be off by a bit and when cutting things out, I believe that will be an issue.

This is mostly a completed design; I’ll likely go back and refine the lines just a bit more (the smooth tool works great for smoothing out curves where they may not look as organic as they should) and add some more labeling to various landmarks. If kerf becomes an issue, then I’ll obviously need to address that in the future.

Oh - interesting facts about the document:
3,248 paths with 35,708 points totalling 1,129 inches

PadreIslandMap_NONOAA.ai (2.8 MB)

41 Likes

Love the write up! this turned out really cool. I’ve got a couple hints for you for Illustrator which help with laser cutting: You can join lines to make complete shapes with the join command (Object>Path>Join), When I am finalizing any AI file to cut I always do Select>Object>Point Type Objects and erase any that it finds. This will prevent the laser from finding stray points and burning a hole in your work. I can’t wait to see this once its cut!

6 Likes

That’s a really beautiful job too! :smiley:

3 Likes

Excellent work. It seems that the things that turn out the best really do take some painstaking work with vectors, no matter how good the trace is. This map has sent me on a geography lesson to understand the barrier islands in the western Gulf. It will be fun. I’ve never been down there but the map is seductive!

3 Likes

Join works great! I was using it with the pencil where I just missed closing the path and then simplifying some paths where I ran into potential kerf issues.

And great info on the select Point Type Objects. I didn’t come up with any problems on that one - but did find a few stray points using the same (Select>Object>Stray Points).

I think that adjusting my stroke width to approximate kerf will be my standard practice going forward for Illustrator designs. It’s much easier to visualize the cut, especially on something like this where you may be zoomed in several hundred percent looking at very fine details.

Can’t wait to put it together - just need a Glowforge! (Ahem @dan) :wink:

How have you finished yours in the past - watercolor based paints or very diluted acrylics? I think one could do some pretty amazing things with paint on something like this - but, I’m not a very talented painter. :slight_smile:

2 Likes

I’ve never really been a fan of auto-trace in Illustrator. While the results can sometimes be ok, the file structure and layout is horrendous. It’s more of a pain to go back and make the edits than to just trace by hand! I’d rather do like I did and trace by hand even though it takes longer.

And that you’re checking out the geography down there? Super cool!

Part of the reason for adding all of the little islands is that I know the area pretty intimately. I’ve spent hundreds and hundreds of hours on the water down there. Everyone fishing down there has a favorite spot and knows most of these islands by heart - since we largely use them for landmarks on where to run and not run.

If you’re searching out the geography, also search out Laguna Madre (which is the body of water behind the barrier island). It’s a pretty rare area - one of only six or seven hypersaline bodies of water in the world (saltier than the ocean).

2 Likes

Stray Points is another good command for the toolbox.

I’ve finished mine with acrylic paint before but most of the time I have left it plain. I’m usually using chip board so it has an earth aesthetic :wink:

Have you seen the bathymetric maps with blue acrylic? layering it gives it a translucent depth. Much like this image.

15 Likes

That’s beautiful. This first one might cost me a couple hundred $ in just experimentation!

I also designed it as 12x20" so it fits the bed of a basic Glowforge. It would be a fairly simple proposition to rescale and do the design as 4 segments for a final size of 24x40".

2 Likes

Talking again about finishing. I just remembered a couple years ago my friend made a scale model of the Hudson River out of chip board then painted it with some kinda of latex sealer to make it waterproof. Then he added an aquarium pump and come red dye to model the hydrodynamics of the river. It was really cool. Made me think of this: https://en.m.wikipedia.org/wiki/Mississippi_River_Basin_Model

1 Like

This looks awesome, amazing job!! Part of my to-do list involves making a bathymetric chart of the Chesapeake- I can imagine a couple family friends that would love it.

4 Likes

This is on my list too!

1 Like

I found this one on Thingiverse that looks really cool http://www.thingiverse.com/thing:2040212 and I remember there being quite a few instructables on it… everyone has a different method too so it will for sure be trial and error

5 Likes