I sure as heck don’t have @takitus’s knack for this, but I wanted to fiddle around with some 3D engraving on a file that he sent along, so I messed with it today.
And I messed with it.
And messed with it some more, because once you start in on it, you just can’t seem to quit.
Eventually, I gave up on trying to print the thing as it was…It occurred to me that the 3D engraving settings are going to be able to give a deeper engrave in thicker (like 1/4 inch thick) hardwood.
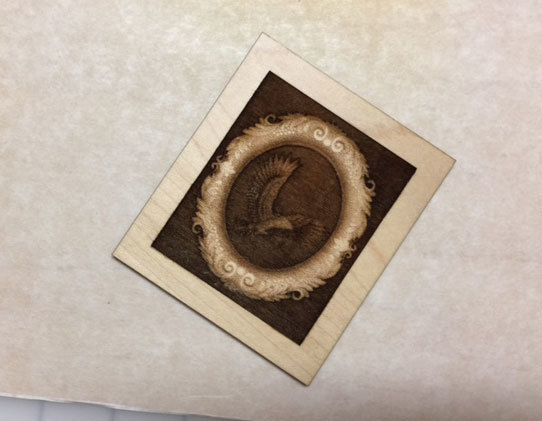
There just wasn’t enough working room for the eagle to engrave properly, but the shading on the frame was working out okay, so I modified the file and got something workable.
Then I completely removed all the beautiful shading by trying to clean the residue off…just smeared it into the cracks…oh well…
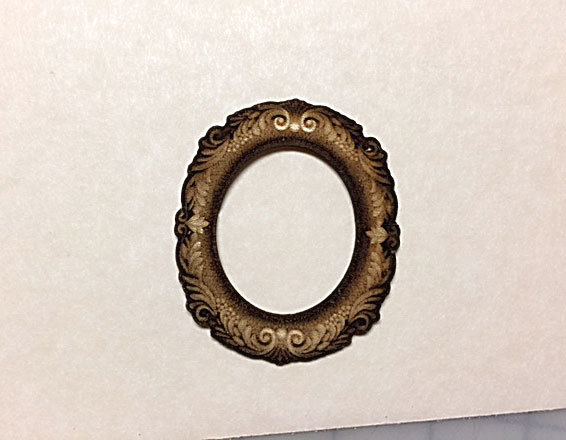
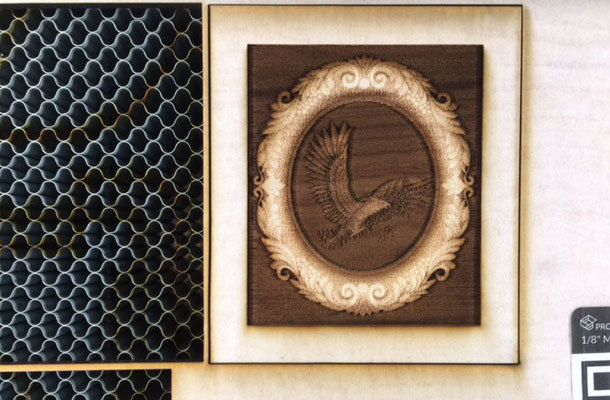
So it looks like the 3D engraving is working, even without me having the correct materials on hand, and without having to make any adjustments to the settings in the GF interface. I just told it to engrave and it did its thing. (Have since learned they are still working on it so it’s not done yet. Still pretty cool!)
The differences in brightness are from testing out the dark engrave versus the 3rd engrave setting. With something this shallow, the dark engrave gave more 3D definition, but it darkened a lot of the areas that would normally have printed lighter in something that gave the depth of the engrave enough room to work. And the final item was so thin that it snapped right after I took the last picture. (Need to use thicker wood.)
Other notes:
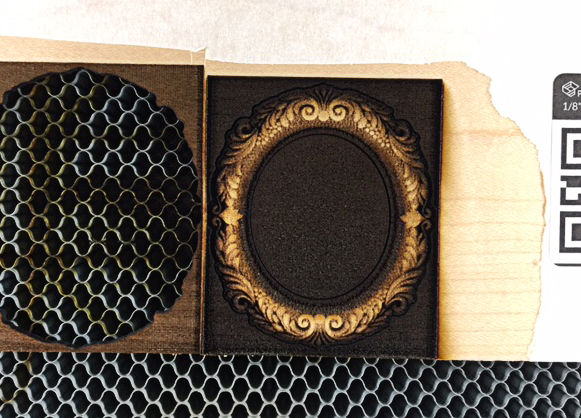
Removing the mask before 3D engraving is a good idea. The adhesive and/or burned paper tends to gunk up the details on really tiny deep areas, making things look fuzzy. And it’s hard to clean out.
It takes a longer time to do dark engraving compared to the lighter engraving shades. (Something to keep in mind.) The third engraving shade gives a nice chocolate brown without taking quite so long as the dark engrave. The dark engrave is really dark. Almost black.
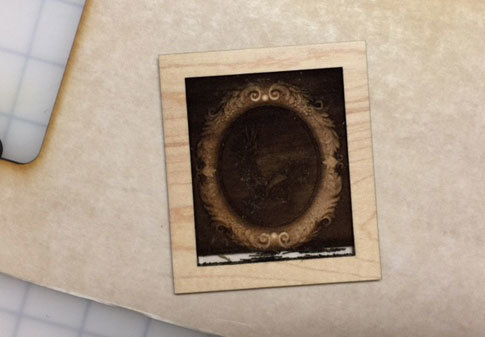
And if you do a double engrave at the darkest setting on 1/8 inch maple, you will burn all the way through the wood. (First picture.)
I killed the print by lifting the lid for a moment. Works.
Another thing I was testing was the placement. Look how closely placed those cuts are in the waste material. I measured one leftover remnant between the edges of the cuts - 0.3 mm. Very sweet!
Anyway, I’ll probably leave the 3D engravings to the expert (@takitus ) until I can get some thicker hardwood in here to test it on.
And I hate to get all cheerleadery again, but I actually cried when it started engraving this afternoon, and that shape first started to appear.
It was just an overwhelming thing to watch. 
