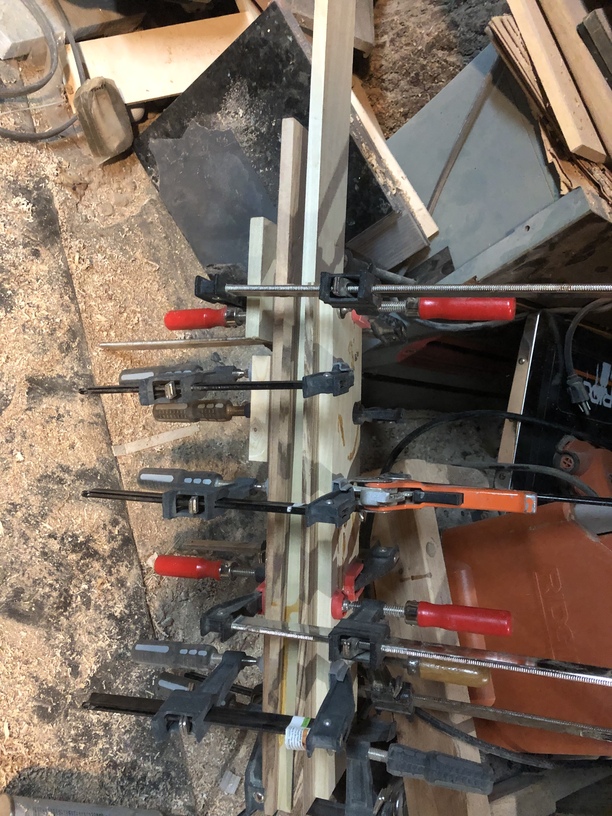
Just wondering if there’s a better process for inlays. I’m currently putting them between two soft wood boards and clamping them like crazy. I can’t imagine there’s a faster or easier way of doing it but figured I’d ask since I’ve been making a ton of them.
Not sure what you’re asking. An inlay should fit snugly into the cut/engraved area, or a gentle tap with a poly-head hammer or small block of wood for difficult parts.
2 Likes
Process will depend on materials and design.
What are you working with?
As evansd2 pointed out it would help is we had visuals and materials (wood gives, acrylic does not.)
Engraving out a pocket takes forever, and iirc you are in this for profit, so cutting out a hole and then putting in your inlay is one way to speed things up.
The more complex your shape the more impossible it is to adjust for kerf. Not because of the glowforge, but because of the design software.
If you do the cut a hole and fill it completely method make one of them (the hole or the piece) a mirror image and flip it over.
If you’re using wood you are going to sand. At least that is my experience.
I’ve yet to hit this, and I do some complicated inlay shapes. I’ve recently stumbled onto a way to get really good results with kerf offset on weird shapes, I just haven’t had a chance to write it up yet.
Maybe later today, it’s a good one.
6 Likes

6 Likes
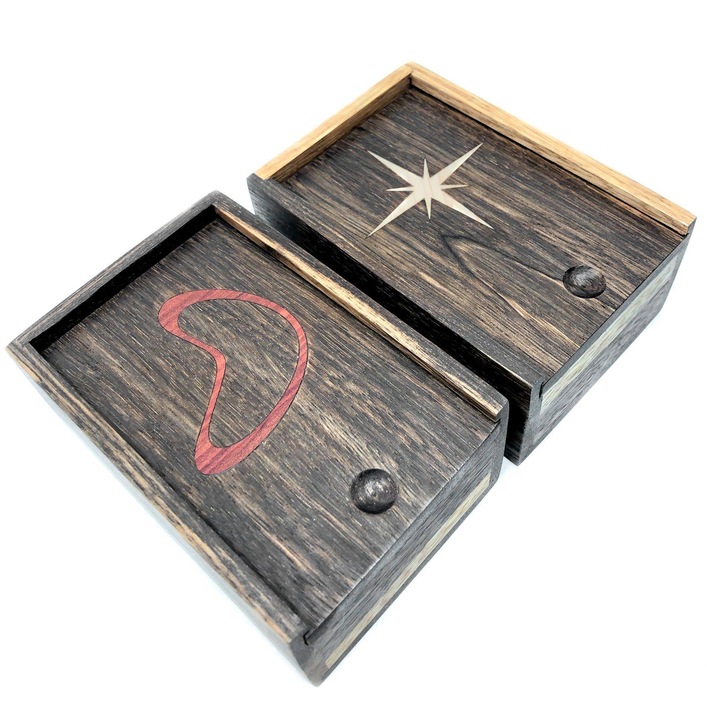
Sorry I should have added more detail. I’m currently engraving a hole deep enough to fit the piece so that it does not move around when clamping. I put the pieces between two boards and clamp them for 12-24 hours. Sand it down and voila. It’s just a bit of a process and I was thinking there may be a better way since I kind of did it on the fly one day to see how it would look.
5 Likes
I mean you’re getting good results… How thick is your material? As people have said, if you can cut and insert the contrasting piece it goes a lot faster.
The tops are 1/4 so it’s possible to make the actual hole. I’m just freaked out about screwing it up. Inlay is 1/8. Maybe I’ll try on a scrap piece today. I use pretty exotic woods so I’d hate to make a mistake.
What is your inlay material? Many veneers come with a self-adhesive backing. Or you can cut your own, but wide sheets of 3M double-sided tape are not cheap.
1 Like
I’m ripping my own so they’re hardwood. I can get them down to a little less than 1/8. I was ripping them smaller but the ends were burning when I had to cut smaller points.
1 Like
Goes back to what I said - change the cut on the inlay so it is a tight press fit. You shouldn’t have to clamp anything for work like that.
I’m not criticizing your work - you’re asking for help - but I see gaps between the inlay and the surrounding material. The “best inlay process” is to adjust your cuts until there is no visible gap. That means you have to adjust the design.
Also be aware that the cuts are not perfectly vertical, so you can make it even tighter by flipping the inlay cuts.
It sounds complicated, it is, but once you figure it out, it makes for parts that fit together perfectly.
4 Likes
Really one of the biggest keys to success here will be ensuring the inlaid material and the surround are the same thickness.
2 Likes
No offense taken. Like I said, this was done on the fly. I know there’s a ton of room for improvement so I’m open to the critique and welcome the help. I love the look of them so I’d like to improve before I try bigger pieces.
I’ll try it!
Not arguing with the master of inlay here, but as long as the inlay is a tight fit from above when cut “inverted”, it works out just fine when they are different thicknesses. That hex thing you shared, I made from walnut and clear acrylic, the side I worked from is smooth, the underside is not.
I also think I’m not going deep enough with the engraving. Im really freaked out because I was engraving wenge for an inlay and it started to smoke like it was going to catch. I am currently doing 1 pass at 1000 and full power and a second at 1500. It makes a pocket just big enough that it doesn’t move when I clamp it and can sand it down. I’m sure that if I wasn’t so scared to go deeper into the wood that it would be easier and probably fit better too.
I’m going to try it inverted today with your suggestions. I have some scraps of zebrawood and walnut.
Start with a circle. I found that, for me, helped figure out how to scale everything.
4 Likes
That was my point.
The worst case is that you have to sand them to be the same thickness, which is always a drag.
2 Likes
Ah yes, agreed. In my case - and I believe here - the underside is not important.
If needing it perfect on both sides then absolutely need to be the same thickness.
1 Like