This is a beta version of a beta project.
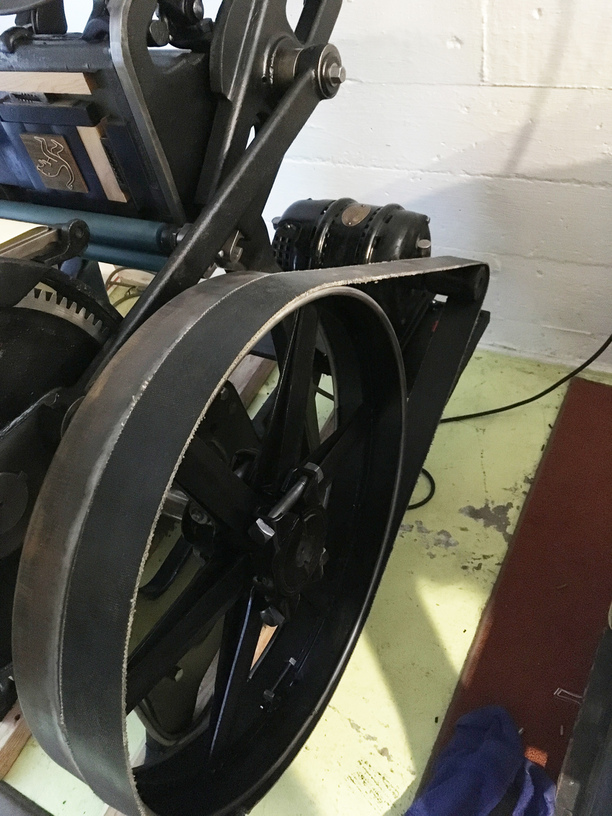
A while ago I moved R’s letterpress printing press into her studio.
Unfortunately we have been having some variable power supply issues that have kept us from printing, since we can’t run the unit at low enough power to be safe.
Basically I need find a place that will make a new belt twice as wide as the one I have because at low speed this one jumps off.
Anyway…
We have not wanted to ink up the press until I can get the belt thing resolved, but we are both pretty antsy about playing with the press.
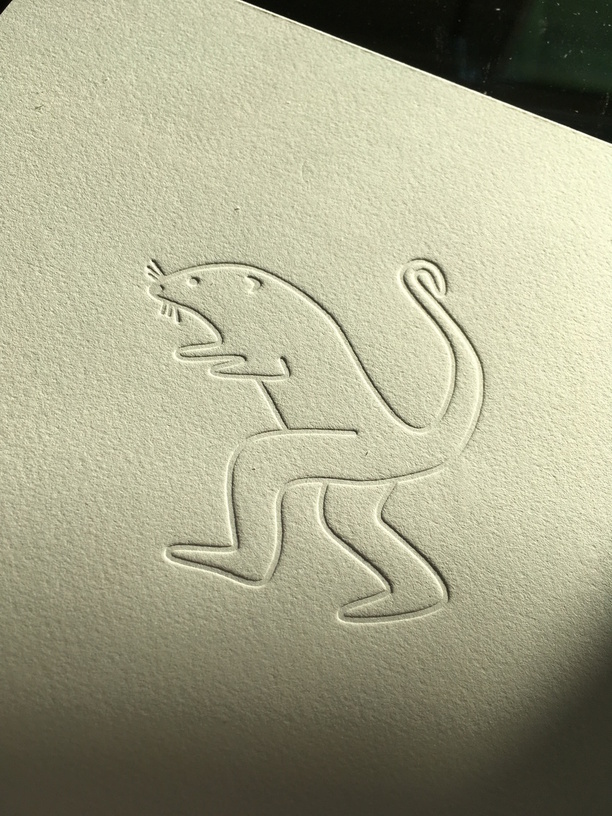
So we decided to spend some time adjusting the platen pressure (which makes it print evenly) using a “blind emboss”. This was a new term for me, but R says it means mushing type (or in this case a wood block) into paper to leave an indentation.
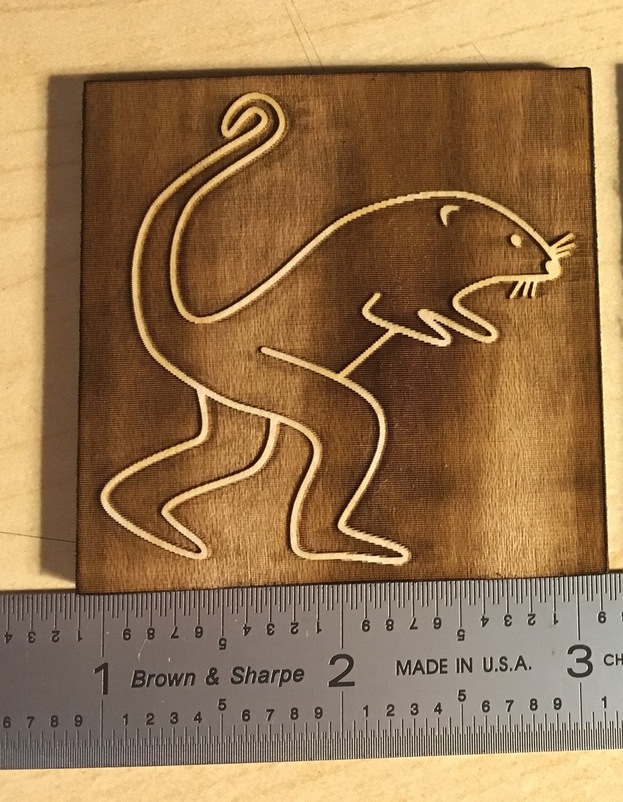
I engraved the new logo for R’s letterpress “shop” into a piece of plywood. You should all be able to recognize it as a monkey otter.
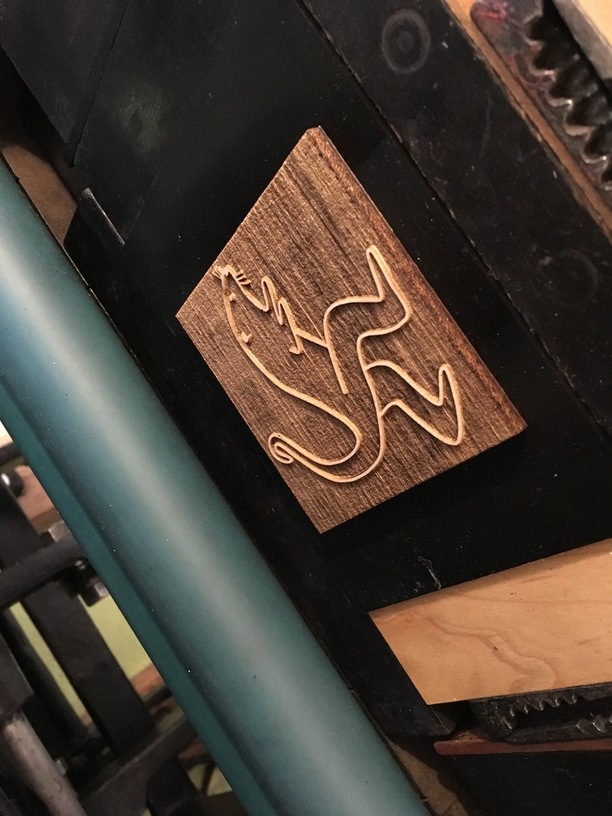
Then I cut a piece of delrin on my mill to make a base for the plywood and get it to “type high”. This is the traditional thickness of type, and is .918".
Then R locked it up in a chase and mounted it on the press.
Did you notice any compression in the structure of the stamp after your impression? It looks like your line thickness is about .04" which seems pretty thin.
I did not measure but that sounds about right.
We have not run it though many times, but yeah, I would be surprised if it lasts very long. Plywood is probably not the best material for this and I intend to work with some thicker maple at some point. Fortunately it is really easy to redo.
If your belt walks at low or high speed you need to check the alignment of the motor and pulley on the shaft that turns the belt. Just a fraction off at that size difference would make the belt walk pretty significantly.
Edit: love the project and my wife is extremely jealous, she loves embossing
That is spectacular! (And embossing was not a use for lasers that I would have thought of…but I’ve got a CuttleBug and a BigShot, and the cartridges for them are too blinking expensive…)
Sweet. In general, when you start printing real stuff you may find that the corners and edges of your printed area make a deeper impression than the center. The press I worked in kept a supply of several thicknesses of really thin paper for makeready to even the impression out (we were also working with type that had seen a lot of use). You might also be able to do a graded engrave to compensate for that.
I probably would have missed this use case as well, as i don’t have any press experience but it circles around to what I said in some way back post. If you can’t make what you want directly, drop back and ask can I make a jig or templet with this tool to do it in two steps.
I’m REALY hope certain people stay as active after we are up and running as they are now. @jkopel is one of them for his deep engineering insights.
Thanks all. The belt problem is two fold, first it is too narrow, and second it is slightly misaligned. I am trying to track down a local source for wide leather belting and once I get one made I can tackle the alignment.
In the mean time we are negotiating the appropriate hourly rate for spinning her wheel.