Some projects you start with a specific goal in mind. I need to make a box to hold this tool, or I want to make a tile with two types of wood, that sort of thing. This is not one of those. This project has no real goal. This project is not finished. This project might just sit on the shelf for two or three years with any further progress.
Here is a page from a sketch book that I drew maybe 6 or 7 years ago.
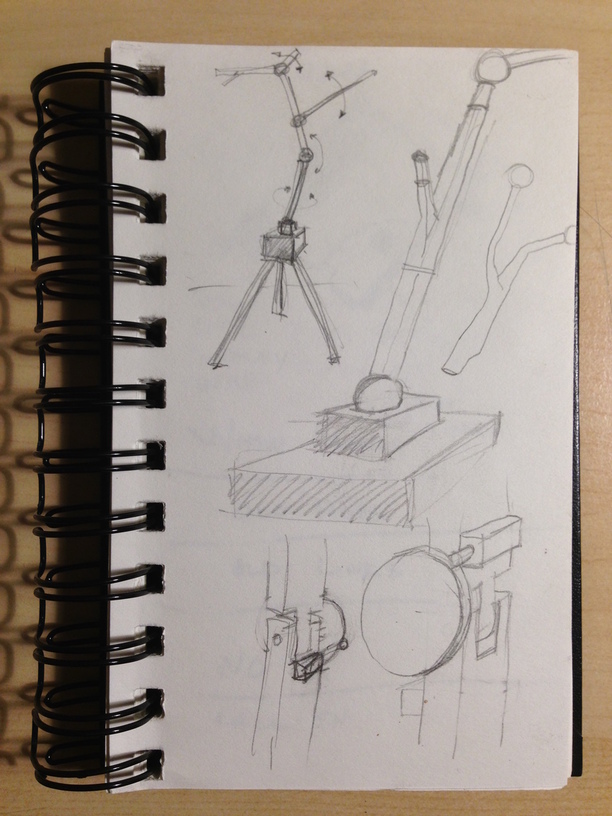
I had not been in Seattle long, and never having lived so near the sea before I was obsessed with collecting driftwood and stones and shells from the beach near our house. This sketch (or the idea behind it) eventually became a sculpture I collaborated on with a friend. We built a piece called Flotsam, which I described as a post-industrial sea urchin. The spines were mounted on gimbals, and used facial recognition to point themselves towards whomever was looking at them. Here is an impossibly bad photograph from a gallery show we were part of.
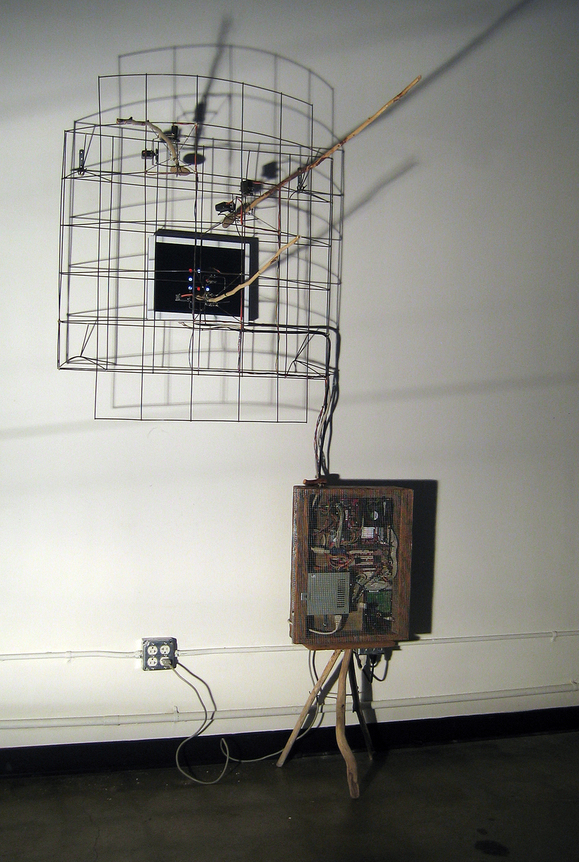
(more if you are curious Flotsam | Flickr)
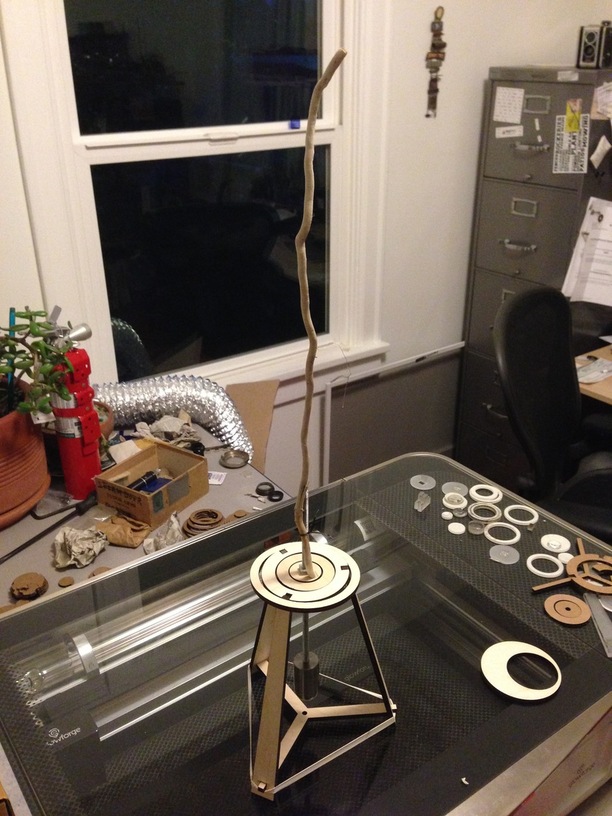
Anyway, I am still thinking about the original form, which was a tripod with a spine or spines of driftwood sticking up. Maybe they would be motorized and have electronics to control them. Maybe they would be carefully balanced and just move under environmental influences.
I figured that given the mechanical challenges involved I would start off with the simplest possible version. Even that ended up being a fairly complex thing though.
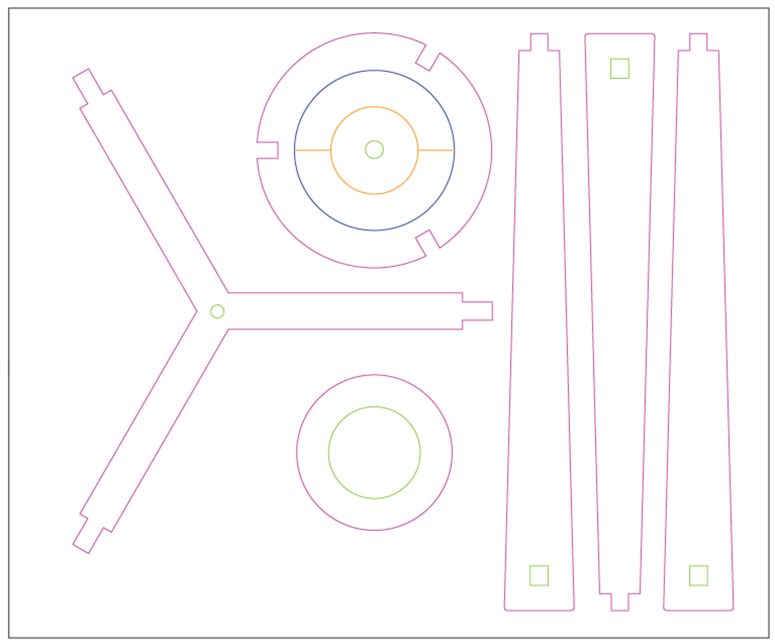
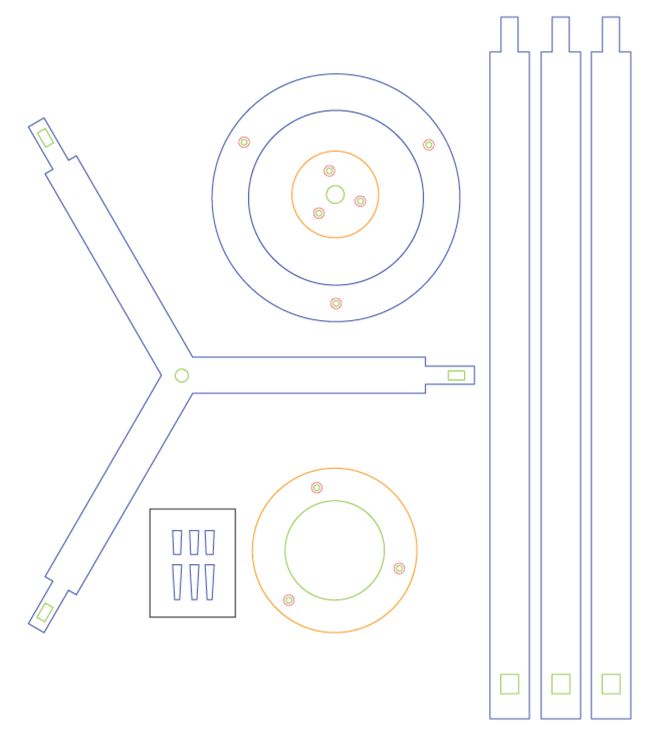
Here is the (deceptively simple) drawing from Illustrator I started with and pictures of a few early versions. The three pointed piece near the bottom started as an jig to space the legs apart while gluing them, and morphed into an integral part of the structure.
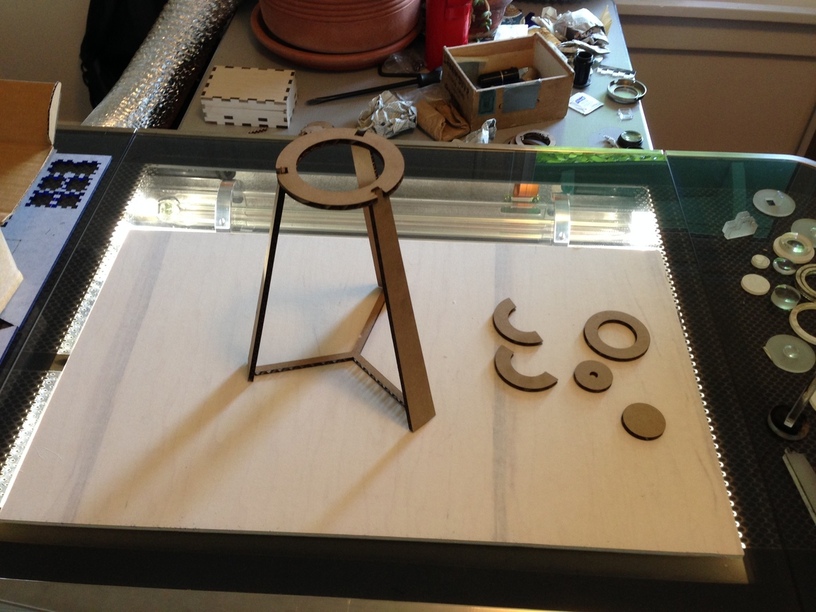
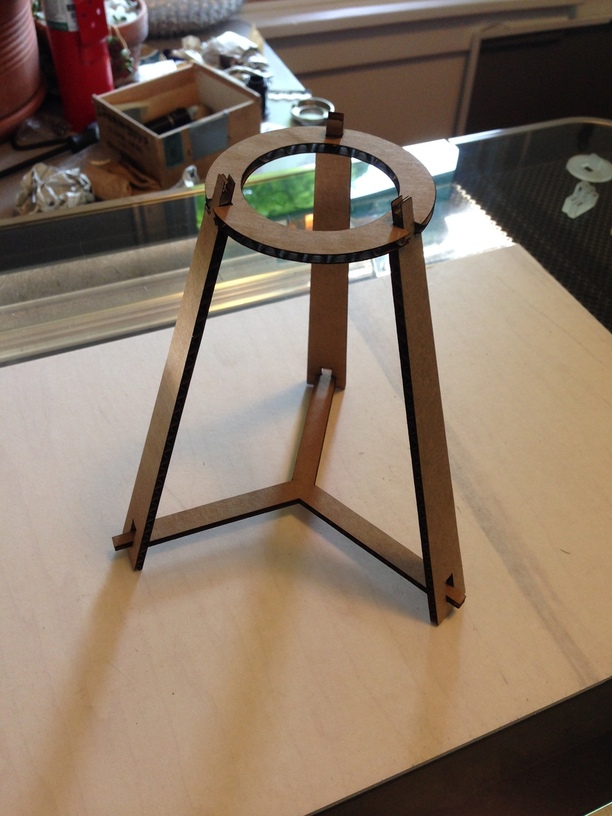
And here is the first one I cut out of wood (while held together with a rubber band).
After making this first version, I realized several things. First and most importantly I needed to come up with a way to use the glowforge to fixture the rings for drilling. Each ring has little holes through it with a wire connecting it to the next smaller ring. They need to be very precisely positioned and straight or else the rings won’t move very well. Without a jig I was unable to get the long thin drill bit to stay accurate as it moved through the wood.
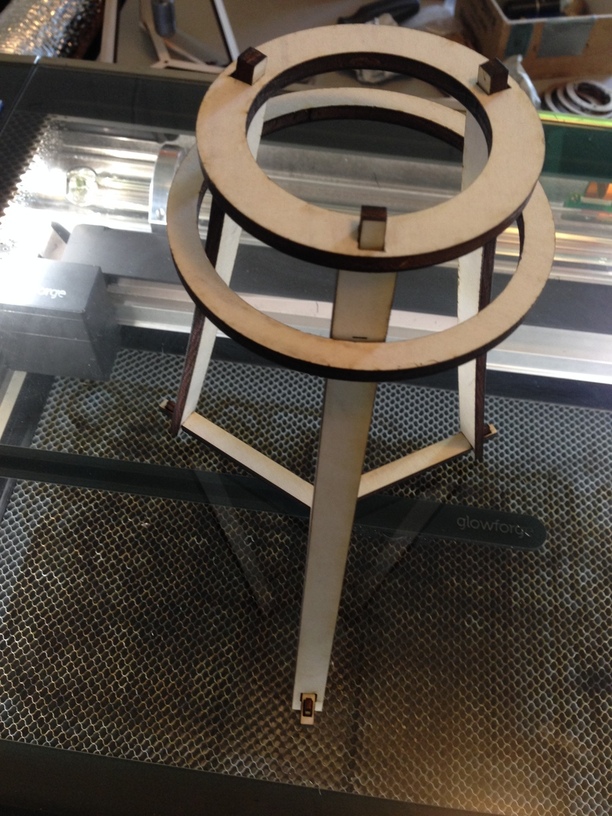
I also did not like the proportions of the tripod, the legs looked to “designerly” when they were tapered, and I wanted to figure out how to lock the pieces together without gluing them. That last part became a rabbit hole of indeterminate depth as I fell into a world of Japanese joinery full of pins and wedges and slits and notches. The solution I ended up using is a simple one, but I have lots and lots of other things I want to try.
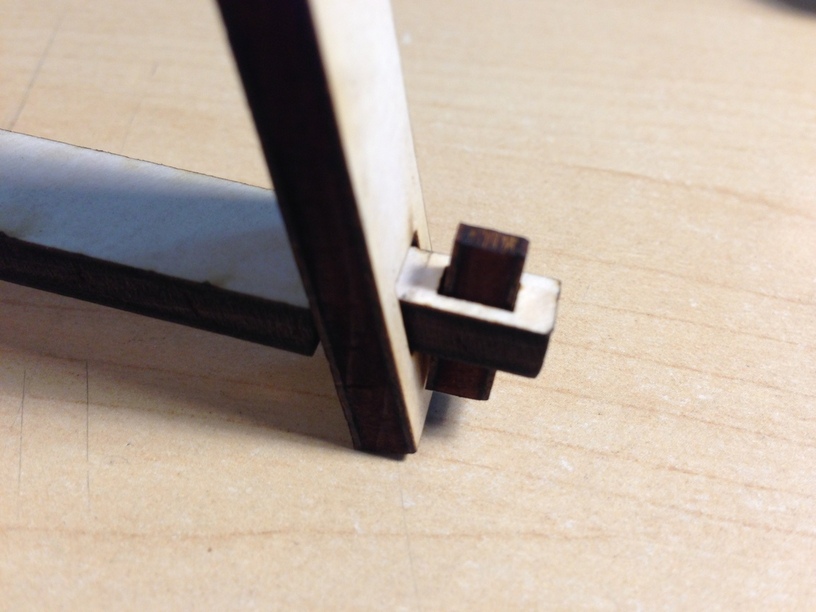
Here is a detail shot of the way I cut a little wedge and pushed it into a slot to keep the legs together.
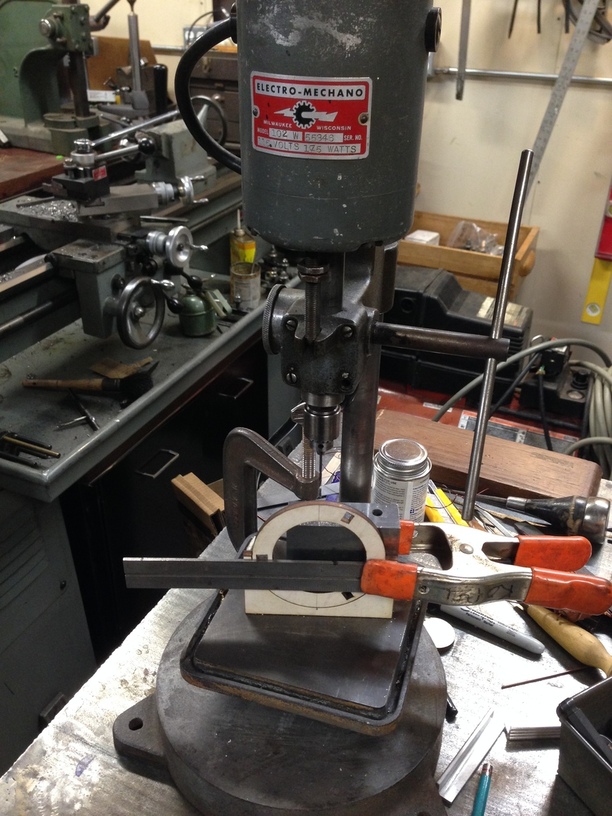
I tried making semi-circular jigs to hold the top rings for drilling on my little drill press, but that still did not give me the precision I wanted.
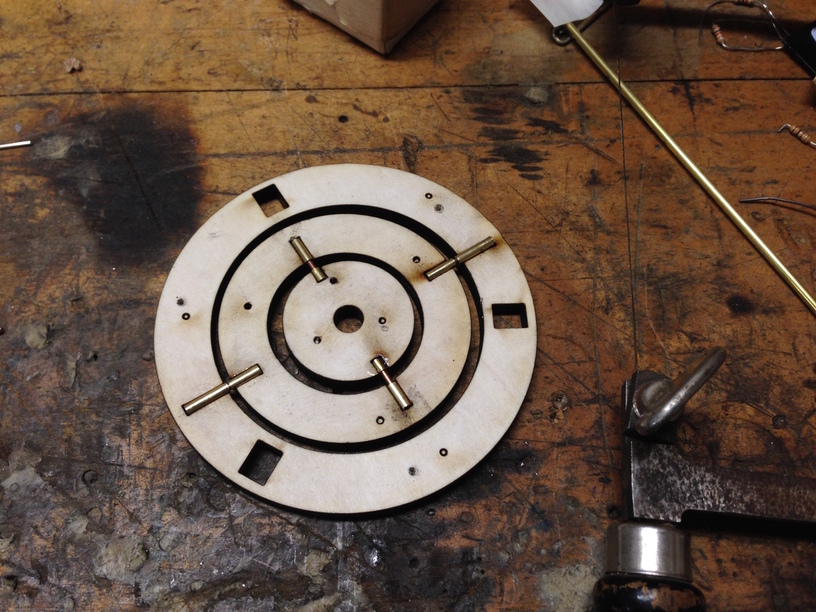
In the end I decided to make two piece rings and sandwich the pivots between two layers. This time precision was built into it by making the cuts on the Glowforge, and I went an extra step by cutting little sections of brass tubing (not on the Glowforge) to make hinges. So here is the bottom layer:
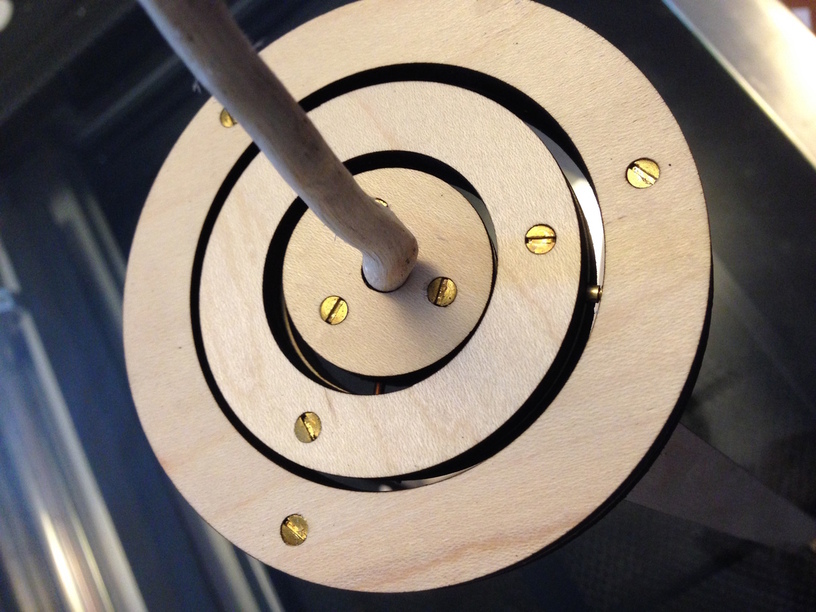
And here it is with the top layer screwed on. I would very much like you all to see those perfect LASER CUT COUNTERSINKS. Yes indeed, all the same depth, and a perfect fit on the screw heads. I suppose if you have not tried to do this by hand you may not understand why it is so exciting. If you haven’t, then just take my word for it, it rocks.
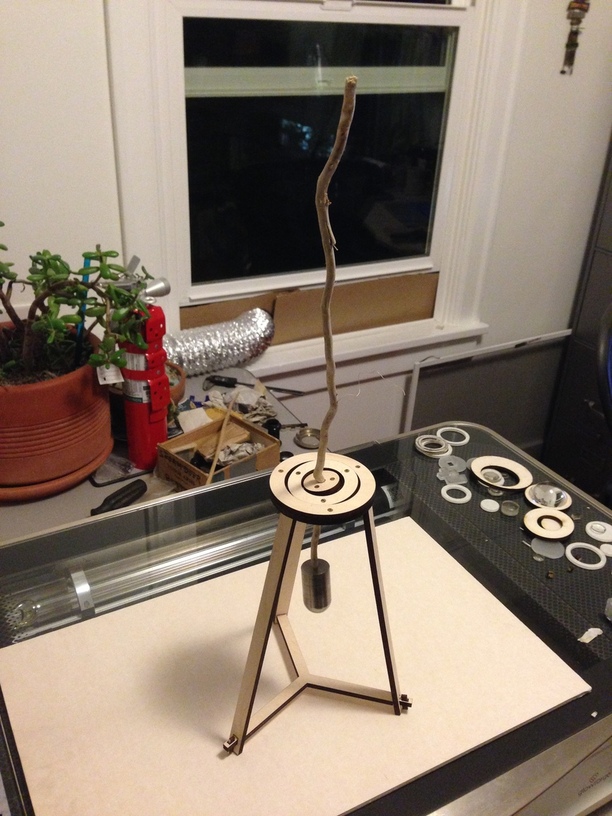
Here is where I stopped (for now). After fighting with it for several days I finally have something to look at and ponder. The mechanics are good, and it moves very smoothly although the weight is way too heavy. It is definitely not done though, I think it needs to be twice as big, with a big forked stick coming out of the top. I will have to start collecting driftwood again.
The “final” drawing and a quick video of it in “action”.


 Either way, well done.
  …wow…I’m totally impressed by the concept as well as the execution!